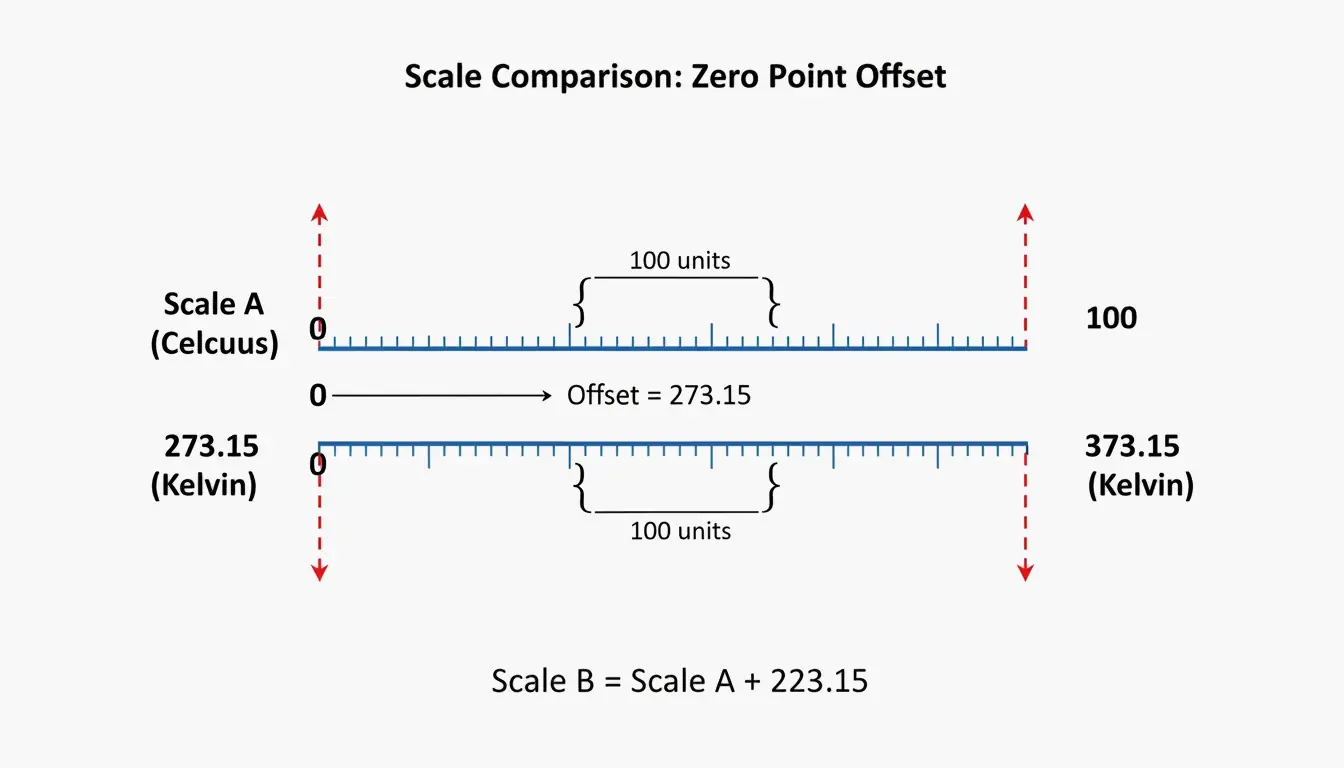
Blog

  • CM to Feet and Inches: Ultimate Conversion Guide & Height Chart (2026)

    CM to Feet and Inches: Ultimate Conversion Guide & Height Chart (2026)

    To convert cm to feet and inches: divide cm by 2.54 to get total inches, then divide by 12 for feet with the remainder as inches. Example: 180 cm = 70.87 in = 5’10.9″. Per NIST SP 811, 1 foot = exactly 30.48 cm, 1 inch = exactly 2.54 cm.

    The 3-Step Formula

    Step Operation Example (180 cm)
    1. Total inches cm ÷ 2.54 180 ÷ 2.54 = 70.866 in
    2. Feet total inches ÷ 12 (whole number) 70.866 ÷ 12 = 5 ft
    3. Remaining inches decimal remainder × 12 0.866 × 12 = 10.4 in
    Result 5’10.4″

    Alternative for Step 3: (original cm − feet × 30.48) ÷ 2.54 = remaining inches.

    Never round 2.54 to 2.5 — this creates a 1.6% error that compounds in construction and medical records.

    Height Chart: CM to Feet & Inches

    Centimeters Feet & Inches (rounded) Exact Imperial Context
    150 cm 4’11” 4’11.06″
    155 cm 5’1″ 5’1.02″
    159 cm 5’3″ 5’2.99″ Global avg female
    160 cm 5’3″ 5’2.99″
    165 cm 5’5″ 5’4.96″
    170 cm 5’7″ 5’6.93″
    171 cm 5’7″ 5’7.32″ Global avg male
    175 cm 5’9″ 5’8.90″
    180 cm 5’11” 5’10.87″
    185 cm 6’1″ 6’0.83″
    190 cm 6’3″ 6’2.80″
    200 cm 6’7″ 6’6.74″

    Height averages per GIGAcalculator.

    Diurnal Variation

    Humans are tallest in the morning and can “shrink” by up to 1 cm (0.39 in) by evening as spinal discs compress from standing.

    Decimal Feet ≠ Feet + Inches

    Critical trap: 5.8 feet is NOT 5’8″ — it’s 5’9.6″ (0.8 × 12 = 9.6 in).

    Misread Actual Difference
    5.8 ft read as 5’8″ Actual: 5’9.6″ +1.6 inches
    6.1 ft read as 6’1″ Actual: 6’1.2″ +0.2 inches
    5.5 ft read as 5’5″ Actual: 5’6.0″ +1.0 inches

    A side-by-side visual comparison showing why 5.8 feet is taller than 5'8".

    Decimal Inches to Fractions (Construction)

    For US tape measures (base-16):

    Decimal Inches × 16 Fraction
    0.25 in 4/16 1/4″
    0.50 in 8/16 1/2″
    0.75 in 12/16 3/4″
    0.0625 in 1/16 1/16″
    0.4375 in 7/16 7/16″

    Multiply the decimal portion by 16, round to nearest whole number, simplify the fraction.

    Standards: 1959 Agreement & US Survey Foot

    Standard Definition Status (2026)
    International foot 1 ft = 30.48 cm exactly Active
    International inch 1 in = 2.54 cm exactly Active
    US Survey Foot ~2 ppm different from international Retired Jan 1, 2023 per NIST

    The meter is defined by the speed of light (299,792,458 m/s) per the BIPM.

    Practical: Furniture & Home Conversion (IKEA)

    Item Metric (cm) Imperial US Standard Difference
    European Queen bed 160 cm wide 62.99 in US Queen: 60 in +3 inches wider
    European ceiling 250 cm 8’2.4″ US ceiling: 8′ (243.84 cm) +2.4 inches taller
    Standard door 200 cm 6’6.7″ US door: 6’8″ (203.2 cm) −2.5 inches shorter

    Contractors must use the exact 2.54 factor when installing imported cabinets or appliances.

    Child Height Prediction

    Method Accuracy Requirements
    Multiplier Method (Paley et al.) 85% within 5 cm Child’s current height + age
    Khamis-Roche More precise Both parents’ heights required

    Per GIGAcalculator, the Multiplier Method works across ethnicities and requires less input data.

    Conclusion

    cm → total inches (÷2.54) → feet (÷12) + remaining inches. Never confuse decimal feet with feet+inches. For construction, convert decimal inches to 1/16th fractions. For furniture imports, check exact cm dimensions against US standards before purchasing.

    FAQ

    Why is 5.8 feet not the same as 5’8″?

    Feet use decimal (base-10) but inches use base-12. Multiply the decimal portion by 12: 0.8 × 12 = 9.6 inches. So 5.8 feet = 5’9.6″, nearly 2 inches taller than 5’8″.

    What is the average global height?

    Per GIGAcalculator: men 171 cm (5’7″), women 159 cm (5’3″). Varies significantly by region — the Netherlands averages are notably higher.

    How do I convert decimal inches to fractions for construction?

    Multiply the decimal portion by your target denominator (16 for 1/16ths), round to the nearest whole number, and simplify. Example: 0.75 × 16 = 12/16 = 3/4 inch.

  • CM to Inches: Complete Guide to Formulas, Height Conversion & Standards

    CM to Inches: Complete Guide to Formulas, Height Conversion & Standards

    To convert cm to inches, divide by 2.54. Formula: inches = cm ÷ 2.54. For quick estimates, multiply by 0.39. This ratio is fixed by the NIST and the 1959 International Yard and Pound Agreement — it applies to every conversion, from height tracking to CNC machining.

    Conversion Methods

    Method Formula Example (30 cm) Precision
    Exact cm ÷ 2.54 30 ÷ 2.54 = 11.811 in Full
    Multiply cm × 0.3937 30 × 0.3937 = 11.811 in Full
    Mental estimate cm × 0.39 30 × 0.39 ≈ 11.7 in ~1% error
    Halve & subtract 20% (cm ÷ 2) × 0.8 50 cm → 25 → 20 in ~1.5% error

    Go Tools confirms a standard 30 cm ruler = 11.81 inches.

    A 3-step visualization of the 'halve and subtract 20%' mental math shortcut

    Quick Conversion Table

    Centimeters Inches (exact) Feet + Inches
    1 cm 0.394 in
    10 cm 3.937 in 3′ 15/16″
    30 cm 11.811 in 11′ 13/16″
    50 cm 19.685 in 1′ 7 11/16″
    100 cm 39.370 in 3′ 3 3/8″
    150 cm 59.055 in 4′ 11 1/16″
    159 cm 62.598 in 5′ 3″ (avg woman)
    171 cm 67.323 in 5′ 7″ (avg man)
    178 cm 70.079 in 5′ 10″

    Height averages per Best Calculators.

    Height Conversion: cm to Feet + Inches

    Critical: Decimal feet ≠ feet + inches. 5.8 feet is 5 feet + 9.6 inches, NOT 5 feet 8 inches.

    Two-Step Method

    1. Total inches: cm ÷ 2.54 (e.g., 171 ÷ 2.54 = 67.32 in)
    2. Split: ÷ 12 for feet, remainder is inches (67.32 ÷ 12 = 5 ft, 7.32 in → 5’7″)

    Comparison showing why 5.8 feet is not 5'8"

    Best Calculators and the WHO recommend recording height in centimeters for medical accuracy.

    Standards: NIST and the 1959 Agreement

    Standard Definition Status (2026)
    International inch Exactly 2.54 cm (25.4 mm) Active
    International foot Exactly 0.3048 m Active
    US Survey Foot 1 m = 39.37 in (slightly different) Retired Jan 1, 2023 per NIST

    All professional mapping and engineering in 2026 must use the international foot (0.3048 m).

    Precision Warning

    Using 0.39 instead of 0.3937 creates a 0.7 mm error per meter — exceeding the ±0.05 mm tolerance for precision CNC machining, per Go Tools.

    Practical Applications

    Screen Diagonals

    Screen Size Diagonal (cm) Approximate Width (cm)
    55-inch TV 139.7 cm ~121.8 cm
    27-inch monitor 68.6 cm ~59.8 cm
    13-inch laptop 33.0 cm ~28.6 cm

    Go Tools notes screen width is always less than the diagonal measurement.

    Paper Sizes

    Standard Size In Inches
    US Letter 21.59 × 27.94 cm 8.5 × 11 in
    A4 21.0 × 29.7 cm 8.27 × 11.69 in

    A4 is 0.6 cm narrower but 1.76 cm taller than US Letter. Incorrect scaling between these standards ruins print layouts.

    Developer Implementation

    // Exact factor per 1959 Agreement
    const CM_PER_INCH = 2.54;
    const cmToInches = (cm) => cm / CM_PER_INCH;
    
    
    def cm_to_inches(cm):
        inches = cm / 2.54
        assert abs(inches * 2.54 - cm) < 1e-10
        return inches
    

    Excel: =CONVERT(A1, "cm", "in") — uses official international standards.

    Conclusion

    cm ÷ 2.54 = inches. For casual use, the 0.39 shortcut works. For engineering, medical, or construction work, always use the exact 2.54 factor — small rounding errors compound over distance. As of 2026, the international foot (0.3048 m) is the only legal standard for professional work.

    FAQ

    Why is 1 inch exactly 2.54 cm?

    The 1959 International Yard and Pound Agreement unified US and British imperial systems with the metric system. The international yard was set at exactly 0.9144 meters, making 1 inch = 25.4 mm = 2.54 cm.

    How do I convert cm to fractional inches for woodworking?

    1. Divide cm by 2.54 to get decimal inches
    2. Take the decimal portion and multiply by your desired denominator (e.g., 16 for 1/16ths)
    3. Round to nearest whole number for the fraction

    Is a centimeter larger than an inch?

    No. 1 inch = 2.54 cm. A centimeter is roughly fingernail width; an inch is closer to adult thumb width.

    How to use Excel for cm to inches conversion?

    Use =CONVERT(number, "cm", "in") — this uses NIST international standards and is the most accurate method for bulk spreadsheet conversions.

  • Can AI Remove Watermark from Photo? 2026 Guide to the Best Tools and Techniques

    Can AI Remove Watermark from Photo? 2026 Guide to the Best Tools and Techniques

    Yes, in 2026, AI can remove watermark from photo files with high accuracy. Using deep learning, tools like Pixelbin and HitPaw employ Generative Inpainting to reconstruct backgrounds or Reverse Alpha Blending to mathematically reverse semi-transparent overlays. These techniques can clean complex AI-generated labels — such as Gemini’s “Nano Banana” — without degrading image quality.

    How Does AI Remove Watermark from Photo? The 2026 Technical Breakdown

    Watermark removal has moved far beyond manual clone-stamp editing. Modern neural networks analyze image context to intelligently restore covered areas. In 2026, the real challenge is not visibility but how the watermark is embedded. Standard logos are straightforward to erase, but invisible markers like SynthID are woven into the image’s mathematical structure, making them extremely difficult to remove without quality loss.

    According to HitPaw, their AI solution maintains a 98% satisfaction rate across more than 6.5 million downloads. These systems rely on two core methods:

    Generative Inpainting: Reconstructing Missing Pixels

    Generative Inpainting works by analyzing the healthy pixels surrounding a watermark — examining textures, lighting, and patterns — to predict what should be behind the logo. Tools like HitPaw use Content-Aware Fill models to plug the gaps automatically, blending new pixels naturally with the surrounding image.

    Reverse Alpha Blending: Mathematical Pixel Recovery

    Unlike inpainting, Reverse Alpha Blending is a calculation, not a prediction. Most watermarks are applied using the formula: Watermarked = alpha x Logo + (1 - alpha) x Original. If the AI can determine that formula (the alpha map), it reverses the math to recover the original pixels. This is the optimal method for semi-transparent text because it restores actual data rather than painting over it.

    Side-by-side visual comparison of Inpainting (reconstructing) vs. Alpha Blending (mathematical reversal)

    Removing AI-Generated Watermarks: Gemini (Nano Banana) and Meta AI

    By 2026, a new category of challenge has emerged: watermarks generated by AI systems themselves, such as Meta’s “Imagined with AI” label and Google’s “Nano Banana” pattern. These are engineered to be persistent. Standard removal tools often leave behind visible artifacts.

    Research by Allen Kuo produced specialized 48×48 and 96×96 Reverse-Alpha Masks designed for Gemini watermarks. By targeting the exact blending mathematics Google uses, these scripts achieve pixel-perfect cleanup that general-purpose erasers cannot match.

    The “AI vs. AI” Workflow for Synthetic Media

    For professional results on AI-generated images, experts deploy a two-pass workflow. After the initial watermark is removed, a second pass using models like FDnCNN (Fast Deep Convolutional Neural Network) cleans up residual edge artifacts. As Allen Kuo notes, removing SynthID without quality loss is nearly impossible because it is entangled with the entire image. However, for visible labels, GPU-accelerated denoisers effectively eliminate the “sparkle” or blurry edges that basic tools leave behind.

    Best AI Watermark Removers in 2026: Ranked by Performance

    The market splits between accessible web tools and powerful developer scripts. A 2026 test of 15 services by GStory AI found that performance depends heavily on background complexity and watermark opacity.

    Top Free Picks for Quick Web Edits

    Tool Key Strength Format Support Free Tier
    GStory AI Complex area reconstruction JPG, PNG, WEBP 50 free credits
    DeWatermark.ai Multiple watermark handling JPG, PNG Auto 3.0 mode
    Phototune AI No-signup simplicity JPG, PNG (up to 10MB) Free
    Pixelbin Modern format support WEBP, HEIC Auto Mode

    Pro Tools for Batch Processing and High-Resolution Assets

    For bulk work, Batch Processing is essential. PhotoGrid allows processing up to 20 photos simultaneously at no charge. For developers, GitHub tools like the Gemini Watermark Tool can integrate into Claude Code Skills or MCP Servers, enabling AI agents to handle removal automatically within local workflows using FDnCNN for high-resolution output.

    Step-by-Step: How to Use AI to Remove Watermarks Without Quality Loss

    Most AI tools simplify the process into three stages:

    1. Upload: Select your file (JPG, PNG, or WEBP). Tools like Pixelbin accept files up to 10MB.
    2. Mask Selection: Let “Auto Mode” detect the logo, or use a manual brush to highlight the area.
    3. Refinement: After removal, use a “Magic Brush” or Content-Aware Fill to clean up any spots the AI missed.

    3-step linear flow: Upload then Selection then Refine

    Troubleshooting: What to Do When AI Leaves a Blur

    If a blurry patch remains, the background was likely too complex for the AI to predict accurately. Run a second pass with a denoiser like FDnCNN to smooth out the noise. For final polish, a quick touch-up with a Clone Stamp tool in an editor like Photopea provides professional-grade results.

    Conclusion

    Watermark removal in 2026 has evolved from simple blurring to mathematical precision via Reverse Alpha Blending. Whether handling a standard copyright logo or a stubborn Gemini “Nano Banana” label, current tools are up to the task. For quick fixes, web tools like GStory or Pixelbin are the most accessible options. For photographers and professionals who demand pixel-perfect output, GitHub-based tools and MCP server integrations offer maximum control without the “hallucinations” typical of basic AI erasers.

    FAQ

    Is it legal to remove watermarks from images for personal use?

    Generally, removing a watermark is illegal if it infringes on copyright, as protected under DMCA Section 1202. Exceptions may exist for recovering your own lost assets or for uses that fall under specific fair use provisions. Always verify the original creator’s license before modifying an image.

    Can AI remove invisible watermarks like Google’s SynthID?

    No. While AI can erase the visible pixels of a logo, SynthID is embedded into the image’s structural features. Removing it typically requires degrading the image quality to an unusable state. According to research by Allen Kuo, SynthID remains detectable by specialized safety tools even after visible editing or cropping.

    How to remove watermarks from photos on iPhone or Android without an app?

    Use mobile-optimized web tools like DeWatermark.ai or GStory directly in your mobile browser. Modern mobile browsers support Generative Inpainting APIs for one-click removal. This approach avoids the security risks of downloading “free” apps that may contain malware or excessive advertising.

  • How to Optimize Photos for the Web: The 2026 Performance Guide

    How to Optimize Photos for the Web: The 2026 Performance Guide

    Getting images right is often the fastest way to speed up a website. In 2026, the standard workflow follows three steps: Resize, Compress, and Convert. This process keeps pages competitive at a time when users expect instant loading and Google’s ranking systems reward strong page experience.

    The AVIF format has overtaken WebP as the preferred choice for web images. According to SimpleResizer, AVIF delivers roughly 20% better compression than WebP while maintaining equivalent visual quality, and it is now supported across virtually all modern browsers.

    Step 1: Precise Resizing and Aspect Ratio Scaling

    Serving an image that is significantly larger than its display dimensions is one of the most common performance mistakes. Data from DebugBear shows that resizing a raw 4.3 MB photo to standard web dimensions (such as 1266 x 845 pixels) can cut file weight by 89%.

    Before uploading, check the maximum width of your site’s content area. For most blogs this falls between 800px and 1200px. Tools like Canva or Photoshop can scale images to these exact sizes. For high-density Retina displays, serve a 2x version (for example, 2400px for a 1200px container) using responsive markup, but never upload a raw 6000px+ file directly from a camera.

    A comparison showing file size reduction from a raw photo to a resized web-ready image.

    Step 2: Choosing Between Lossy and Lossless Compression

    Compression removes data that a file does not need. In 2026, developers generally choose between two methods:

    Compression Type How It Works Best Use Case Typical Quality Setting
    Lossy Discards some visual data to minimize file size Photos, blog images, product shots 75% – 82%
    Lossless Retains all original data pixel-for-pixel Logos, technical diagrams, icons 100%

    As purshoLOGY notes, lossy compression should be the default for photographic content to keep sites fast. Reserve lossless formats like PNG for situations that specifically require transparency or simple line graphics.

    Step 3: Format Selection — AVIF, WebP, or JPEG

    The format you choose has a direct impact on both file size and browser compatibility.

    Format Compression vs. JPEG Browser Support (2026) Best Role
    AVIF ~50% smaller Universal Primary format
    WebP ~30% smaller Universal Fallback
    JPEG Baseline Universal Legacy fallback

    Impact on Core Web Vitals: LCP and CLS

    Images directly affect search rankings. According to SimpleResizer, 70% of web pages feature an image as their Largest Contentful Paint (LCP) element — the largest visible block when the page loads. A heavy hero image drags down LCP scores, and rankings can follow.

    Cumulative Layout Shift (CLS) is equally important. It occurs when a browser cannot determine an image’s dimensions before loading, causing text to reflow once the image appears. Always include width and height attributes so the browser reserves space immediately.

    The fetchpriority=”high” Attribute

    A common mistake is “over-optimizing” by lazy loading every image. While loading="lazy" benefits below-the-fold content, applying it to the hero image (the LCP element) actively slows things down.

    The 2026 best practice: remove lazy loading from above-the-fold images and add fetchpriority="high" instead. This signals the browser to prioritize that specific image ahead of less critical scripts or styles.

    A 3-step decision flow for image loading strategy: above-the-fold vs. below-the-fold.

    Modern Delivery: CDN Implementation and Responsive Code

    Even a small image feels slow when it has to travel across continents. A Content Delivery Network (CDN) such as Cloudflare or BunnyCDN stores copies of images on servers geographically closer to visitors.

    EXIF metadata — GPS coordinates, camera settings, and other hidden data embedded in smartphone photos — should also be stripped. This saves 2% to 10% on file size and protects the privacy of whoever took the photo.

    Code Snippet: The Optimal Image Tag with Fallbacks

    Use the picture element to serve AVIF to modern browsers while maintaining a fallback chain for older clients:

    picture
      source type image/avif srcset photo.avif
      source type image/webp srcset photo.webp
      img src photo.jpg width 1200 height 675 alt "Descriptive alt text" loading lazy decoding async
    

    A GIMP test demonstrated that shrinking a JPEG from 1072 KB to 384 KB (a 64% reduction) using techniques like Chroma subsampling (4:2:0) produces significant gains without any perceptible quality loss.

    Top Tools for Automated Image Optimization

    Tool Type Strength Best For
    Squoosh Manual / Free Full control over AVIF and WebP settings One-off compression
    TinyPNG Manual / Free Fast batch shrinking Quick bulk jobs
    Imagify Automated / Paid Scans entire library, converts to AVIF, serves via CDN WordPress sites
    EWWW Image Optimizer Automated / Paid Full-pipeline automation with CDN E-commerce stores

    As SimpleResizer points out, Google Images can account for 20-30% of all search traffic for online stores, making automated optimization a measurable revenue driver.

    Conclusion

    Optimizing photos for the web in 2026 means managing three levers: format selection (AVIF primary, with fallbacks), delivery infrastructure (CDN), and browser priority hints (fetchpriority). A fast site is no longer optional — it is a requirement for retaining users and ranking well in search.

    Action Step: Run your site through PageSpeed Insights to identify LCP bottlenecks. Then set up an automated AVIF pipeline with JPEG fallbacks to keep your site fast and accessible on every device.

    FAQ

    Does optimizing images affect their visual quality on Retina displays?

    High-density displays need 2x or 3x resolution to look sharp. Use the srcset attribute to send high-resolution versions only to devices that can display them. Modern formats like AVIF preserve significantly more detail at these resolutions than older JPEG files, even at substantially smaller file sizes.

    Should I use AVIF or WebP as my default image format in 2026?

    AVIF is the better choice for most use cases. It offers approximately 20% better compression than WebP at the same quality level, and nearly all current browsers support it. However, always include a WebP or JPEG fallback using a picture element so the site remains functional for visitors on older browsers or devices.

    How do I fix the “Largest Contentful Paint image was lazily loaded” error?

    Identify the hero image — typically the large banner or product photo at the top of the page. Remove the loading="lazy" attribute from that specific img tag, because lazy loading instructs the browser to defer loading. Instead, add fetchpriority="high" to tell the browser to fetch that image immediately.

    Is it safe to strip EXIF metadata from all website photos?

    Yes, and it is recommended. Stripping EXIF data typically saves between 2% and 10% of file size. It also protects privacy by removing GPS coordinates and other sensitive information. The only exception is when your industry requires copyright or author metadata for legal compliance.

  • Optimizing Photos for Website Performance: The 2026 Technical Guide

    Optimizing Photos for Website Performance: The 2026 Technical Guide

    Optimizing photos for your website in 2026 requires prioritizing modern formats like AVIF and WebP, resizing dimensions for responsive displays, and applying lossy compression. By implementing lazy loading, descriptive alt text, and CDNs, you significantly improve Core Web Vitals (LCP) and visibility in both traditional and AI-driven search engines.

    The 2026 Framework for Optimizing Photos for Website Speed

    Image weight remains the biggest hurdle for web performance. According to NeedleCode, images make up over 60% of the total weight of a typical webpage. This directly impacts your Core Web Vitals, specifically the Largest Contentful Paint (LCP) — the metric that tracks how fast your main content appears. Data from SimpleResizer shows that images trigger the LCP on 70% of pages, meaning search rankings are essentially tied to photo loading speeds.

    Follow this three-step optimization order: Format, Scale, Compress. Start by choosing a modern file type, resize the image to the exact size it will appear on screen, and finally use a compression algorithm to trim unnecessary data.

    The 3-step optimization workflow: Format, Scale, Compress

    Auditing Your Current Performance with DebugBear

    Before making changes, establish a baseline. Tools like DebugBear let you track “Page Weight (Images)” as a specific metric to find pages where heavy media is slowing things down. Set a Performance Budget — for example, an alert if a key page exceeds 600KB in image weight.

    Choosing the Right Format: Why AVIF Is the 2026 Standard

    Format selection is the easiest path to big performance gains. JPEG is mostly phased out in professional web development.

    Format Compression Browser Support Best Use Case
    AVIF Best (smallest files at equal quality) All modern browsers Hero images, high-quality photography
    WebP High (25-35% smaller than JPEG) All modern browsers General site images, reliable default
    PNG Low (lossless, larger files) Universal Flat graphics, logos, transparent backgrounds
    SVG Code-based (resolution-independent) All browsers Icons, simple logos

    An often-overlooked step is stripping EXIF Data. Every camera photo hides metadata like GPS coordinates and timestamps. SimpleResizer notes that removing this data shrinks the file and protects privacy without changing the photo’s appearance. A WordPress Support case study found that exporting a JPEG via GIMP at Quality 60 (with 4:2:0 subsampling) cuts file size by 64% with almost no visible difference.

    Developer Cheat Sheet: Implementing AVIF with WebP Fallbacks

    To use the newest formats without leaving older browsers behind, implement the HTML picture element pattern. This lets the browser select the best format it supports:

    1. Set a source element with type “image/avif” pointing to your AVIF file
    2. Set a source element with type “image/webp” pointing to your WebP file
    3. Set a fallback img element pointing to your JPEG, with loading=”lazy” and descriptive alt text

    This progressive approach ensures every visitor gets the best format their browser supports.

    Technical Implementation: Resizing and Responsive Delivery

    A common mistake is uploading a 4000px wide photo into a 1200px display space. If your content area is 600px wide, WordPress Support recommends serving an image about 1.5 to 2 times that width (1200px). This keeps the image sharp on high-resolution Retina screens without wasting bandwidth.

    Display Width Recommended Image Width Reason
    400px 800px 2x for Retina
    600px 1200px 2x for Retina
    800px 1200px 1.5x (balance of quality and size)

    Use the srcset attribute to offer multiple sizes. This way, a phone does not download a desktop-sized image. For manual optimization, Squoosh and TinyPNG are the go-to tools. DebugBear reports that resizing a standard Pexels image from 7108px to 1266px slashes file size by 89%.

    Responsive image delivery: serving different sizes to different devices

    The Role of a CDN in Global Image Delivery

    Even a perfectly optimized image will feel slow if it travels halfway around the world. A Content Delivery Network (CDN) like Cloudflare or BunnyCDN keeps copies of your images on edge servers closer to users. Many modern CDNs handle format conversion and resizing automatically based on the user’s device.

    Future-Proofing for GEO: Image SEO in the AI Era

    In 2026, photo optimization is about more than speed — it is about Generative Engine Optimization (GEO). AI search tools and visual search like Google Lens need to “read” your images to understand your content. Statistics from SimpleResizer show that 20-30% of all e-commerce traffic now comes from Google Images and visual discovery tools.

    Follow these steps for AI-ready images:

    Step Action Example
    Filenames Use descriptive names red-leather-armchair.webp (not IMG_4837.jpg)
    Alt Text Write factual descriptions “Barista pouring milk into a latte to form a tulip pattern”
    Placement Keep images near related text Helps crawlers understand context

    Lazy Loading: Improving UX and Initial Paint

    Native lazy loading should be used for any image below the fold. Adding loading="lazy" tells the browser to wait before downloading those images, saving data and speeding up the Critical Rendering Path. Important: never lazy load your top hero image. That image is your LCP, and delaying it will hurt your SEO.

    Conclusion

    Modern image optimization balances visual quality with performance. Clicking “Save for Web” is no longer sufficient. You need next-gen formats like AVIF, responsive srcset delivery, and AI-ready alt text.

    To stay ahead in 2026, audit your site with PageSpeed Insights or DebugBear, move toward AVIF as your default format, automate compression where possible, and ensure every image has a clear reason for being on the page. This boosts Core Web Vitals and ensures visibility in the era of visual search.

    FAQ

    Does image optimization affect my Core Web Vitals (LCP/CLS) scores?

    Yes. Images are the primary driver of Largest Contentful Paint (LCP), which measures how fast main content loads. Providing explicit width and height attributes prevents Cumulative Layout Shift (CLS) by allowing the browser to reserve space before the image downloads, ensuring a stable visual experience.

    Should I use a WordPress plugin or optimize images manually before uploading?

    Manual optimization using tools like Squoosh offers the highest quality control and is ideal for critical assets like hero banners. For high-volume sites or blogs, WordPress plugins like Smush, Imagify, or EWWW Image Optimizer are better for bulk automation, ensuring every uploaded image is resized and compressed consistently.

    What is the blur-up technique and how does it improve user perception?

    The “blur-up” technique loads a tiny, low-resolution placeholder (often 10-20 pixels wide) that is stretched and blurred to fit the image container. As the high-resolution version downloads in the background, it replaces the placeholder. This improves perceived speed by giving users a visual hint immediately, reducing bounce rates.

    Comparison of blur-up vs standard loading

  • Centimeters to Kilometers Made Simple: The Everyday Conversion Guide

    Centimeters to Kilometers Made Simple: The Everyday Conversion Guide

    Converting centimeters to kilometers is simpler than it sounds. The rule comes down to one number: 100,000. Divide your centimeters by 100,000, and you get kilometers. That is the whole formula. In this guide, we will walk through how it works, share some mental math tricks, and show you real-world situations where this conversion actually matters.

    The Core Formula: How cm and km Connect

    Both centimeters and kilometers are built on the meter — the base unit of length in the Metric System (also called the SI system). Everything in the metric system scales by powers of 10, which makes conversions predictable and easy.

    Here is the chain connecting the two units:

    Unit Relationship
    1 meter = 100 centimeters
    1 kilometer = 1,000 meters
    1 kilometer = 100,000 centimeters

    So the conversion formula is:

    km = cm / 100,000

    Or equivalently, multiply by 0.00001 (which is 1 / 100,000). As confirmed by NIST standards verified in 2026, this factor is exact — no rounding needed.

    Quick Example

    You have a measurement of 250,000 cm and want to know how many kilometers that is:

    1. Take your value: 250,000 cm
    2. Divide by 100,000: 250,000 / 100,000 = 2.5 km

    Done. According to Calqro, these are exact decimals, so you never have to worry about rounding errors when staying within the metric system.

    Simple cm to km conversion logic diagram

    The Mental Math Shortcut: Move the Decimal 5 Places

    Here is a trick that saves you from reaching for a calculator. Since 100,000 has five zeros, converting from centimeters to kilometers is just a matter of moving the decimal point five places to the left.

    Let us try it with 90,000 cm:

    1. Start with the number: 90,000.0
    2. Move the decimal left one place: 9,000.0
    3. Move it again: 900.0
    4. Again: 90.0
    5. Again: 9.0
    6. One more time: 0.9

    So 90,000 cm = 0.9 km. Data from CoolConversion confirms this result.

    This trick works in reverse too. To go from kilometers to centimeters, move the decimal five places to the right. So 0.9 km becomes 90,000 cm.

    When Would You Actually Use This?

    You might be surprised how often this comes up in daily life:

    • Planning a road trip: Your car’s trip computer might show distance in kilometers, but a product specification lists a cable length in centimeters.
    • Home improvement: A garden hose is 1,500 cm long — that is 0.015 km, or about 15 meters.
    • School projects: Students often encounter both units in science and geography assignments.

    Converting in the Other Direction: Kilometers to Centimeters

    To go from kilometers back to centimeters, simply multiply by 100,000 (or move the decimal five places to the right).

    Kilometers Calculation Centimeters
    1 km 1 x 100,000 100,000 cm
    2.5 km 2.5 x 100,000 250,000 cm
    0.9 km 0.9 x 100,000 90,000 cm
    8.848 km 8.848 x 100,000 884,800 cm

    Real-World Scale: Understanding the Size Gap

    To really appreciate how different centimeters and kilometers are, it helps to look at some familiar examples:

    Example In Kilometers In Centimeters
    A standard pencil 0.000019 km ~19 cm
    A football field ~0.091 km ~9,144 cm
    The Three Gorges Dam (Wikipedia) ~2.3 km ~230,000 cm
    Mount Everest height 8.848 km 884,800 cm
    The Karman Line (“edge of space” – Wikipedia) 100 km 10,000,000 cm

    Notice how quickly the numbers get unwieldy in centimeters once you move beyond everyday objects. That is exactly why we switch to kilometers for larger distances — the numbers stay readable.

    Scientific Notation: The Professional Way

    In science and engineering, writing out long strings of zeros can lead to typos. That is where scientific notation comes in. The conversion factor is written as:

    1 cm = 1 x 10^-5 km (or 0.00001 km)

    This follows ISO 80000-3 standards, which set the global rules for measuring space and time quantities. CoolConversion notes that these factors are checked against BIPM and ISO 80000-3 guidelines (last reviewed March 2026) to keep global trade and research consistent.

    For most everyday situations, though, you do not need scientific notation — just remember “divide by 100,000” and you are set.

    Area Conversions: Square Centimeters to Square Kilometers

    When you move from length (one dimension) to area (two dimensions), the conversion factor gets squared. Since the length factor is 100,000, the area factor is:

    100,000 x 100,000 = 10,000,000,000 (ten billion)

    The formula becomes:

    km^2 = cm^2 / 10,000,000,000

    According to CoolConversion, 1 cm^2 = 1 x 10^-10 km^2. This is mostly used in specialized fields like satellite mapping or land surveying. For everyday purposes, you would never measure a city in square centimeters — the numbers would be impossible to read.

    A Handy Reference Table

    What You Want What to Do Example
    cm to km Divide by 100,000 500,000 cm = 5 km
    km to cm Multiply by 100,000 3 km = 300,000 cm
    cm to m Divide by 100 250 cm = 2.5 m
    m to km Divide by 1,000 2,500 m = 2.5 km
    cm^2 to km^2 Divide by 10,000,000,000 1,000,000,000 cm^2 = 0.1 km^2

    Conclusion

    Converting centimeters to kilometers boils down to one simple rule: divide by 100,000. The metric system’s base-10 design makes this easy, whether you are using a calculator, doing mental math by shifting the decimal, or applying scientific notation for a technical report. For everyday tasks, just remember that 100,000 cm always equals 1 km. Bookmark this guide or save the reference table above for the next time you need a quick conversion.

    FAQ

    How many kilometers are in 1 centimeter?

    There are 0.00001 kilometers in 1 centimeter. In scientific notation, this is expressed as 1 x 10^-5 km. This exact factor is defined by international standards (SI) and is used globally for technical precision.

    What is the easiest way to convert cm to km without a calculator?

    Use the “decimal shift” method. Move the decimal point five places to the left. For example, 500,000.0 cm becomes 5.0 km after shifting the decimal five places. No math required.

    Are centimeters and kilometers part of the Imperial or Metric system?

    Both are units of the Metric System (also known as the International System of Units or SI). The metric system is used globally for science, medicine, and most international trade. The Imperial system uses units like inches and miles instead.

    When should I use centimeters vs. kilometers?

    Use centimeters for small, everyday measurements (a phone screen, a book, a piece of furniture). Use kilometers for distances between places (city to city, a hiking trail, a marathon route). If the number in centimeters gets hard to read, it is probably time to switch to kilometers.

    How do I convert square centimeters to square kilometers?

    Divide the number of square centimeters by 10,000,000,000 (ten billion). For example, 5,000,000,000 cm^2 equals 0.5 km^2. This type of conversion is mostly used in mapping, geography, and land surveying.

  • How to Make QR Codes for Websites: A 2026 Guide to Secure and Custom Designs

    How to Make QR Codes for Websites: A 2026 Guide to Secure and Custom Designs

    A QR code on a flyer, business card, or storefront window is a direct bridge from the physical world to your website. In 2026, the process is straightforward: copy your URL, paste it into a generator like Bitly or Adobe Express, customize the look, and download an SVG for print.

    But doing it well — with proper tracking, brand consistency, and security — takes a bit more thought. This guide walks through the full process: from preparing your URL and choosing between static and dynamic codes, to preventing quishing attacks and getting the print size right.

    The 2026 Framework: 4 Steps to a Professional Website QR Code

    Data from QR Code AI 2026 shows that custom-branded QR codes get up to 30% more scans than plain black-and-white ones. Here’s how to get there.

    Step 1: URL Preparation and UTM Tagging

    Before you generate anything, prepare your destination URL:

    1. Use HTTPS — Always. An HTTP link will trigger browser security warnings that scare users away.
    2. Add UTM parameters — Append tags like ?utm_source=flyer&utm_campaign=spring_sale to track exactly which QR code drove the traffic in Google Analytics.
    3. Shorten long URLs — For static codes, a shorter URL produces a simpler, faster-scanning pattern. Use a URL shortener before generating the code.

    Step 2: Customize for Brand Identity

    Modern generators (Canva, Bitly, Adobe Express) go well beyond the basic black-and-white grid. You can:

    • Add your brand colors to the foreground modules
    • Place a logo in the center of the code
    • Include a Call to Action frame like “Scan to Order” or “Scan for Menu”
    • Use AI-powered tools to blend the QR pattern with artistic brand imagery

    The key is making the code feel like part of your design, not an afterthought bolted onto the corner.

    Step 3: Pre-Print Security Audit

    Don’t send anything to print until you’ve verified:

    • The destination URL is live and loading correctly
    • Any redirects are functioning as expected
    • The code is not vulnerable to quishing (QR phishing — where scammers swap your code for a malicious one)
    • The exported file is SVG format, which stays sharp at any print size

    3-step creation process: Secure URL, Custom Brand, Security Audit

    Step 4: Choose Your Format (Static or Dynamic)

    This decision shapes everything else — see the detailed comparison below.

    Static vs. Dynamic QR Codes: Which Should You Choose?

    As the DoItQR Industry Guide puts it, “A URL is invisible on a printed surface” — which is why the flexibility of your format matters so much.

    Feature Static QR Code Dynamic QR Code
    Data storage Baked into the pattern Uses a redirect link
    Change URL after printing? No — permanent Yes — anytime
    Scan tracking Not available Time, location, device
    Pattern complexity Depends on URL length Always clean (short redirect)
    Cost Free Typically paid plan
    Best for Permanent links (“About Us” page) Campaigns, menus, promotions

    Simple comparison: Static (Fixed) vs Dynamic (Flexible/Trackable)

    In 2026, most professional creators default to dynamic codes for the flexibility and analytics — unless the use case is truly permanent and doesn’t need tracking.

    Advanced Design: Error Correction, Logos, and the Quiet Zone

    Good QR code design is a balance between looking great and actually scanning. Statista reported nearly 100 million US users scanning codes by 2025 — your design needs to work on every device.

    Error Correction and Logo Placement

    QR codes use Reed-Solomon error correction, which allows the code to remain readable even when partially covered or damaged — up to 30% in the highest setting.

    Level Tolerance When to Use
    L 7% Digital screens only
    M 15% Standard marketing (default)
    Q 25% Small logo in center
    H 30% Logo overlay or heavy customization

    If you’re placing a logo in the center, you must use Level H to ensure scanners can still read the data hidden behind the logo.

    The Quiet Zone and Sizing Rules

    Two physical requirements that trip people up:

    1. Quiet Zone — Every QR code needs a blank white border on all sides (at least 4 module widths). Without it, scanners can’t find the code’s edges.
    2. The 10:1 distance rule — The code’s size should be roughly 1/10th of the scanning distance.
    Use Case Scanning Distance Minimum Code Size
    Business card ~8 in (20 cm) 0.8 × 0.8 in (2 × 2 cm)
    Table tent ~20 in (50 cm) 2 × 2 in (5 × 5 cm)
    Poster ~40 in (1 m) 4 × 4 in (10 × 10 cm)

    Never go smaller than 0.8 × 0.8 inches (2 × 2 cm) on a business card — anything smaller and older phone cameras will struggle.

    2026 Security: Preventing Quishing (QR Phishing)

    With the global QR market projected to hit $33 billion by 2030 (DoItQR), security is no longer optional. Quishing — QR phishing — happens when fraudsters replace legitimate codes with malicious ones that steal data or install malware.

    Three rules for 2026:

    1. Enforce HTTPS everywhere — Never link to an unencrypted (HTTP) page.
    2. Use preview-capable generators — Tools that show a safety preview or diagnostic report before the user reaches the destination add a trust layer.
    3. Automate with controlled platforms — For bulk projects, use tools like Zapier to generate unique, trackable codes in a controlled environment rather than creating them manually across multiple services.

    Conclusion

    Making a QR code for a website is simple. Making one that’s professional, trackable, and secure takes a bit more work — but it’s worth it. Follow the four-step framework:

    1. Prepare your URL — HTTPS + UTM tags + shorten if needed
    2. Customize the design — Brand colors, logo, CTA frame
    3. Audit security — Verify the link, check for quishing risks
    4. Pick the right format — Dynamic for campaigns, static for permanent links

    Start with a dynamic QR code, set error correction to Level H if you’re adding a logo, and always test on multiple phones before printing.

    FAQ

    Do QR codes for websites ever expire?

    Static QR codes never expire — the data is hardcoded into the pattern. They only become useless if the destination URL is deleted. Dynamic QR codes don’t technically expire either, but the redirect will stop working if your subscription to the generator service ends.

    Can I change the destination URL after printing?

    Only with dynamic QR codes. Static codes embed the URL directly into the pixel pattern — if the URL changes, you need to generate and reprint a completely new code.

    Why is my QR code not scanning correctly?

    The usual culprits: low contrast between code and background, a missing Quiet Zone (white border), or — for static codes — a URL that’s too long, making the pattern too dense for older phone cameras to resolve.

    Is it possible to track website QR scans for free?

    Yes — add UTM parameters to your URL and monitor the traffic in Google Analytics. While some free generators offer basic scan counts, detailed analytics (device type, location, time) typically require a premium dynamic plan.

  • How Can I Make a QR Code? A Complete Guide to Free & Custom Generators (2026 Update)

    How Can I Make a QR Code? A Complete Guide to Free & Custom Generators (2026 Update)

    Need a QR code? You’re closer than you think. Open a free generator like QR Code Generator or Adobe Express, paste your link, tweak the design if you want, and download it as a PNG or SVG. In 2026, you can even create one straight from Chrome or Safari’s built-in Share menu — no extra tools required.

    Whether you’re putting a QR code on a business card, a restaurant menu, or a conference banner, this guide walks through every method, helps you pick the right type (static vs. dynamic), and shows you how to make sure it actually scans every time.

    The Fastest Way to Make a QR Code (Step-by-Step)

    Creating a QR code has become a basic digital skill. According to Wikipedia, 89 million US users scanned a QR code in 2022 — a 26% increase from 2020 — mostly to open digital menus or make payments.

    Method 1: Online Generators (Best for Customization)

    Online tools give you the most control over branding, format, and image quality. According to QR Code Generator, the standard workflow is three steps:

    1. Select the data type — Choose what you want to share: a URL, vCard (contact info), plain text, or WiFi credentials.
    2. Enter your information — Paste your link or type your text. If your URL is very long, Freetool24 recommends using a URL shortener first. Shorter URLs produce simpler patterns that are easier for older phones to scan.
    3. Customize and download — Adjust colors, add a frame, or choose your format. Use PNG for digital use (emails, social media) and SVG for anything that will be printed — vector files stay sharp at any size.

    3-step creation process: Select Data -> Input Info -> Customize/Download

    Pro tip: Always test the scan on your screen before you finalize. If it takes more than two seconds to register, try increasing the contrast or simplifying the design.

    Method 2: Built-in Browser Tools (Chrome & Safari)

    If you just need a quick code for a webpage, your browser already has this built in:

    • Chrome (Desktop): Go to the page → three-dot menu → “Cast, Save, and Share” → “Create QR Code.”
    • Chrome / Safari (Mobile): Tap the Share icon in the address bar → “Create a QR Code.”

    This is the fastest option for instant sharing, though customization is limited to the standard black-and-white pattern (plus the occasional Chrome dinosaur logo).

    Static vs. Dynamic QR Codes: Which Should You Choose?

    This is the most important decision for any QR code you plan to use long-term.

    Feature Static QR Code Dynamic QR Code
    Data storage Baked directly into the pattern Uses a redirect short link
    Can change the URL later? No — permanent once printed Yes — update anytime
    Expires? Never Only if subscription ends
    Scan analytics Not available Location, time, device type
    Cost Free Typically requires paid plan

    Side-by-side comparison of Static (permanent) vs Dynamic (editable) codes

    According to QR Code AI, custom-branded codes can produce a +30% marketing engagement lift over plain black-and-white designs. That said, be aware of “quishing” (QR phishing). By 2026, security best practices recommend using dynamic links from reputable providers that offer encrypted, GDPR-compliant redirection to prevent malicious link swaps.

    Optimizing for Scannability: The 10:1 Rule and Error Correction

    A QR code that looks great but doesn’t scan is wasted space. Most scanning failures come down to two things: size and error correction.

    The 10:1 Distance Rule

    Your QR code’s physical size should be about 1/10th of the expected scanning distance:

    Use Case Scanning Distance Minimum QR Code Size
    Business card ~20 cm 2 × 2 cm
    Table tent / menu ~50 cm 5 × 5 cm
    Poster on a wall ~1 meter 10 × 10 cm
    Billboard ~5 meters 50 × 50 cm

    Visualization of the 10:1 ratio between scanning distance and QR code size

    Error Correction Levels (L, M, Q, H)

    QR codes use Reed-Solomon error correction, which acts as a built-in backup system. The code remains scannable even when partially damaged or covered.

    Level Damage Tolerance Best For
    L 7% Digital screens — always clear, no damage risk
    M 15% General marketing materials (default choice)
    Q 25% Adding a small logo in the center of the code
    H 30% Heavy customization, outdoor signage, harsh environments

    If you’re adding a logo overlay, use Level Q or H to compensate for the data area you’re covering.

    Advanced Use Cases: vCards, WiFi, and Design Integration

    QR codes aren’t limited to URLs — they can trigger specific actions on a smartphone:

    vCard / Digital Business Card
    Instead of a link, encode your name, phone, and email. When scanned, the phone prompts “Add to Contacts.” SkyToolz recommends the vCard 3.0 format for the best cross-platform compatibility between iPhones and Androids.

    WiFi Credentials
    Let guests join your network without typing a password. Use this format:

    WIFI:S:NetworkName;T:WPA;P:Password;;
    

    Scan it and the phone connects automatically.

    Design Integration
    Tools like Canva and Adobe Express now let you generate QR codes directly inside your design project. This makes it easy to match the code’s colors to your brand while keeping the Quiet Zone (the required white border) intact.

    The global reach of QR technology is remarkable — Wikipedia notes that China had an 83% QR payment adoption rate as far back as 2018.

    Conclusion

    Making a QR code comes down to three steps: choose your data, generate the pattern, and download the file. The key decisions are:

    • Static vs. Dynamic — Use static for simple, permanent links; use dynamic if you need to track scans or update the URL later.
    • PNG vs. SVG — PNG for digital, SVG for print.
    • Size it right — Follow the 10:1 distance rule and test before you print.

    With the right generator and a basic understanding of error correction, anyone can create a professional, reliable QR code in under a minute.

    FAQ

    Do QR codes expire?

    Static QR codes never expire — the data is hardcoded into the pattern. They’ll work as long as the destination (your website) stays online. Dynamic QR codes may stop working if your subscription to the generator service ends or if the provider deletes the redirect link from their database.

    Why is my QR code not scanning?

    The most common culprits: low contrast (light-colored code on a light background), the code being too small for the scanning distance, or a missing Quiet Zone (the white border around the code). For print, always use SVG files — pixelation from raster images is a leading cause of scan failures.

    Can I track QR code scans for free?

    Most free generators only track scans for dynamic codes, which typically require a paid plan. A practical workaround for static codes: use a free URL shortener with built-in analytics (like Bitly) as your destination link. You won’t track the QR scan itself, but you’ll see every click that came through it.

  • How to Extract ZIP Files on Mac: Native & Terminal Methods (2026)

    How to Extract ZIP Files on Mac: Native & Terminal Methods (2026)

    To extract a ZIP file on Mac, double-click the file in Finder — macOS uses the built-in Archive Utility to decompress it instantly into the same folder. For more control, use the Terminal command unzip filename.zip. For non-native formats like RAR and 7z, install a third-party tool like Bandizip or use a browser-based extractor.

    Three Ways to Extract ZIP Files on Mac

    Method 1: Double-Click in Finder (Fastest)

    macOS has native ZIP support — no extra apps needed. Double-click any ZIP file in Finder, and Archive Utility runs in the background, creating a new folder with the extracted contents in the same location.

    This works on all modern macOS versions (Sonoma and later) and across all Apple Silicon hardware (M1, M2, M3, M4).

    Simple 3-step visualization of the double-click process

    Method 2: Terminal Commands (For Power Users)

    When Finder shows “Decompression Failed” or “Error 1” permission issues, Terminal is more reliable:

    
    unzip filename.zip
    
    # Extract to a specific folder
    unzip filename.zip -d ~/Desktop/extracted/
    
    # View contents without extracting
    unzip -l filename.zip
    
    # Extract password-protected ZIP
    unzip -P yourpassword filename.zip
    

    Expert Olga Weis recommends moving developer packages into a clean folder before unpacking: “This keeps extracted files from cluttering your Downloads folder.”

    Method 3: Right-Click with Third-Party Tools

    For formats beyond ZIP (RAR, 7z, TAR, GZIP), the built-in Archive Utility cannot help. Third-party apps add right-click extraction:

    Tool Formats Supported Key Feature Price
    Bandizip 40+ (RAR5, ZIPX, 7z) Multi-core processing for large files Free
    iBoysoft MagicMenu ZIP, RAR, 7z Right-click Finder integration Paid
    ZIP Extractor ZIP, RAR, 7z Browser-based, works in Google Drive Free (300M+ users)

    Comparison between Native support vs. Third-party needs

    Format Support: What Mac Can and Cannot Open Natively

    Format Finder (Native) Terminal Third-Party Needed?
    ZIP Yes unzip No
    TAR No tar -xf No
    GZIP (.gz) No gunzip No
    RAR No No Yes
    7z No No (without p7zip) Yes
    ZIPX No No Yes

    Safari Auto-Open: Convenience vs. Security

    Safari can automatically unzip downloads: Safari → Settings → General → “Open ‘safe’ files after downloading.”

    Recommendation: Keep this disabled. Auto-opening ZIP files can execute unknown scripts without your knowledge. Manually check downloaded files before extracting.

    Troubleshooting: “Unable to Expand ZIP” Errors

    Error Cause Fix
    “Decompression Failed” Corrupted download Re-download the file
    “Error 1” (permission) Protected folder or shared drive Move ZIP to Desktop or Documents
    “No space left on device” Insufficient disk space Free up storage; extracted files are larger than the ZIP
    “Unable to expand” (encrypted) Password-protected archive Use Terminal: unzip -P password filename.zip

    Always verify disk space before extracting large archives — uncompressed files can be significantly larger than the ZIP.

    Conclusion

    Double-clicking in Finder handles 95% of ZIP extraction needs on Mac. For errors and advanced control, use Terminal unzip commands. For RAR, 7z, and other non-native formats, install Bandizip or use ZIP Extractor in your browser. Keep Safari’s auto-open disabled for security, and always extract to a dedicated folder to stay organized.

    FAQ

    Where is the ‘Unzip’ app on a Mac?

    There is no standalone app. Archive Utility runs automatically when you double-click a ZIP file. You can also right-click → “Open With → Archive Utility.”

    How do I automatically unzip Safari downloads?

    Go to Safari → Settings → General and check “Open ‘safe’ files after downloading.” This auto-decompresses ZIP files. Disable this for better security if you download from untrusted sources.

    How do I extract a password-protected ZIP on Mac?

    Double-clicking usually shows a password prompt. If it does not, use Terminal: unzip -P yourpassword filename.zip. Replace yourpassword with the actual password and filename.zip with your file name.

  • How to Unzip Files on Windows: Complete Guide for Windows 11 & 10 (2026)

    How to Unzip Files on Windows: Complete Guide for Windows 11 & 10 (2026)

    To unzip files on Windows, open File Explorer, right-click the ZIP folder, and select “Extract All” — then choose a destination folder. As of May 2026, Windows 11 also natively supports extracting .rar and .7z files, so most users no longer need third-party software for basic decompression.

    Three Methods to Unzip on Windows

    Method 1: Right-Click “Extract All” (Simplest)

    1. Locate the ZIP file in File Explorer (look for the zipper icon)
    2. Right-click → Select “Extract All”
    3. Choose destination — Windows suggests a new folder in the same location
    4. Click “Extract” — A progress bar appears for large archives

    SupportYourTech notes this is the fastest method for most users.

    Windows standard 3-step extraction workflow

    Method 2: Drag-and-Drop Individual Files

    Need just one or two files from a large archive? Double-click the ZIP to browse inside, then drag specific items to your desktop or another folder. Windows extracts only those files instantly — no full decompression needed.

    Method 3: PowerShell Batch Extraction

    For dozens or hundreds of archives, automate with PowerShell:

    
    Get-ChildItem -Path "C:\SourceFolder" -Filter *.zip |
      ForEach-Object {
        Expand-Archive -Path $_.FullName -DestinationPath "C:\DestinationFolder"
      }
    

    Serverman recommends this for IT admins processing bulk data or setting up automated weekly backups.

    Windows 11: Native RAR and 7z Support

    After the November 2023 update, Windows 11 can extract .rar and .7z files directly in File Explorer — just like ZIP files. Microsoft integrated the open-source libarchive project to make this possible, as noted by PandaOffice Drecov.

    Limitation: You can extract RAR/7z, but Windows still only creates ZIP archives. For creating .7z or .rar files, you need a dedicated app.

    Format Extract (Win 11) Create (Win 11) Windows 10
    ZIP Native Native Native
    RAR Native No Requires third-party app
    7z Native No Requires third-party app
    GZIP / TAR / BZIP2 No No Requires third-party app

    When to Use 7-Zip or WinRAR Instead

    The built-in Windows tool does not support AES-256 encryption for creating password-protected archives. For sensitive data (medical records, tax returns), use a dedicated tool.

    Feature Windows Built-in 7-Zip WinRAR
    Create ZIP Yes Yes Yes
    Create 7z (LZMA2) No Yes No
    Create RAR No No Yes
    AES-256 encryption No Yes Yes
    CRC error recovery Limited Strong Strong
    Price Free Free Paid (trial)

    ZIP Extractor notes that desktop apps like 7-Zip offer better protection against corrupted files and CRC errors compared to browser-based tools.

    Native tools vs third-party software comparison

    Use 7-Zip or WinRAR when:
    – Opening password-protected files with AES-256 encryption
    – Maximum compression is needed (LZMA/LZMA2 algorithms)
    – Working with GZIP, TAR, or BZIP2 formats

    Compression Ratios by File Type

    Not all files compress equally. Serverman provides useful benchmarks:

    File Type Typical Compression Why
    Text documents / spreadsheets 60–90% Highly repetitive data compresses well
    PDFs 20–40% Partially compressed already
    JPEG / MP3 / MP4 Less than 1% Already compressed by their own codecs
    RAW images / BMP 40–70% Uncompressed pixel data

    Modern Windows uses the ZIP64 extension, supporting archives up to 16 exabytes — more than enough for any real-world scenario, per Wikipedia.

    Conclusion

    For most users, right-click “Extract All” in File Explorer handles ZIP, RAR, and 7z extraction on Windows 11. Use PowerShell for batch jobs, and install 7-Zip when you need AES-256 encryption or maximum compression. Always ensure sufficient disk space before extracting large archives.

    FAQ

    What is the difference between ‘Extract All’ and double-clicking a ZIP?

    Double-clicking lets you browse inside without decompressing — files appear but won’t run correctly. “Extract All” fully unpacks the data into a normal folder, which is necessary for apps, installers, and files that interact with your system.

    Why can’t I see the ‘Extract All’ option?

    You may have clicked a regular folder instead of a compressed archive (check the extension is .zip, .rar, or .7z). If WinRAR is installed, it may have replaced the default context menu. Try “Open With → File Explorer” to restore the native option.

    How do I unzip password-protected files when Windows fails?

    The built-in tool doesn’t handle high-level encryption. Use 7-Zip or WinRAR — both support AES-256 encryption that Windows cannot process natively.