Pick up any product in a store and you’ll find a barcode somewhere on the packaging. Most of the time, that’s an EAN-13 — 13 digits stretched across a familiar strip of black and white bars. But occasionally, on something tiny like a pack of gum or a tube of lip balm, you’ll spot a shorter, more compact barcode: EAN-8.
Both formats do the same job — giving each product a unique, scannable ID — but they’re built for different situations. This guide walks through the real differences between EAN-13 and EAN-8, when to use each one, and how they fit into the broader GS1 barcode ecosystem.
EAN-13 vs EAN-8: Key Differences at a Glance
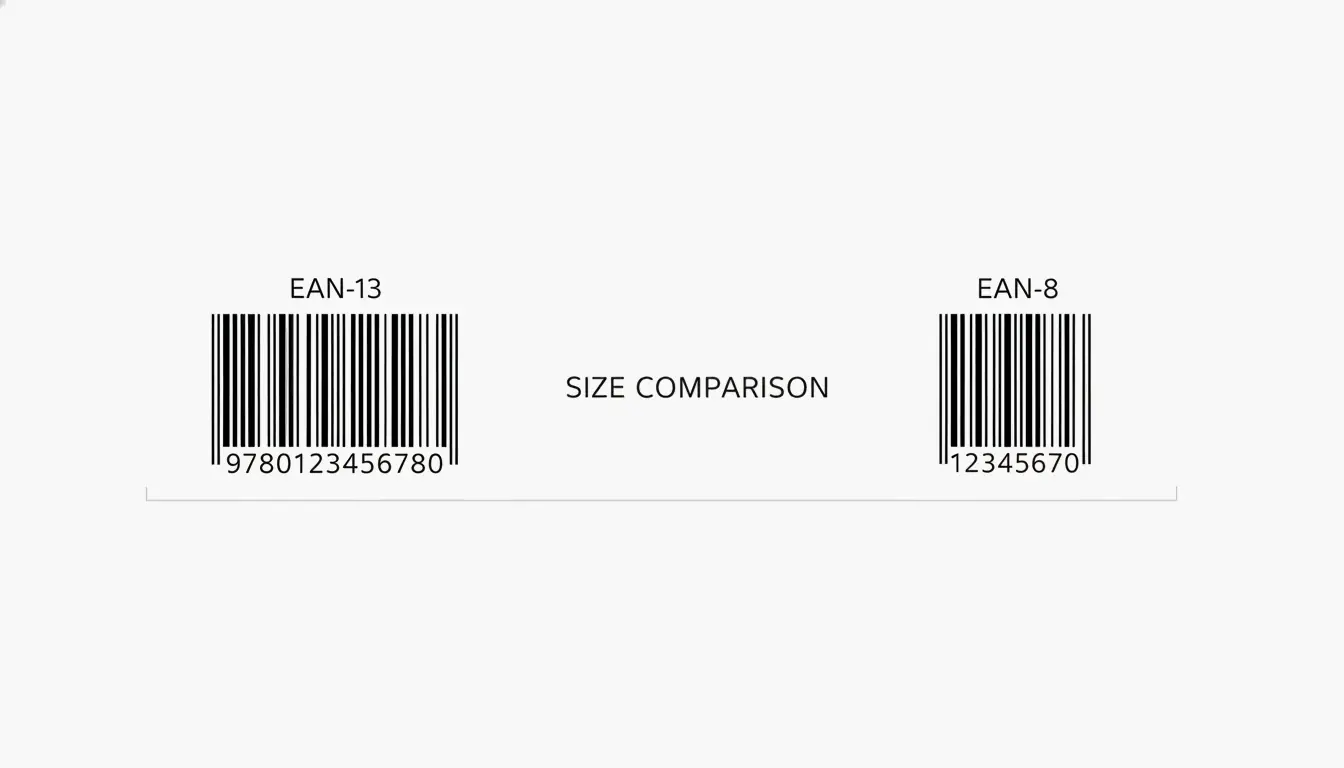
The biggest distinction between these two formats comes down to how many digits they carry and how much physical space they take up on a label.
| Feature | EAN-13 | EAN-8 |
|---|---|---|
| Digits | 13 | 8 |
| Module width | 95 modules | 67 modules |
| Minimum print width | ~1.5 inches (38 mm) | ~1 inch (26 mm) |
| Typical use | Standard retail products | Very small packaging |
| Managed by | GS1 | GS1 |
An EAN-13 barcode encodes 13 digits and is made up of 95 equal-width modules, according to Wikipedia. EAN-8 only encodes 8 digits, which produces a much narrower barcode — roughly two-thirds the width.
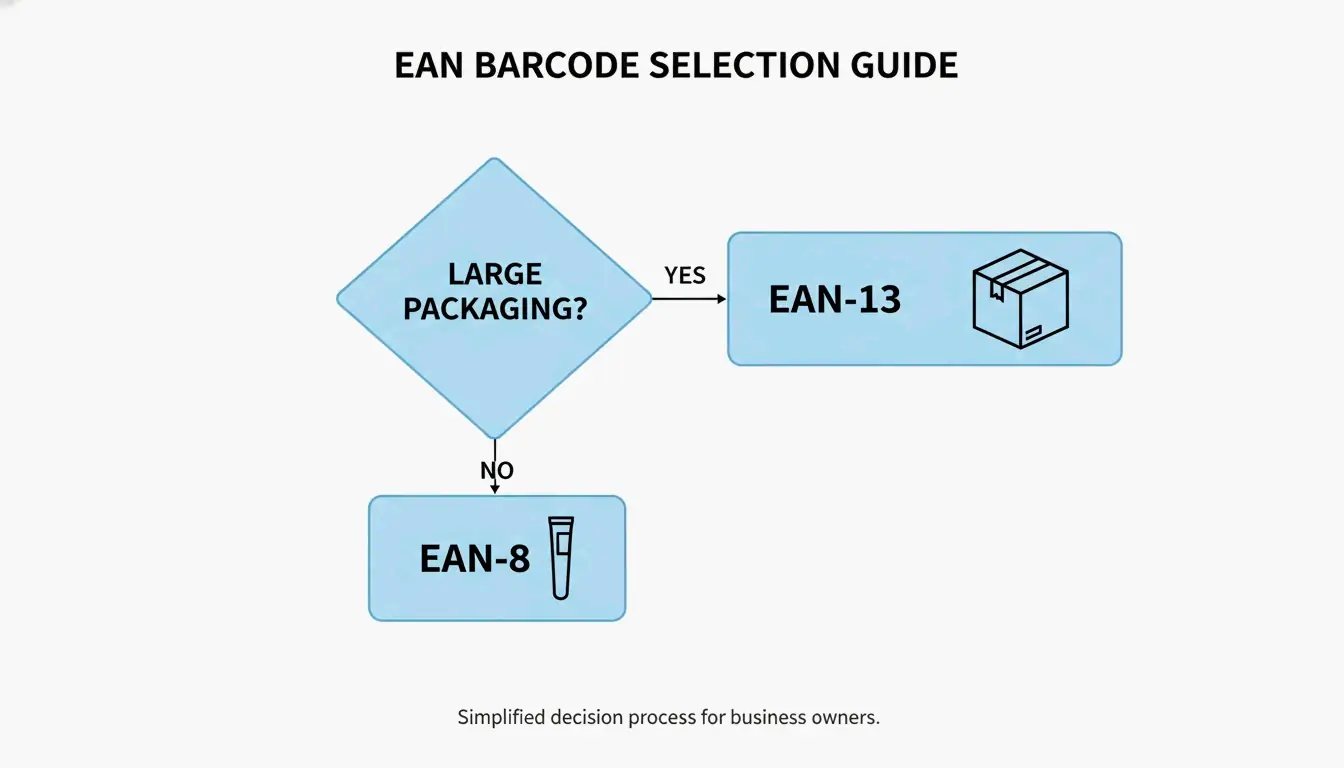
How to Choose: A Simple Decision Tree
For anyone deciding which format to use, the logic is straightforward:
- Standard products — If your packaging has room for a barcode at least 1.5 inches wide, go with EAN-13. It’s the default requirement for retail worldwide.
- Small items — If the printable area on your product is too tight for EAN-13, you can apply for an EAN-8.
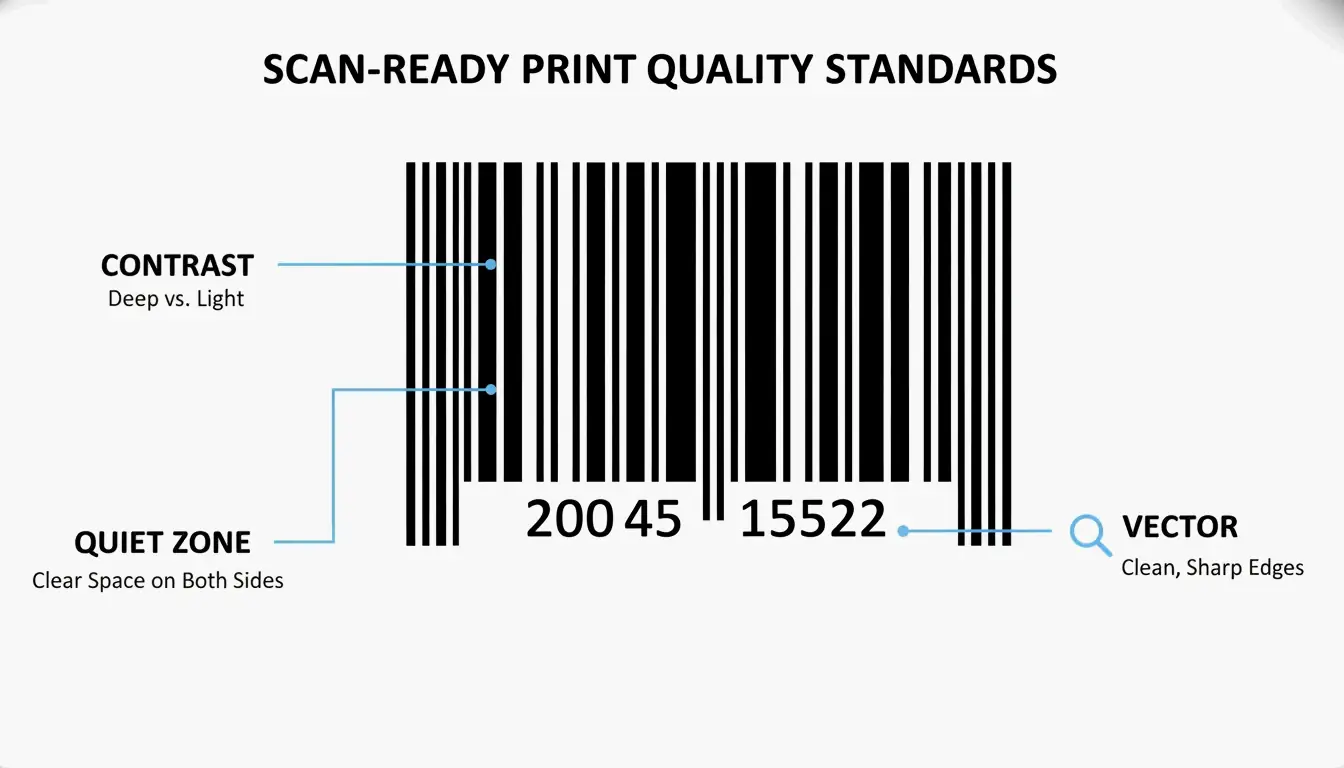
Something people often overlook is the Quiet Zone — the blank white space on both sides of the barcode. According to Wikipedia, EAN-13 barcodes frequently include a right-side > indicator that marks where the Quiet Zone begins. This visual marker helps scanners find the edges of the code so they aren’t confused by nearby graphics or text.
When EAN-8 Is the Right Call: The Surface Area Rule
EAN-8 isn’t a free alternative — it’s a specialized format for products that genuinely can’t fit a standard barcode. As Barcodes South Africa explains, because only 8 digits are available (far fewer unique combinations than 13 digits), GS1 Member Organizations only assign EAN-8 numbers to manufacturers who can demonstrate that their packaging is too small for EAN-13.
In practice, this means you’ll see EAN-8 on items like:
– Individual candy bars or chewing gum packs
– Small cosmetic items (lip balm, mascara)
– Packets of seeds or spices
– Tiny electronics accessories
If your product has enough space, EAN-13 is always the default.
Technical Specifications: How Are EAN Formats Structured?
Behind the bars, EAN formats follow a precise structure that ensures every product gets a globally unique ID through the GS1 (Global Standards 1) system.
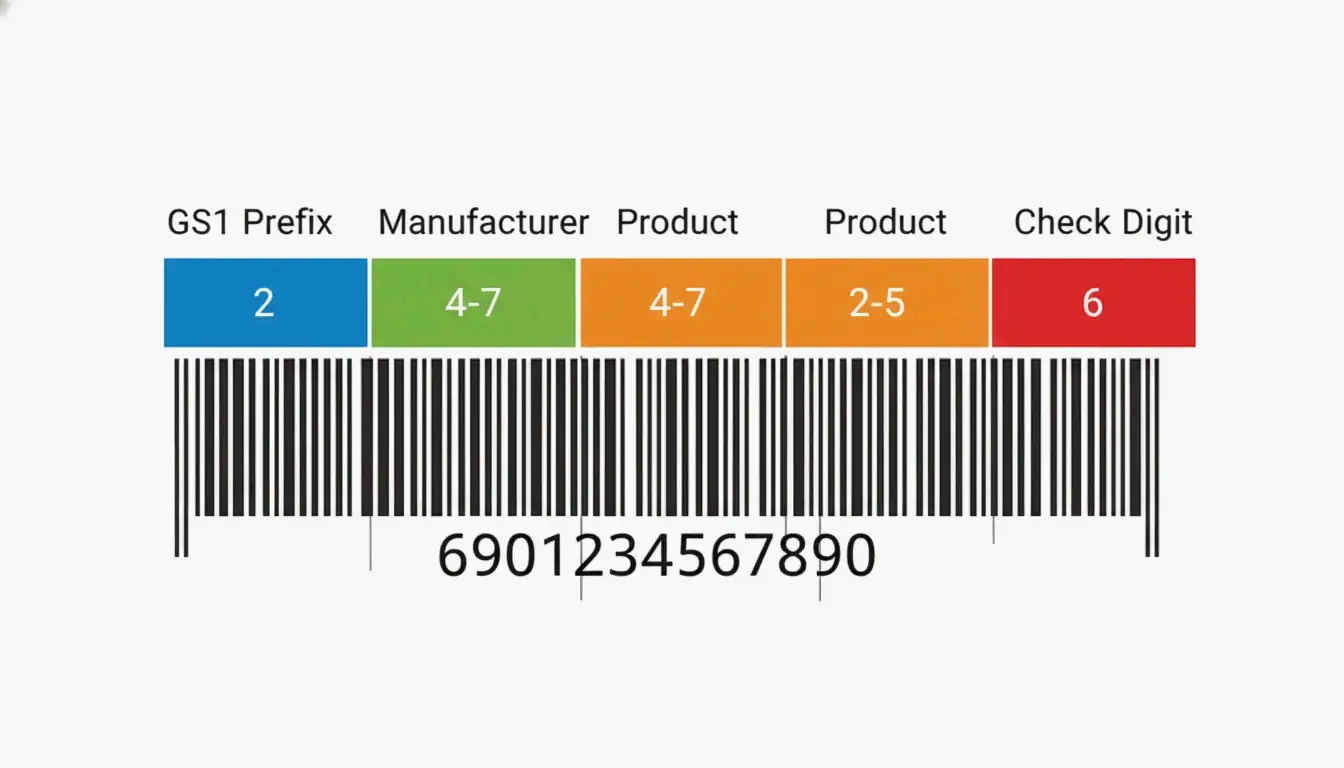
EAN-13 Structure:
- GS1 Prefix (3 digits): Identifies which GS1 Member Organization issued the code. For example,
590is Poland,400–440is Germany. - Manufacturer Code (variable length): The unique identifier assigned to a company.
- Product Code (variable length): The specific number the company assigns to a particular item (essentially the SKU).
- Check Digit (1 digit): The final digit, calculated from all previous digits to catch scanning errors.
EAN-8 Structure:
EAN-8 works differently — there’s no variable-length manufacturer code. The numbering authority assigns product codes directly. According to Oracle, any company can request an EAN-8 even if they already hold an EAN-13 prefix, but the two numbers have no mathematical relationship to each other.
Both formats are remarkably reliable at catching errors. Wikipedia notes that EAN-13 detects 100% of single-digit errors and 90% of transposition errors (where two adjacent digits get swapped). That means if a scanner misreads even one bar, the check digit will almost always flag it.
Is EAN-13 Accepted in the US? Comparing with UPC-A
A common concern for companies selling internationally is whether EAN-13 works in the United States, which historically used its own 12-digit UPC-A format.
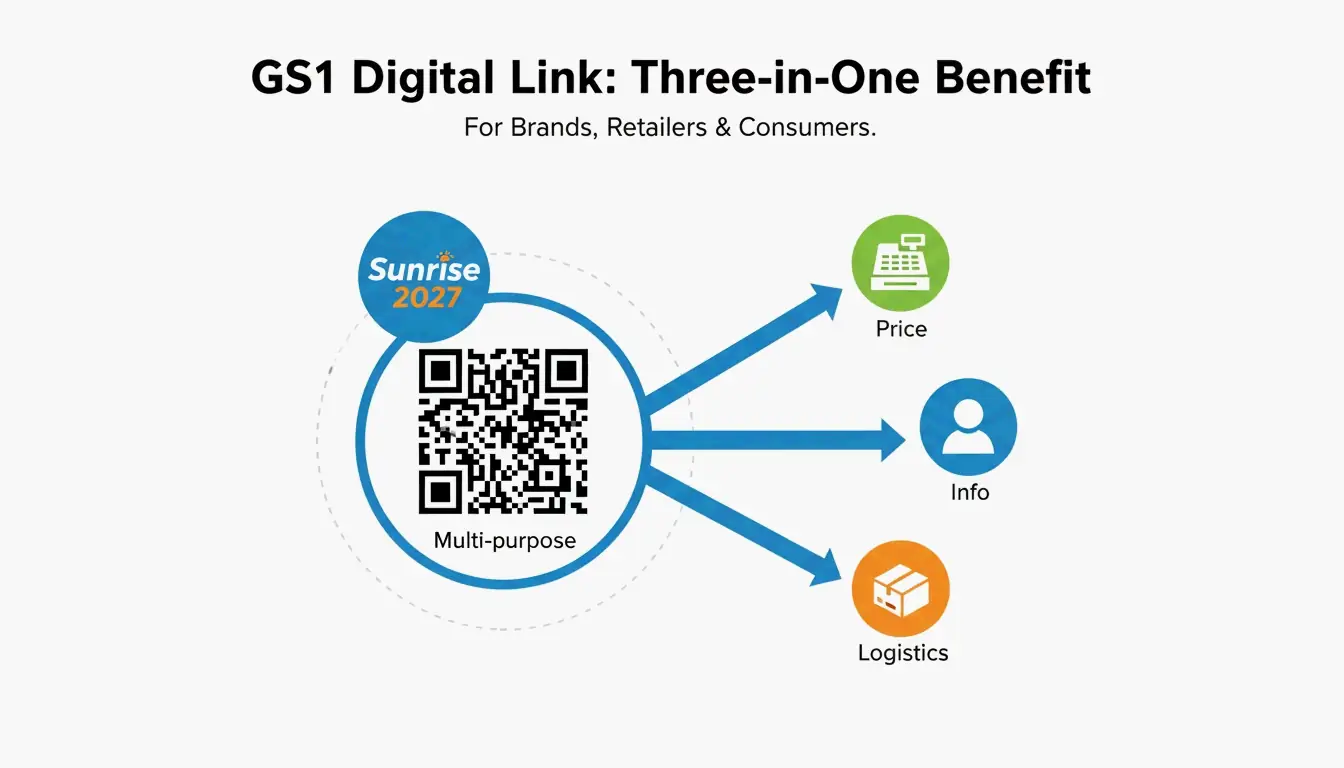
The short answer: yes, completely. The “2005 Sunrise” initiative — now long-standing policy — requires every point-of-sale system in the US and Canada to accept both EAN-13 and UPC-A. In fact, EAN-13 is technically a superset of UPC-A. A UPC-A barcode is simply an EAN-13 where the first digit is 0.
What this means in practice:
– If you’re a global brand, you can use EAN-13 everywhere — no separate UPC-A codes needed.
– American retailers can scan your EAN-13 products without any configuration changes.
There are also specialized prefixes within the EAN-13 system worth knowing about. The Bookland prefixes (978 and 979) embed ISBNs directly into EAN-13, allowing books to be scanned at any standard retail checkout regardless of where they were published.
GTIN Integration and Database Normalization
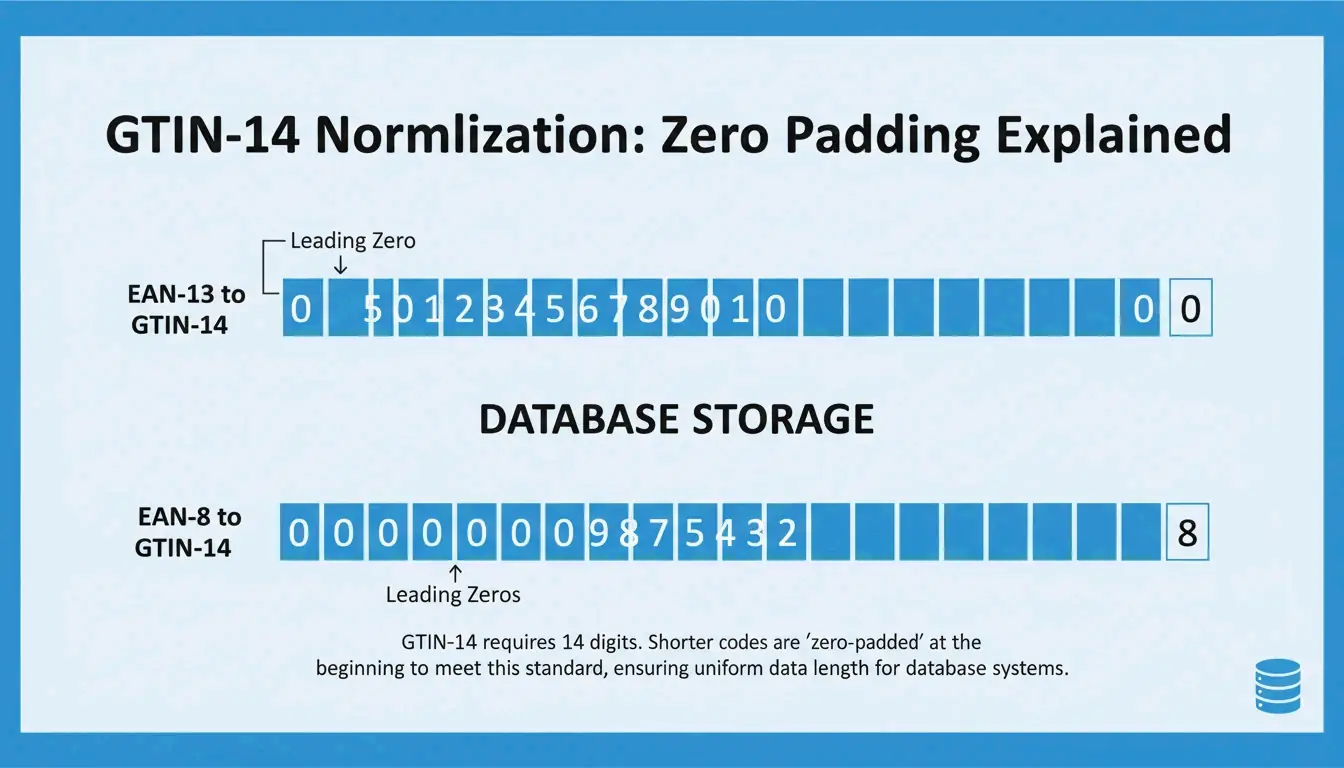
Both EAN-13 and EAN-8 are part of the Global Trade Item Number (GTIN) family. When products with different barcode lengths end up in the same database — say, a warehouse management system — they need a consistent format. That’s where GTIN-14 comes in.
The normalization is straightforward: pad the shorter codes with leading zeros.
| Barcode | GTIN-14 |
|---|---|
EAN-13: 4006381333931 |
04006381333931 (1 leading zero) |
EAN-8: 96385074 |
00000096385074 (6 leading zeros) |
In systems like Oracle WMS, all GTINs are right-aligned and padded to 14 digits so a single database field can handle everything from a tube of lip balm to a full pallet.
How to Calculate the Check Digit (Modulo-10, Step by Step)
The last digit of any EAN barcode isn’t random — it’s calculated using the Modulo-10 algorithm. Modern software handles this automatically, but understanding the math is useful if you’re generating barcodes programmatically or troubleshooting a scanning issue.
Example: verifying the check digit for EAN-13 400638133393?
Step 1 — Starting from the right (excluding the check digit), assign alternating weights of 3 and 1:
| Position | 12 | 11 | 10 | 9 | 8 | 7 | 6 | 5 | 4 | 3 | 2 | 1 |
|---|---|---|---|---|---|---|---|---|---|---|---|---|
| Digit | 4 | 0 | 0 | 6 | 3 | 8 | 1 | 3 | 3 | 3 | 9 | 3 |
| Weight | 1 | 3 | 1 | 3 | 1 | 3 | 1 | 3 | 1 | 3 | 1 | 3 |
| Product | 4 | 0 | 0 | 18 | 3 | 24 | 1 | 9 | 3 | 9 | 9 | 9 |
Step 2 — Add up all products: 4 + 0 + 0 + 18 + 3 + 24 + 1 + 9 + 3 + 9 + 9 + 9 = 89
Step 3 — Find the next multiple of 10 (which is 90). Subtract: 90 − 89 = 1.
The check digit is 1, making the full barcode 4006381333931.
This is a good sanity check to run during label design — catching a wrong check digit before you print thousands of labels saves both money and time.
Conclusion
EAN-13 is the global workhorse of retail barcoding — it’s what you’ll use for the vast majority of products. EAN-8 is the compact alternative, reserved for items where packaging space is genuinely too tight for a standard barcode. Both formats are managed by GS1, both use the same Modulo-10 check digit system, and both are scanned reliably by every modern POS system worldwide — including in the US and Canada.
The decision comes down to surface area. If your packaging can accommodate a barcode at least 1.5 inches wide, use EAN-13. If it can’t, apply for an EAN-8 through your local GS1 office. Either way, your product will scan correctly throughout the entire supply chain.
FAQ
Can I convert an EAN-8 code into an EAN-13 code?
No — they are completely separate identifiers. EAN-8 numbers are assigned directly by GS1 and have no connection to your EAN-13 manufacturer prefix. If you need an EAN-13 code, you’ll need to use a number from your assigned EAN-13 block.
Is EAN-13 accepted in the United States and Canada?
Yes. Since the 2005 Sunrise agreement, every modern POS system in North America scans both UPC-A and EAN-13 without issue. Most global brands now use EAN-13 exclusively to keep things simple across all markets.
What happens if I scan an EAN-8 barcode in a system that expects 14 digits?
The system will zero-pad the 8-digit code by adding six leading zeros to fill the GTIN-14 field (e.g., 000000XXXXXXXX). This is standard practice in systems like Oracle WMS to keep database records consistent across different product sizes.