Picking a random number sounds simple — but doing it in a way that’s truly fair, verifiable, and trustworthy requires more than clicking a “randomize” button. In 2026, running a fair digital draw means using the right algorithm (CSPRNG), the right settings (unique mode), and providing transparent proof of the result.
This guide covers the practical framework for unbiased digital selection — from raffles and classroom picks to corporate giveaways and simulations.
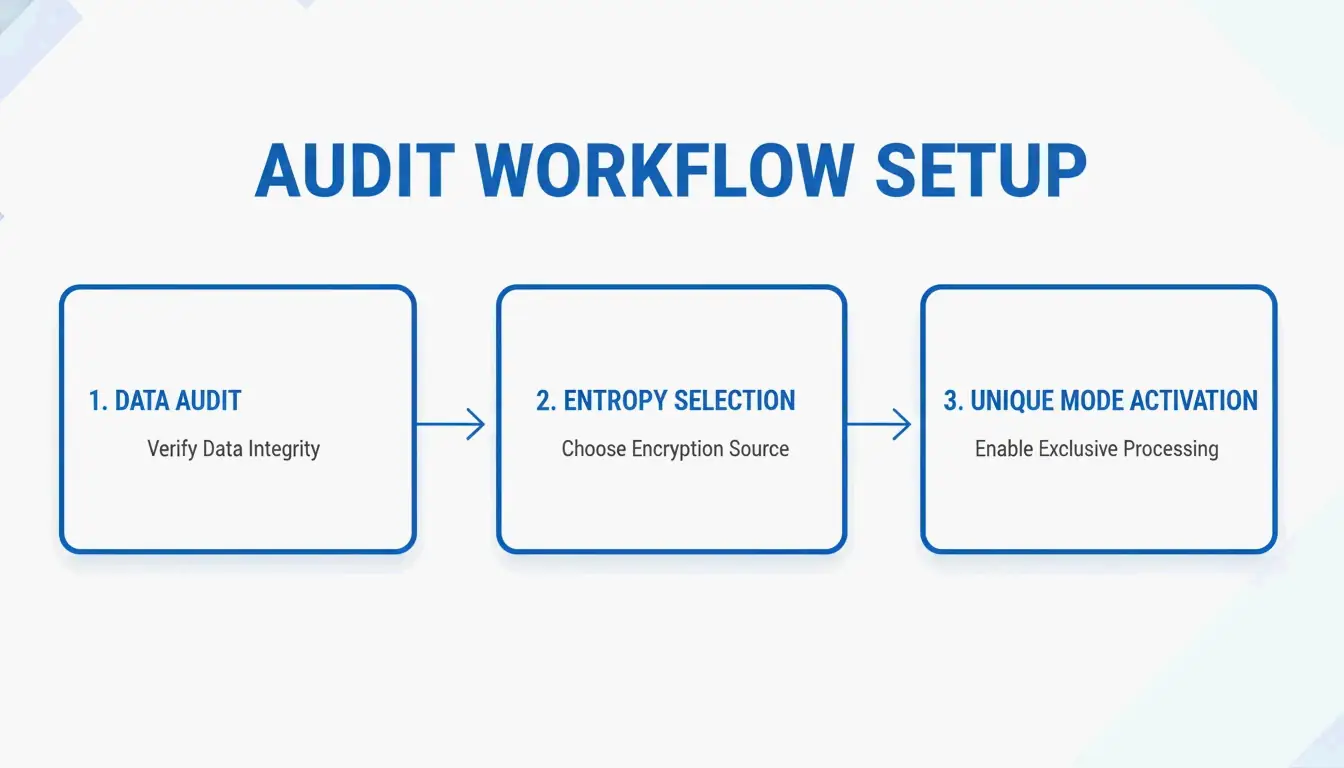
The 2026 Fairness Framework: Setting Up a Random Draw
According to Wheel of Names, these tools are in massive demand — the platform recorded over 462 million wheel spins in 2026 alone. At that scale, keeping things fair requires a structured setup.
Step 1: Choose Your Mode
| Mode | Best For | Key Feature |
|---|---|---|
| Integer mode | Raffles, giveaways, classroom picks | Supports “Unique Mode” — prevents duplicate picks |
| Decimal mode | Simulations, probability testing | Precision up to 10 decimal places (MyClickTools) |
Step 2: Pre-Draw Audit Checklist
Before hitting “generate,” run through this checklist:
- Check your entry list — Remove accidental duplicates from your data.
- Pick a secure entropy source — Choose “Secure (Crypto)” mode over basic
Math.random. Tools like GadgetKit let you toggle between fast and secure modes. - Enable Unique Mode — For giveaways, disable “Allow Duplicates.” A good tool should warn you if you try to pick 11 unique winners from a pool of 10.
- Choose sorting — Decide whether results display randomly or sorted (ascending/descending) for easier auditing.
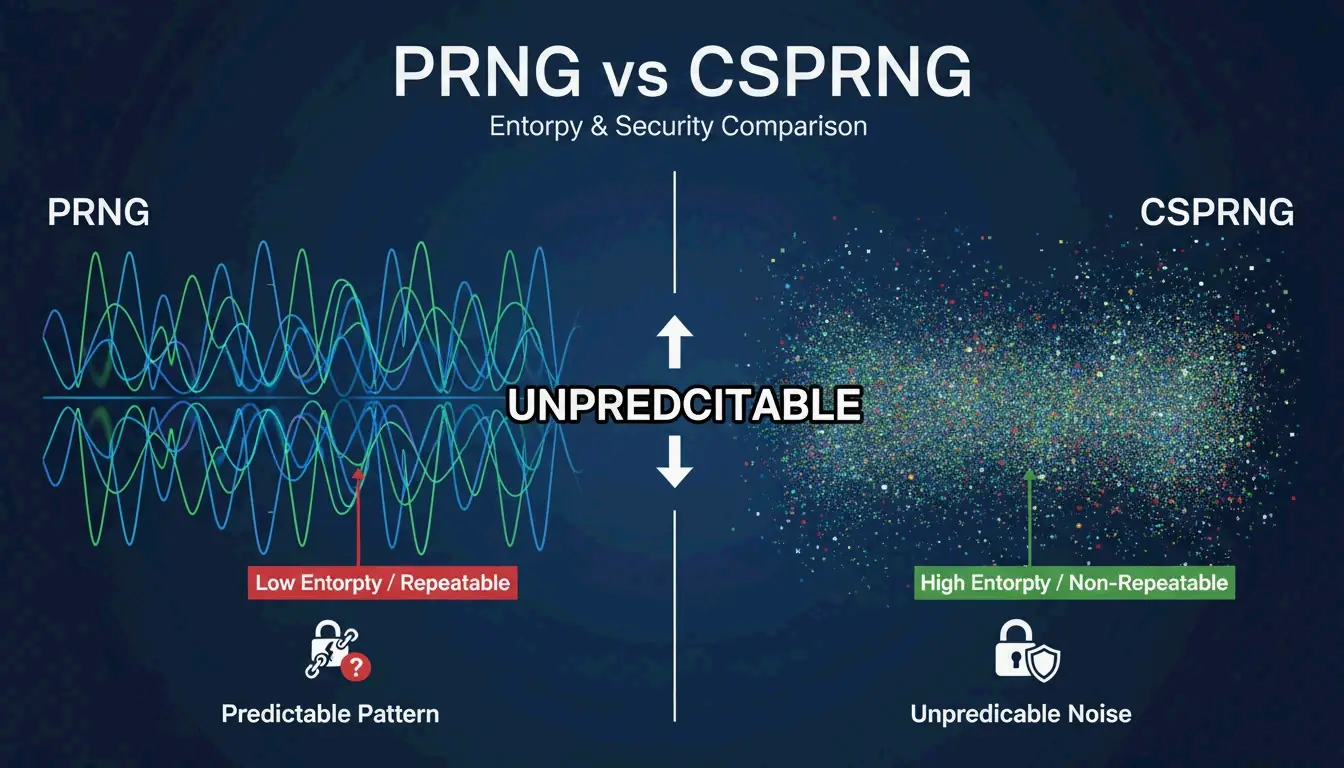
CSPRNG vs. PRNG: Why It Matters
Most people think all “random” buttons work the same way. They don’t. As computer scientist John von Neumann famously said in 1951:
“Anyone who considers arithmetical methods of producing random digits is, of course, in a state of sin.”
| Feature | PRNG (e.g., Mersenne Twister) | CSPRNG |
|---|---|---|
| Predictability | Predictable if the seed is known | Impossible to predict |
| Entropy source | Mathematical formula | Hardware timings, mouse movements, system events |
| Standard | Fine for simulations | Required by NIST SP 800-90A for high-stakes draws |
| Example | Math.random() |
crypto.getRandomValues() |
The Stakes Are Real
A historical case involved a $16.5 million lottery fraud where an insider rigged a secure RNG computer to make winning numbers predictable. Modern tools like Wheel of Names prevent this by using crypto.getRandomValues() instead of Math.random().
Weighted Selection: When Not Everyone Has Equal Odds
Weighted selection lets certain entries have better odds while keeping the final result random — for example, giving VIP members extra entries in a draw. According to YesOrNoWheelPicker, the key is being 100% transparent about the rules before the draw.
When announcing results, be clear:
“To reward our most active community members, this draw used a weighted selection process. Everyone had a chance to win, but those in our ‘Loyalty Tier’ received [X] additional entries. The final pick was processed through a CSPRNG algorithm to ensure it was entirely random and unbiased.”
| Selection Type | How It Works | When to Use |
|---|---|---|
| Standard | Everyone has equal odds (1 in N) | Simple raffles, classroom picks |
| Weighted | Some entries get more “tickets” | Loyalty rewards, tiered giveaways |
If you use weighted draws, disclose the weighting rules beforehand — otherwise participants lose trust.
Compliance and Data Privacy (2026)
Fairness and privacy go hand-in-hand. If you’re handling participant data, GDPR and CCPA requirements apply. The best platforms use client-side generation — random numbers are created in your browser and never sent to a server.
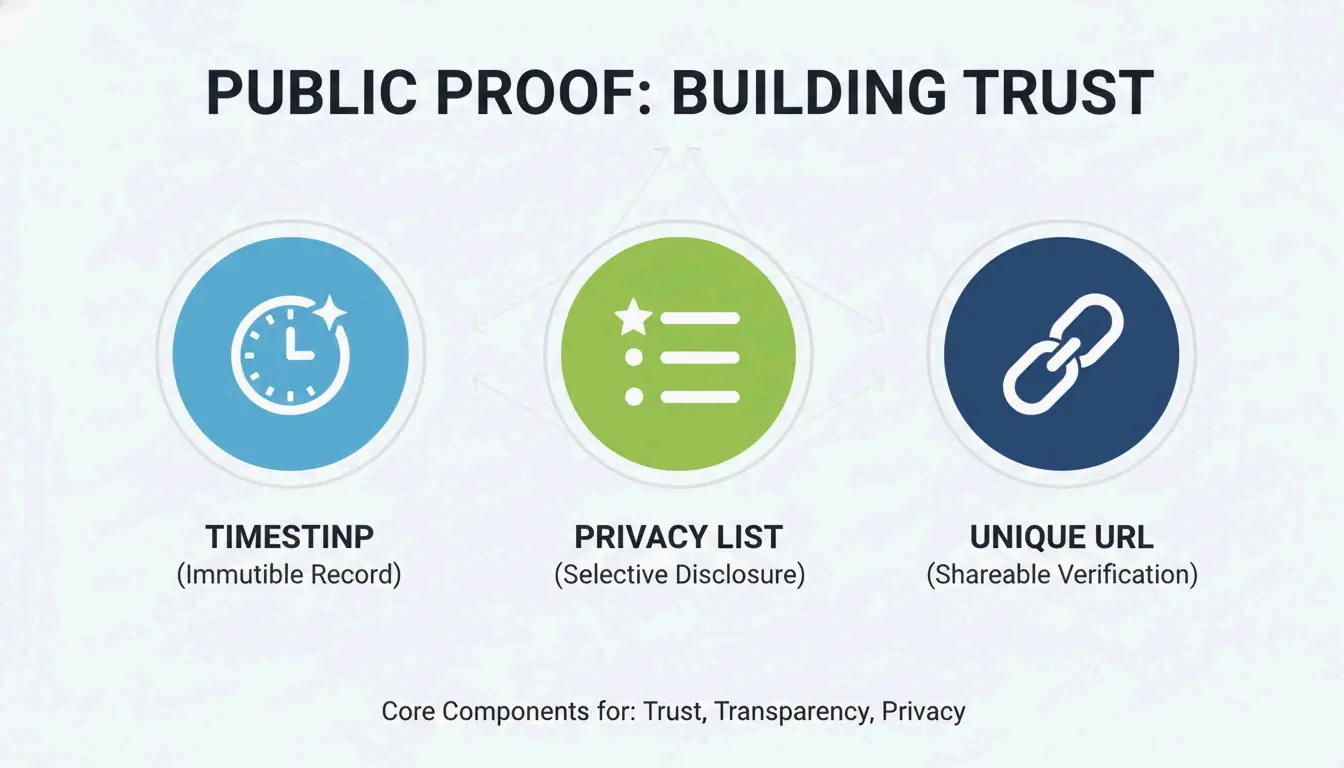
Public Verification vs. Data Protection
A RandomPicker study recommends using Public Proof Pages — permanent records that show:
| Proof Element | What It Shows |
|---|---|
| Timestamp | Exact date and time of the draw |
| Redacted entry list | Participant emails masked (e.g., j***@email.com) — auditable without exposing private info |
| Unique URL | Proves results weren’t changed or deleted after the fact |
Conclusion
Fairness in digital selection comes down to three things:
- The right algorithm — CSPRNG for any draw involving prizes or money
- The right settings — Unique Mode to prevent duplicates, secure entropy source
- Clear transparency — Public proof pages with timestamps and redacted entry lists
In 2026, “trust me” doesn’t cut it. You need to show your work with timestamped logs, NIST-compliant tools, and verifiable proof pages. Whether you’re picking a student in a classroom or running a major giveaway, the same standards apply.
FAQ
Is Math.random() fair enough for a high-stakes giveaway?
No. Math.random() is a PRNG that can technically be predicted. For any draw involving prizes or money, use a tool based on CSPRNG (like crypto.getRandomValues()) to ensure results are truly unpredictable.
How do I pick a winner from a list without manual bias?
Use a “List Randomizer” or “Winner Generator” tool. Paste your names, enable Unique Mode, and run the draw. For maximum trust, record your screen during the process and share a timestamped results link or public proof page.
What’s the difference between standard and weighted random selection?
Standard: Everyone has equal odds (1 in N). Weighted: Certain entries get more chances (e.g., a VIP gets 5 entries instead of 1). If using weighted selection, you must disclose the rules before the draw so all participants understand how it works.