Optimizing photos for your website in 2026 requires prioritizing modern formats like AVIF and WebP, resizing dimensions for responsive displays, and applying lossy compression. By implementing lazy loading, descriptive alt text, and CDNs, you significantly improve Core Web Vitals (LCP) and visibility in both traditional and AI-driven search engines.
The 2026 Framework for Optimizing Photos for Website Speed
Image weight remains the biggest hurdle for web performance. According to NeedleCode, images make up over 60% of the total weight of a typical webpage. This directly impacts your Core Web Vitals, specifically the Largest Contentful Paint (LCP) — the metric that tracks how fast your main content appears. Data from SimpleResizer shows that images trigger the LCP on 70% of pages, meaning search rankings are essentially tied to photo loading speeds.
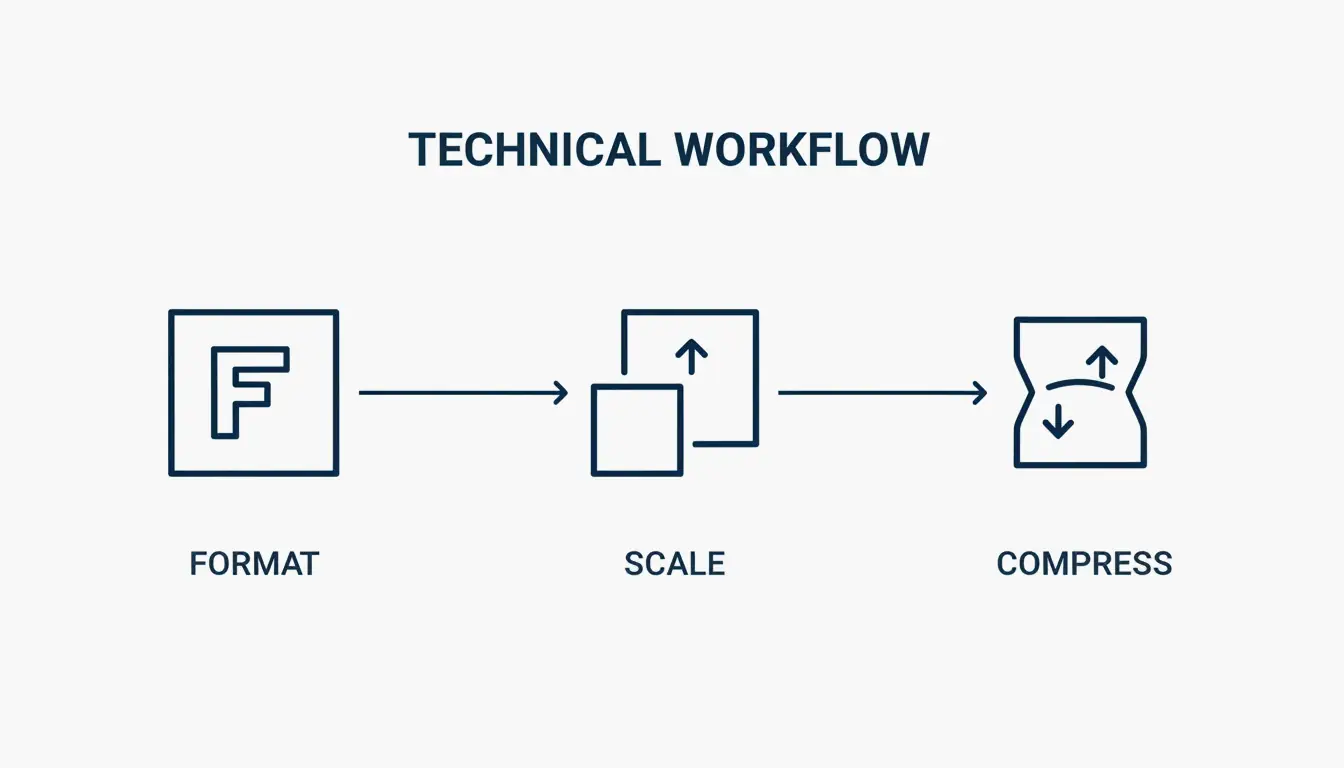
Follow this three-step optimization order: Format, Scale, Compress. Start by choosing a modern file type, resize the image to the exact size it will appear on screen, and finally use a compression algorithm to trim unnecessary data.
Auditing Your Current Performance with DebugBear
Before making changes, establish a baseline. Tools like DebugBear let you track “Page Weight (Images)” as a specific metric to find pages where heavy media is slowing things down. Set a Performance Budget — for example, an alert if a key page exceeds 600KB in image weight.
Choosing the Right Format: Why AVIF Is the 2026 Standard
Format selection is the easiest path to big performance gains. JPEG is mostly phased out in professional web development.
| Format | Compression | Browser Support | Best Use Case |
|---|---|---|---|
| AVIF | Best (smallest files at equal quality) | All modern browsers | Hero images, high-quality photography |
| WebP | High (25-35% smaller than JPEG) | All modern browsers | General site images, reliable default |
| PNG | Low (lossless, larger files) | Universal | Flat graphics, logos, transparent backgrounds |
| SVG | Code-based (resolution-independent) | All browsers | Icons, simple logos |
An often-overlooked step is stripping EXIF Data. Every camera photo hides metadata like GPS coordinates and timestamps. SimpleResizer notes that removing this data shrinks the file and protects privacy without changing the photo’s appearance. A WordPress Support case study found that exporting a JPEG via GIMP at Quality 60 (with 4:2:0 subsampling) cuts file size by 64% with almost no visible difference.
Developer Cheat Sheet: Implementing AVIF with WebP Fallbacks
To use the newest formats without leaving older browsers behind, implement the HTML picture element pattern. This lets the browser select the best format it supports:
- Set a source element with type “image/avif” pointing to your AVIF file
- Set a source element with type “image/webp” pointing to your WebP file
- Set a fallback img element pointing to your JPEG, with loading=”lazy” and descriptive alt text
This progressive approach ensures every visitor gets the best format their browser supports.
Technical Implementation: Resizing and Responsive Delivery
A common mistake is uploading a 4000px wide photo into a 1200px display space. If your content area is 600px wide, WordPress Support recommends serving an image about 1.5 to 2 times that width (1200px). This keeps the image sharp on high-resolution Retina screens without wasting bandwidth.
| Display Width | Recommended Image Width | Reason |
|---|---|---|
| 400px | 800px | 2x for Retina |
| 600px | 1200px | 2x for Retina |
| 800px | 1200px | 1.5x (balance of quality and size) |
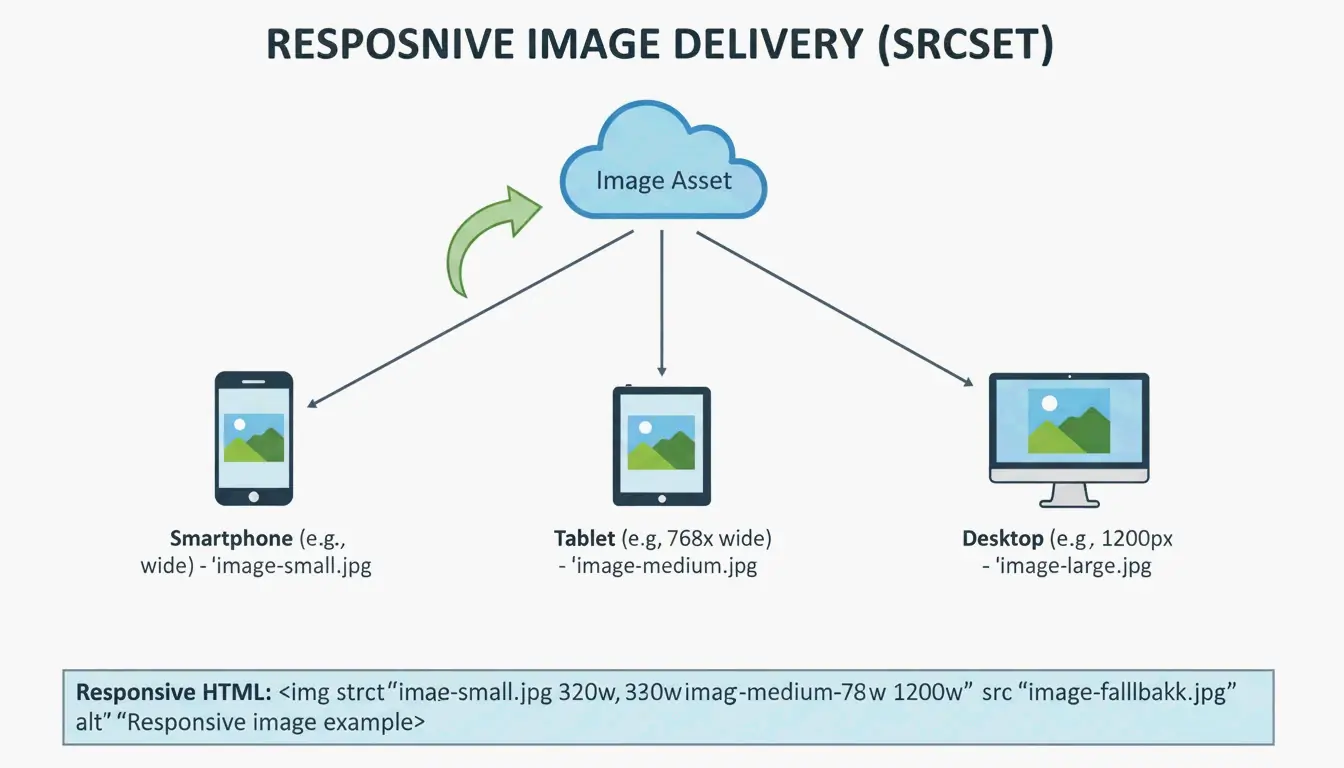
Use the srcset attribute to offer multiple sizes. This way, a phone does not download a desktop-sized image. For manual optimization, Squoosh and TinyPNG are the go-to tools. DebugBear reports that resizing a standard Pexels image from 7108px to 1266px slashes file size by 89%.
The Role of a CDN in Global Image Delivery
Even a perfectly optimized image will feel slow if it travels halfway around the world. A Content Delivery Network (CDN) like Cloudflare or BunnyCDN keeps copies of your images on edge servers closer to users. Many modern CDNs handle format conversion and resizing automatically based on the user’s device.
Future-Proofing for GEO: Image SEO in the AI Era
In 2026, photo optimization is about more than speed — it is about Generative Engine Optimization (GEO). AI search tools and visual search like Google Lens need to “read” your images to understand your content. Statistics from SimpleResizer show that 20-30% of all e-commerce traffic now comes from Google Images and visual discovery tools.
Follow these steps for AI-ready images:
| Step | Action | Example |
|---|---|---|
| Filenames | Use descriptive names | red-leather-armchair.webp (not IMG_4837.jpg) |
| Alt Text | Write factual descriptions | “Barista pouring milk into a latte to form a tulip pattern” |
| Placement | Keep images near related text | Helps crawlers understand context |
Lazy Loading: Improving UX and Initial Paint
Native lazy loading should be used for any image below the fold. Adding loading="lazy" tells the browser to wait before downloading those images, saving data and speeding up the Critical Rendering Path. Important: never lazy load your top hero image. That image is your LCP, and delaying it will hurt your SEO.
Conclusion
Modern image optimization balances visual quality with performance. Clicking “Save for Web” is no longer sufficient. You need next-gen formats like AVIF, responsive srcset delivery, and AI-ready alt text.
To stay ahead in 2026, audit your site with PageSpeed Insights or DebugBear, move toward AVIF as your default format, automate compression where possible, and ensure every image has a clear reason for being on the page. This boosts Core Web Vitals and ensures visibility in the era of visual search.
FAQ
Does image optimization affect my Core Web Vitals (LCP/CLS) scores?
Yes. Images are the primary driver of Largest Contentful Paint (LCP), which measures how fast main content loads. Providing explicit width and height attributes prevents Cumulative Layout Shift (CLS) by allowing the browser to reserve space before the image downloads, ensuring a stable visual experience.
Should I use a WordPress plugin or optimize images manually before uploading?
Manual optimization using tools like Squoosh offers the highest quality control and is ideal for critical assets like hero banners. For high-volume sites or blogs, WordPress plugins like Smush, Imagify, or EWWW Image Optimizer are better for bulk automation, ensuring every uploaded image is resized and compressed consistently.
What is the blur-up technique and how does it improve user perception?
The “blur-up” technique loads a tiny, low-resolution placeholder (often 10-20 pixels wide) that is stretched and blurred to fit the image container. As the high-resolution version downloads in the background, it replaces the placeholder. This improves perceived speed by giving users a visual hint immediately, reducing bounce rates.

Leave a Reply