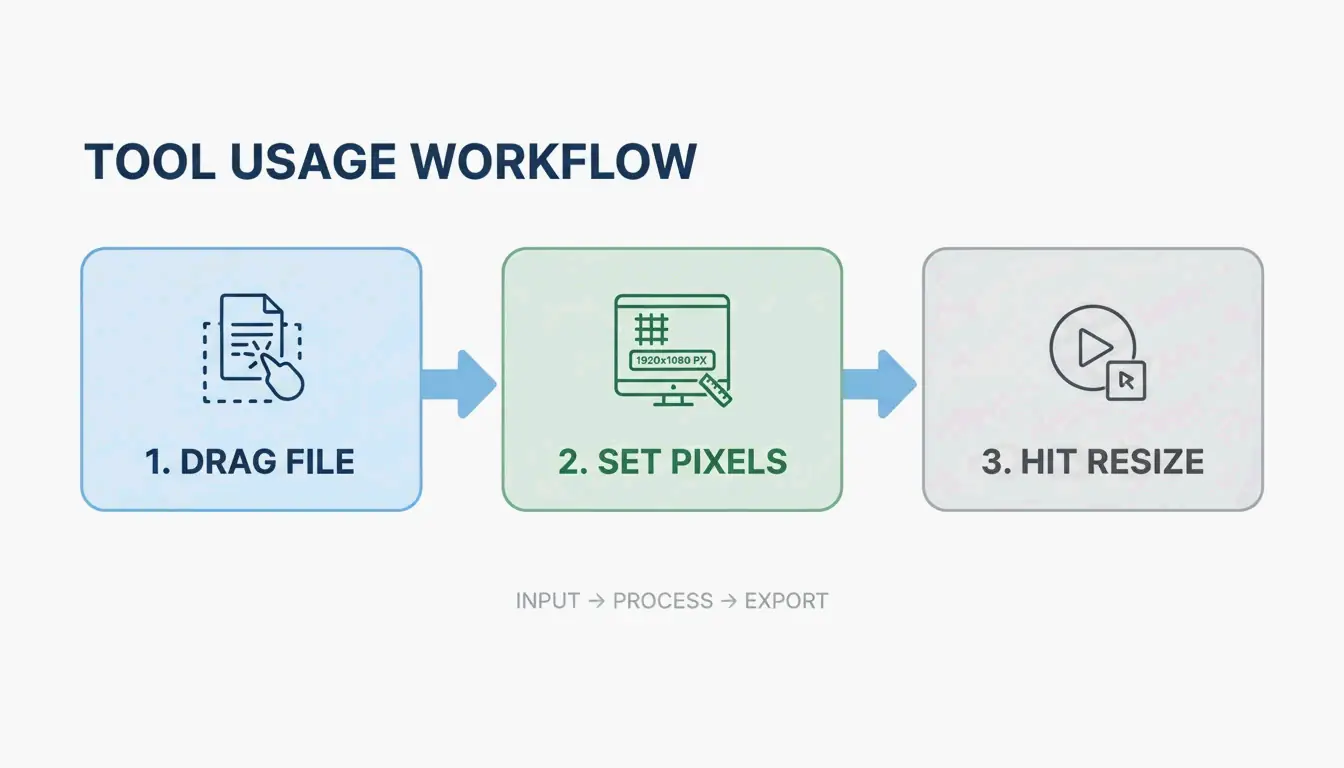
To achieve the best photo resize results in 2026, you need tools that balance speed and image integrity. Use Birme for fast, privacy-focused bulk resizing in your browser, Overchat AI to expand aspect ratios without cropping, and iLoveIMG for cloud-connected batch processing. For mobile users, the Image Size app provides precise pixel-level control.
How to Choose the Best Photo Resize Method for Your Needs
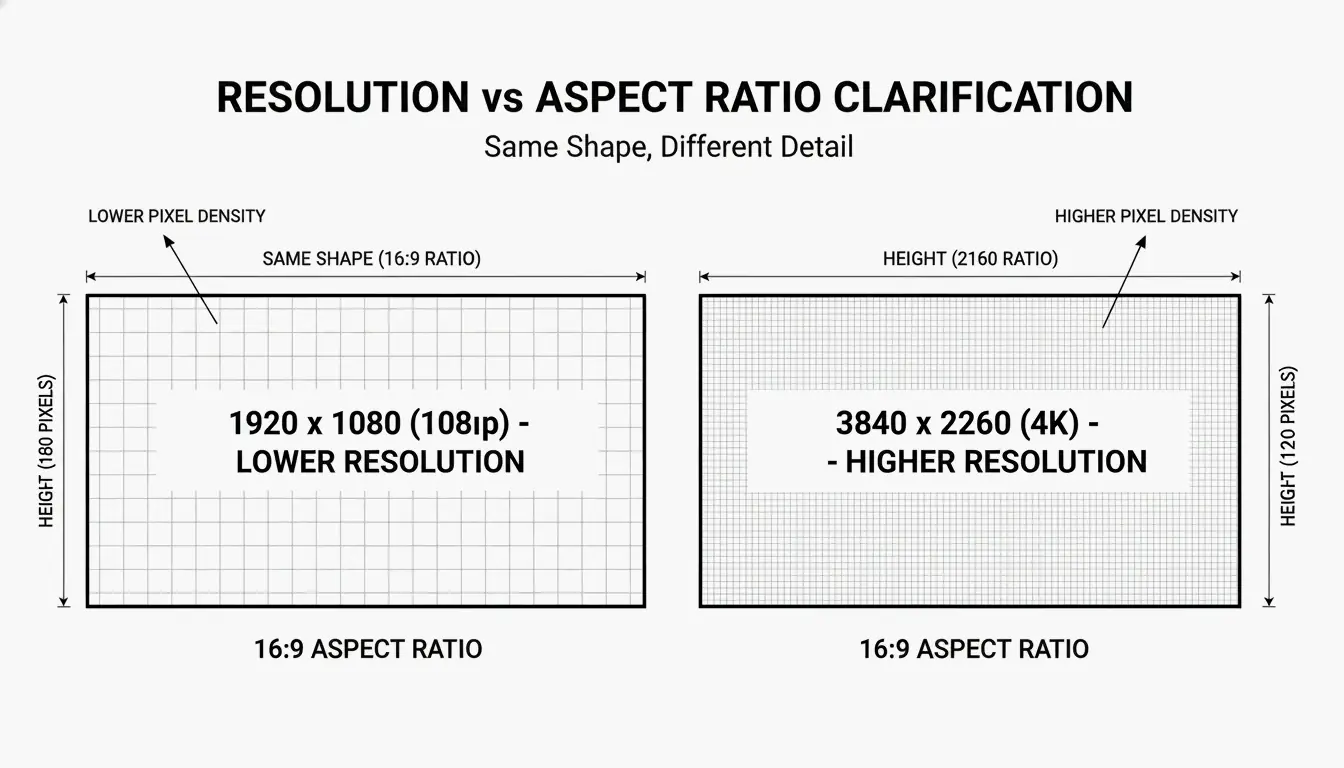
The right resizing method comes down to three factors: speed, final image quality, and data privacy. In 2026, professional workflows demand precise Pixel Dimensions (Width/Height) optimized for high-density displays, making accuracy more important than ever.
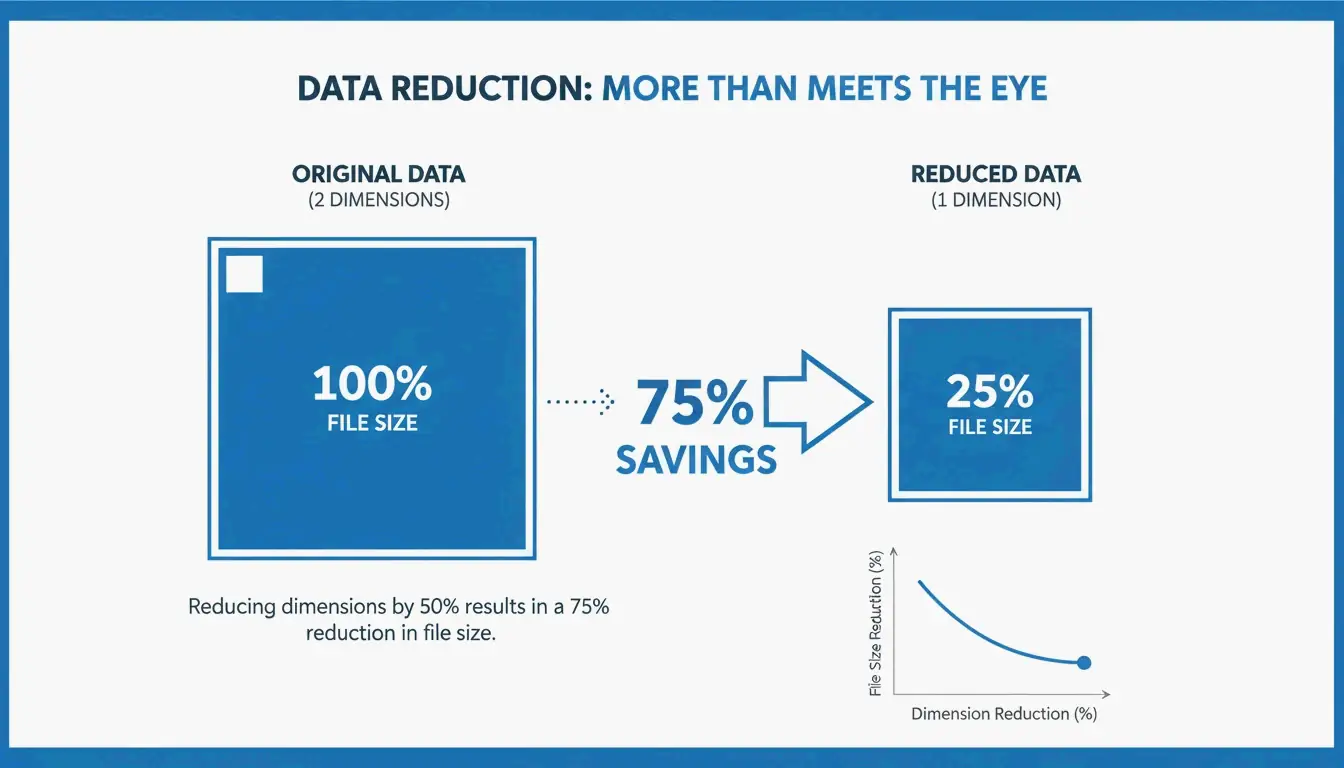
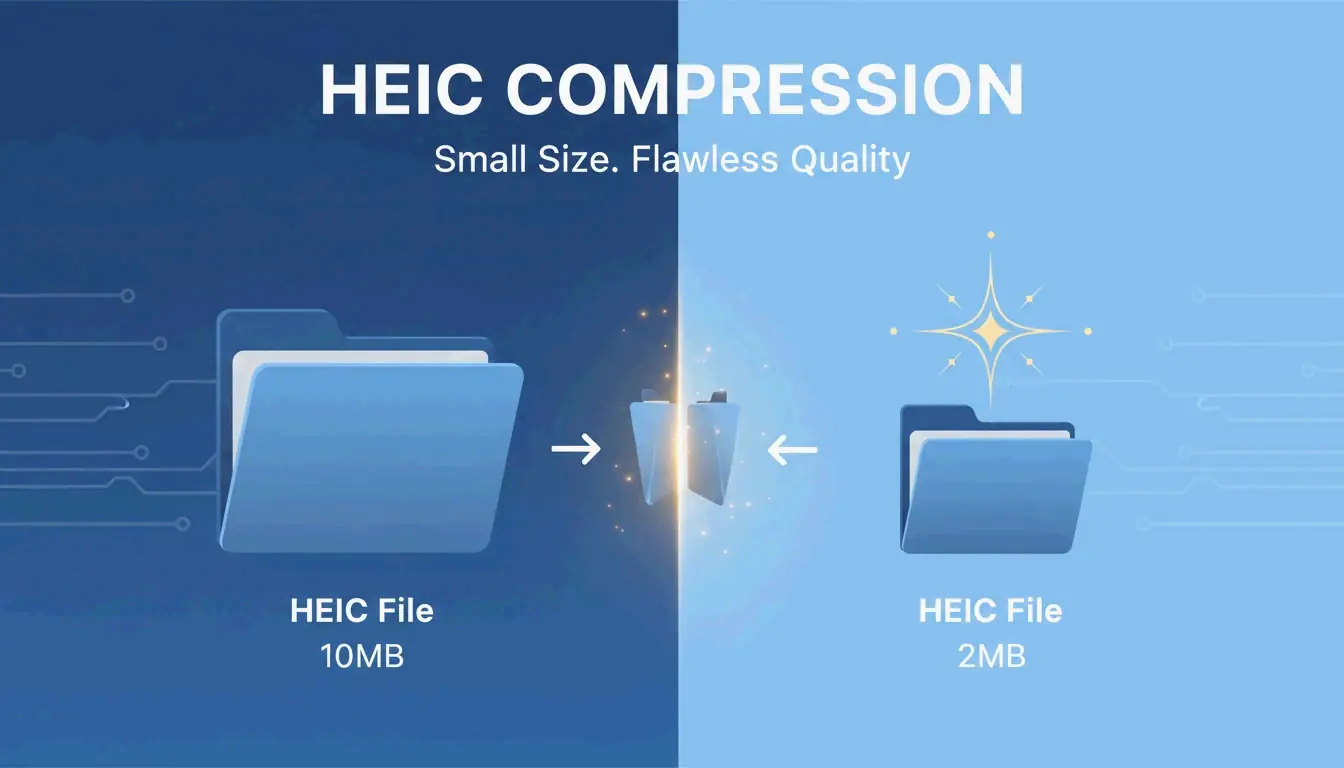
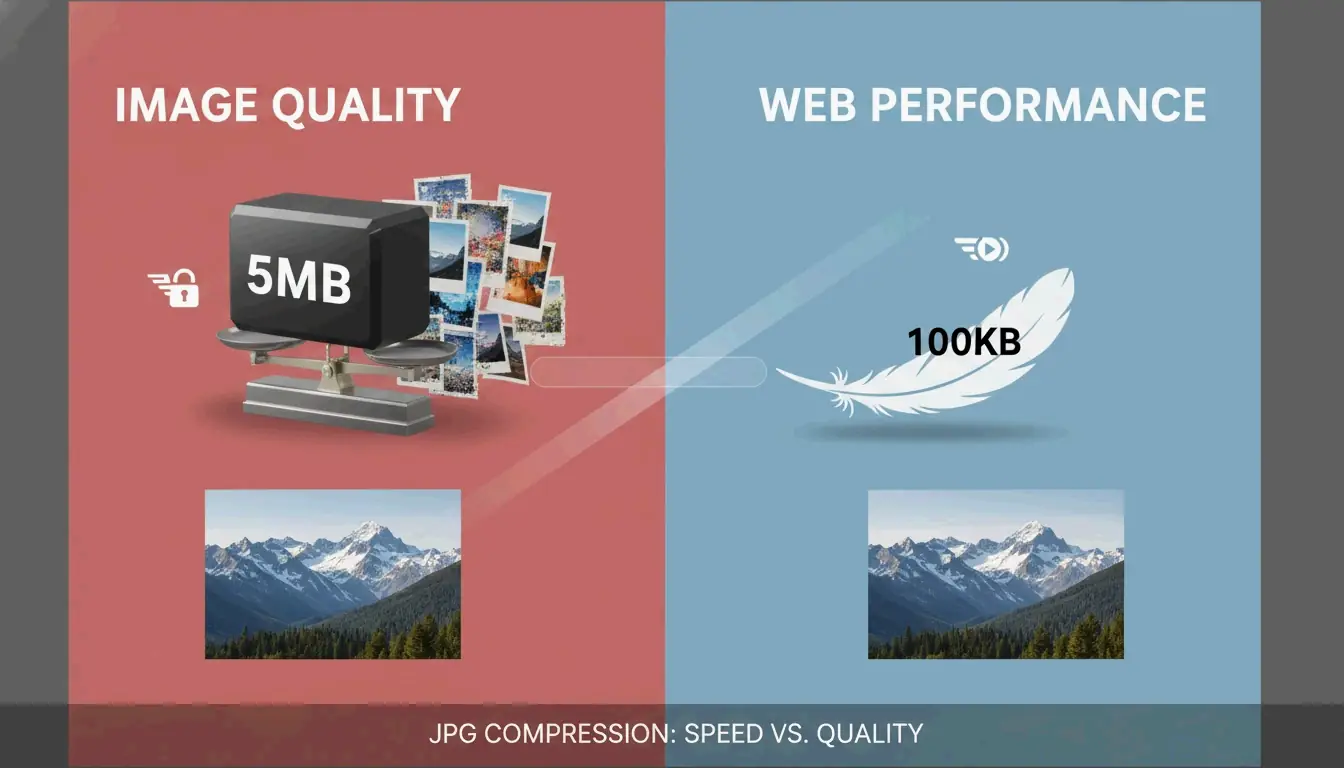
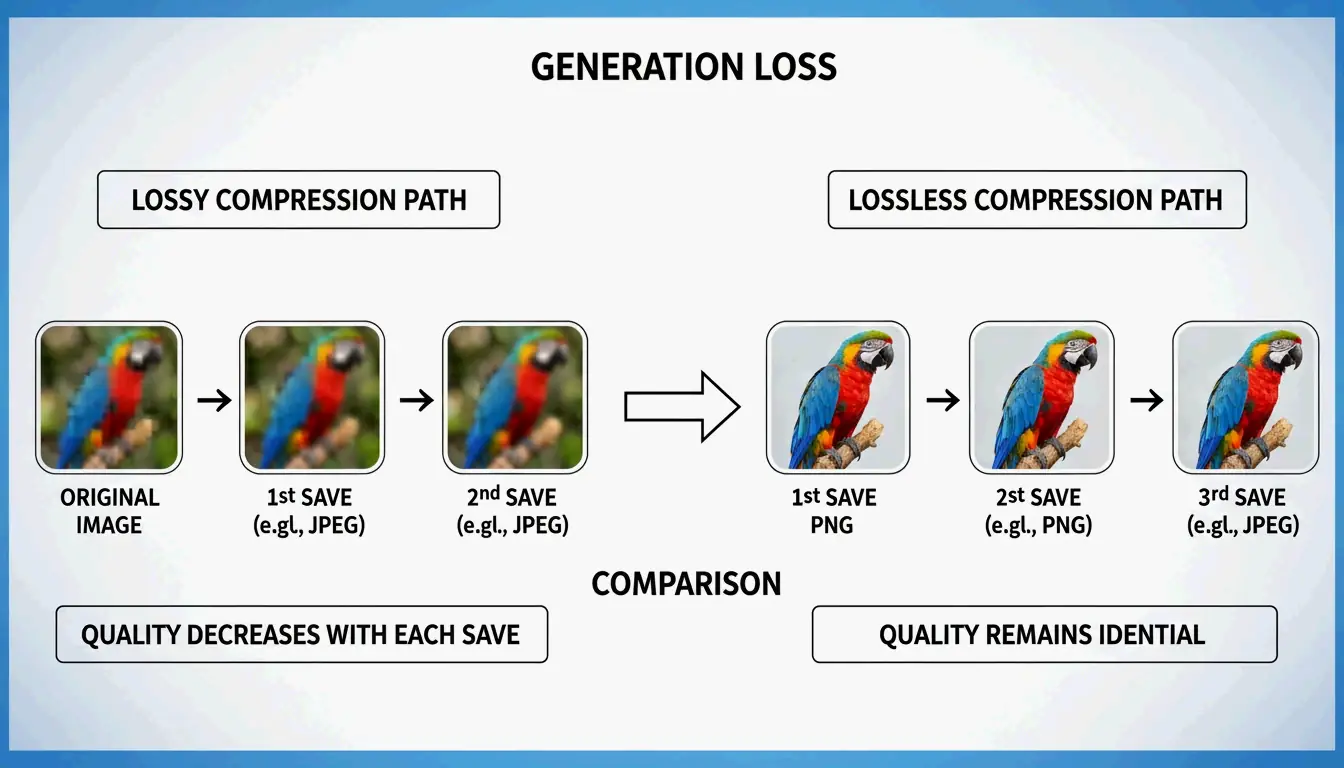
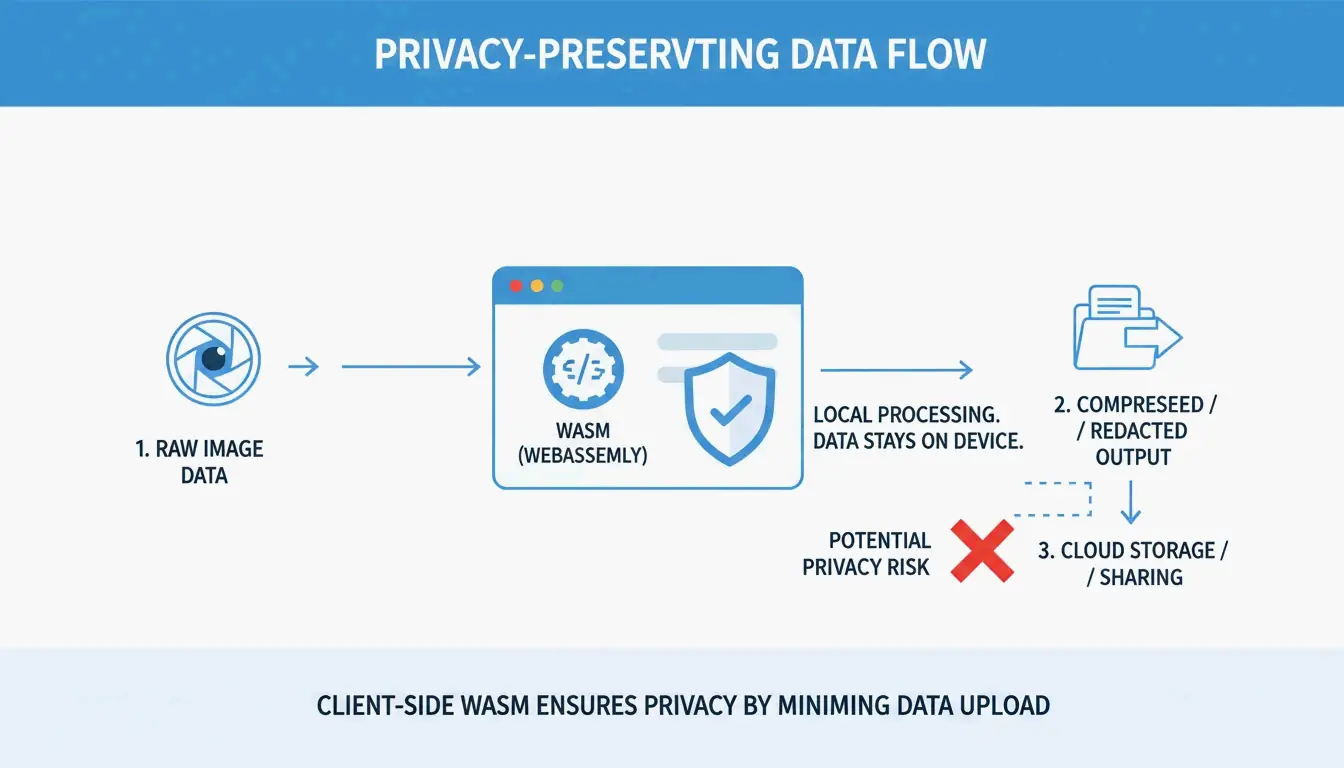
Traditional resizing remains the standard for making images smaller — converting a 4000px photo into an 800px version for a blog post, for example. This approach is fast and preserves sharpness as the image shrinks. However, for enlarging or changing shape, standard tools often fall short. Data from Birme, which serves over 50,000 users monthly, shows that Privacy/Browser-based Processing is a priority for modern creators. Client-side JavaScript ensures sensitive photos never leave your device.
The Decision Matrix: Traditional Pixel Control vs. AI Expansion
| Approach | Best For | Method | Trade-off |
|---|---|---|---|
| Traditional Resizing | Specific resolution targets | Pixel interpolation | Cannot add new content |
| AI Expansion | Aspect ratio changes | Generative fill for new pixels | Requires AI model processing |
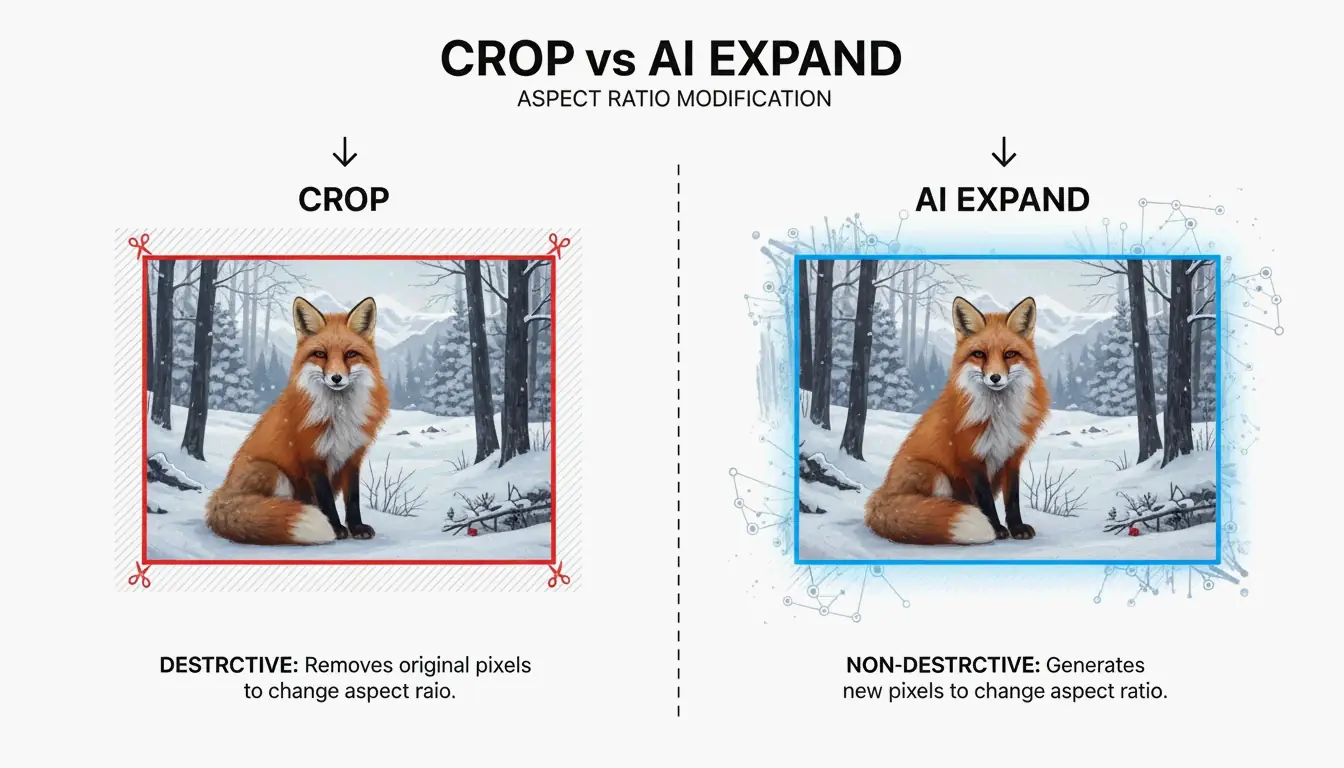
Traditional tools like ImageResizer.com work well when you have a specific resolution in mind and do not need to alter the image content. AI expansion is superior when the target aspect ratio differs from the original. While traditional cropping simply removes edges, AI generative fill creates new pixels to extend the scene, preserving the main subject.
Best Photo Resize Tools for Bulk Processing and Privacy
For content-heavy workflows, Bulk/Batch Resizing is essential. Processing hundreds of photos individually wastes time and introduces inconsistency. Tools like Birme let you set a single aspect ratio and apply it to an entire gallery at once.
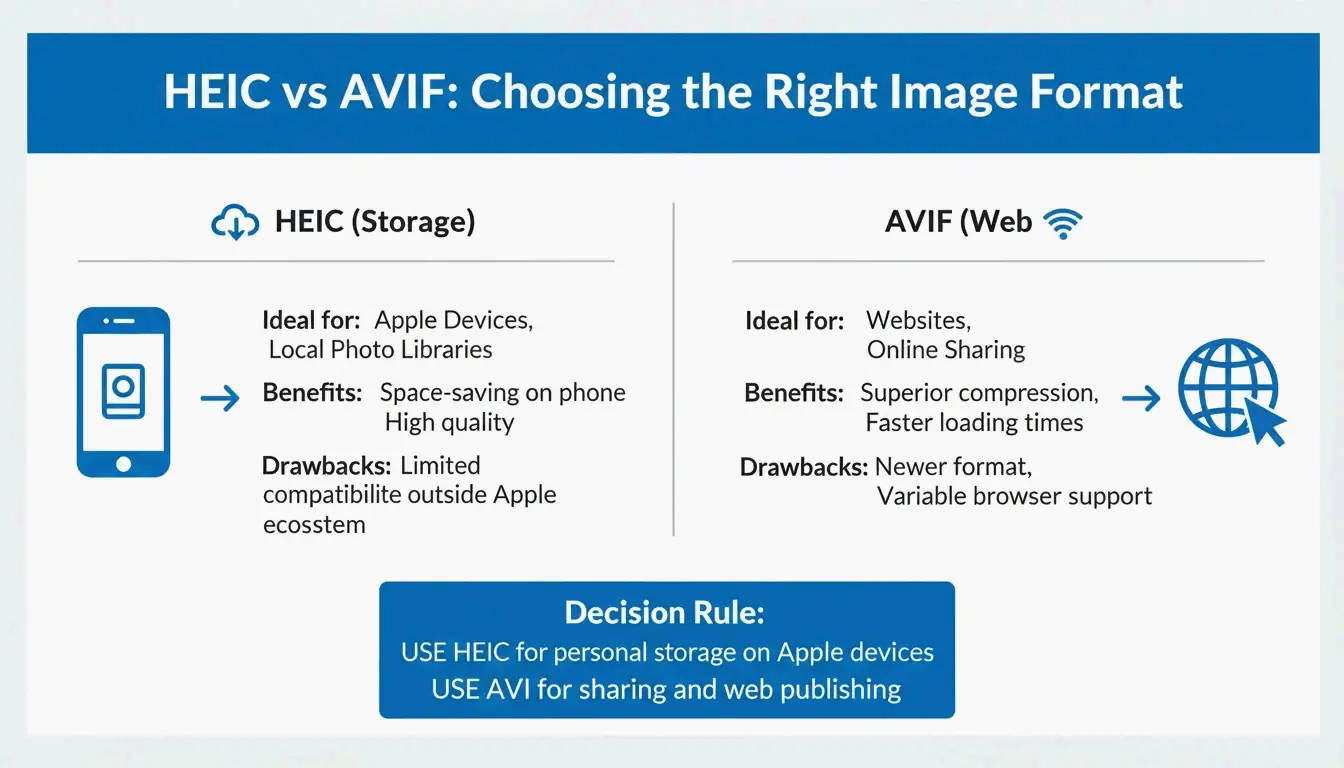
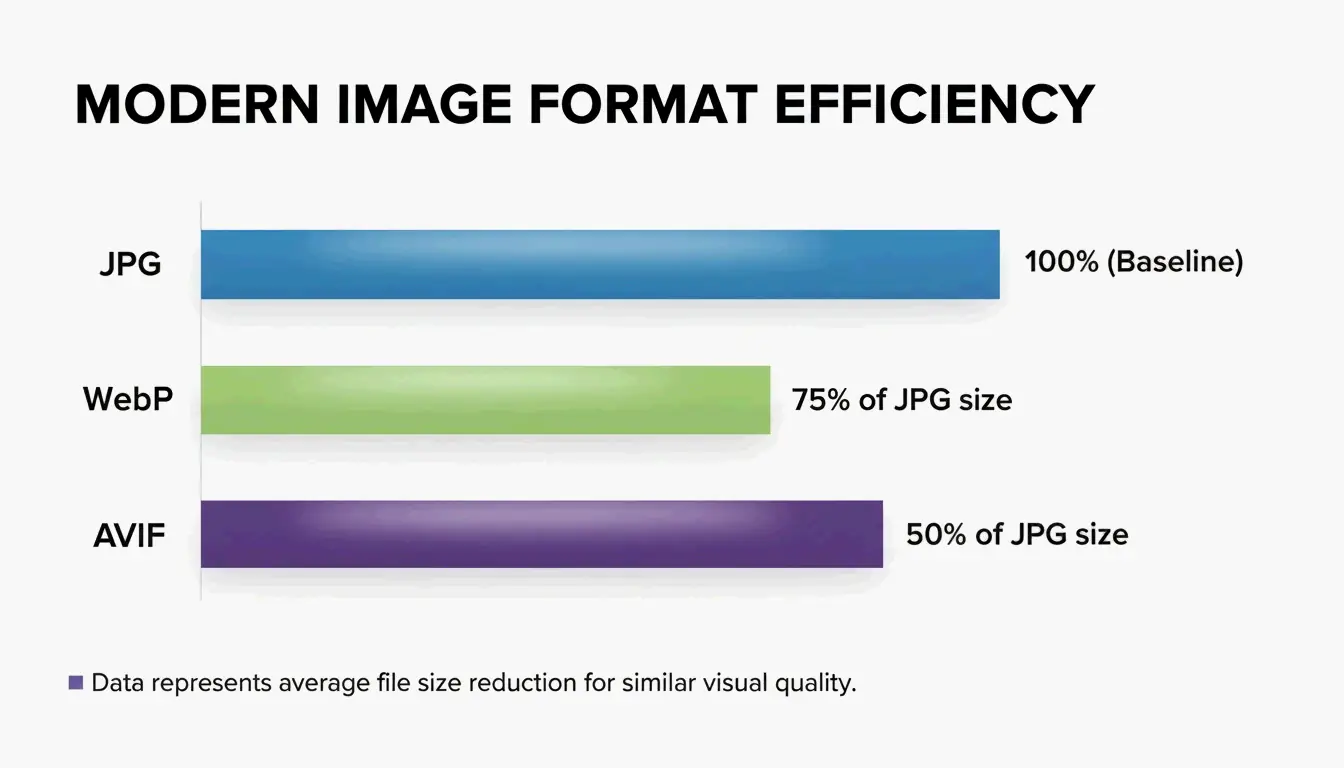
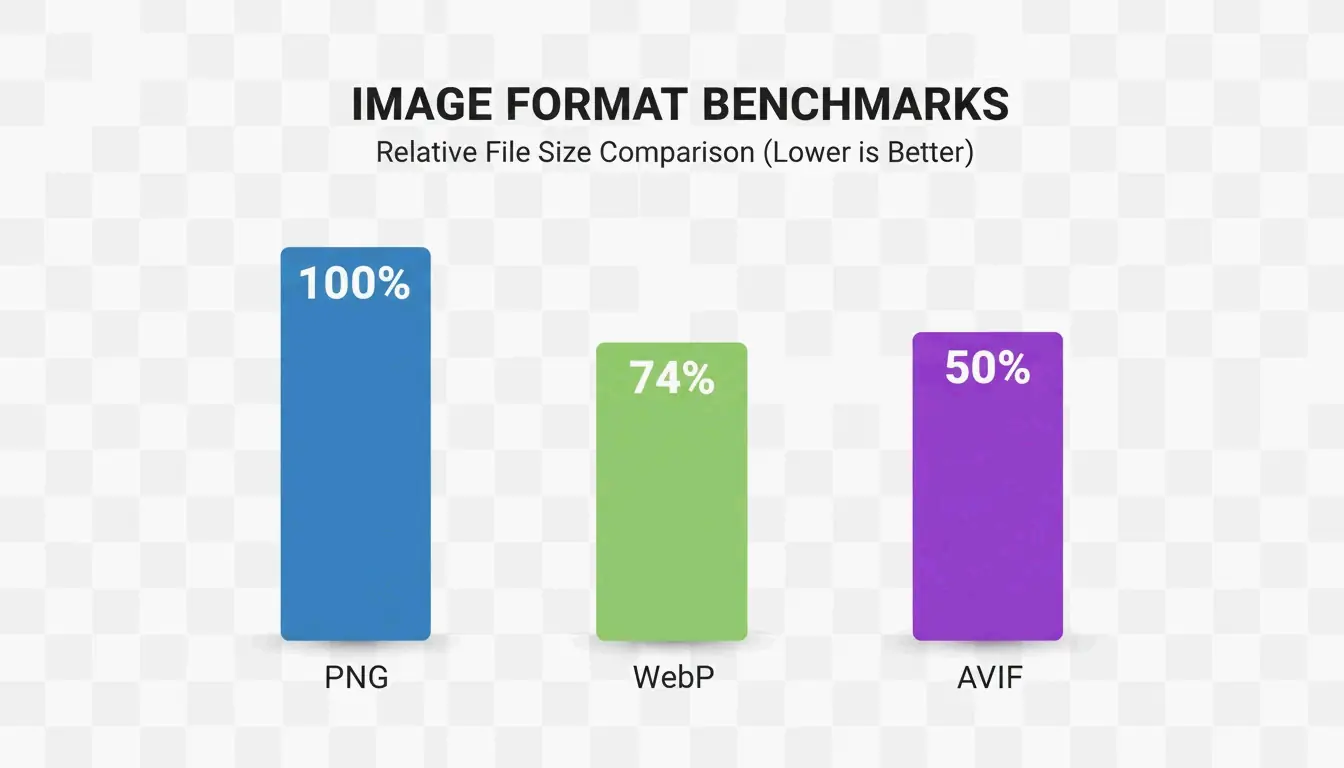
For batch work, format selection directly impacts website speed:
| Format | Compression | Quality | Browser Support (2026) |
|---|---|---|---|
| JPEG | Lossy | Good | 100% |
| PNG | Lossless | Excellent | 100% |
| WebP | Both | Excellent | ~97% |
| AVIF | Both | Excellent | ~93% |
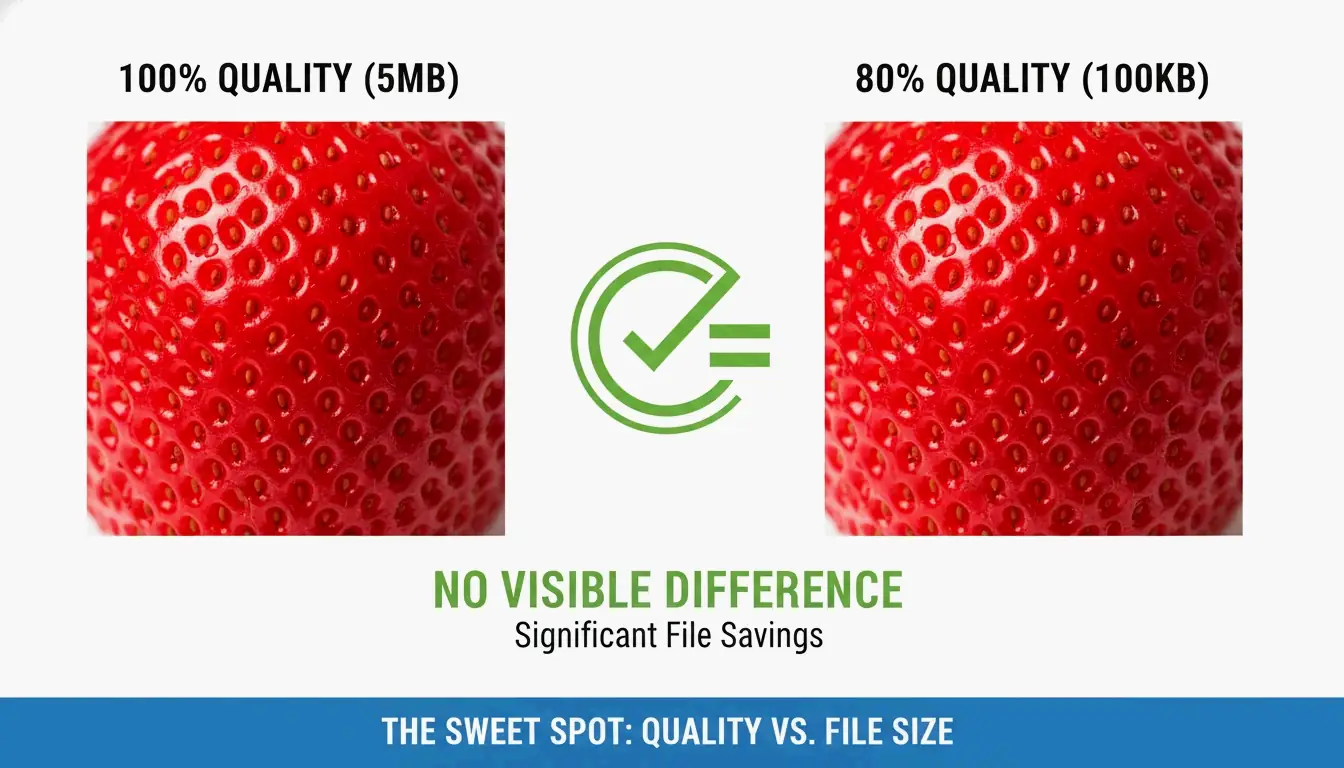
Birme recommends an 80%-90% quality balance for WebP or JPEG exports. This range represents the sweet spot where photos look professional but file sizes remain small enough for fast page loads.
How to Batch Resize Without Losing Quality
To maintain image sharpness, always resize downward from a high-resolution original. If upscaling is unavoidable, use a tool with a “High Quality Resize Method” or AI engine to prevent blurriness and pixelation. For cloud-connected workflows, iLoveIMG integrates directly with Google Drive and Dropbox, enabling pull-resize-save operations in a single flow.
AI Aspect Ratio Expansion: Resizing Beyond the Frame
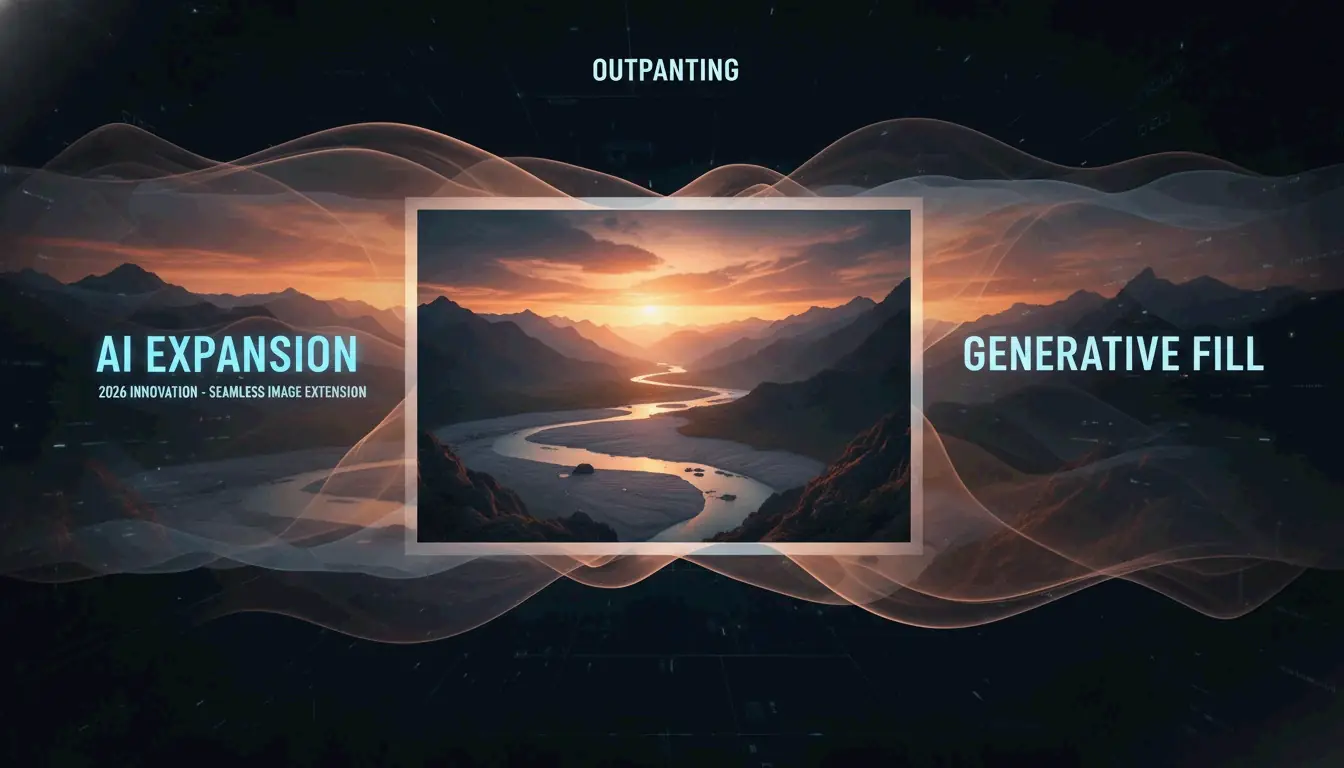
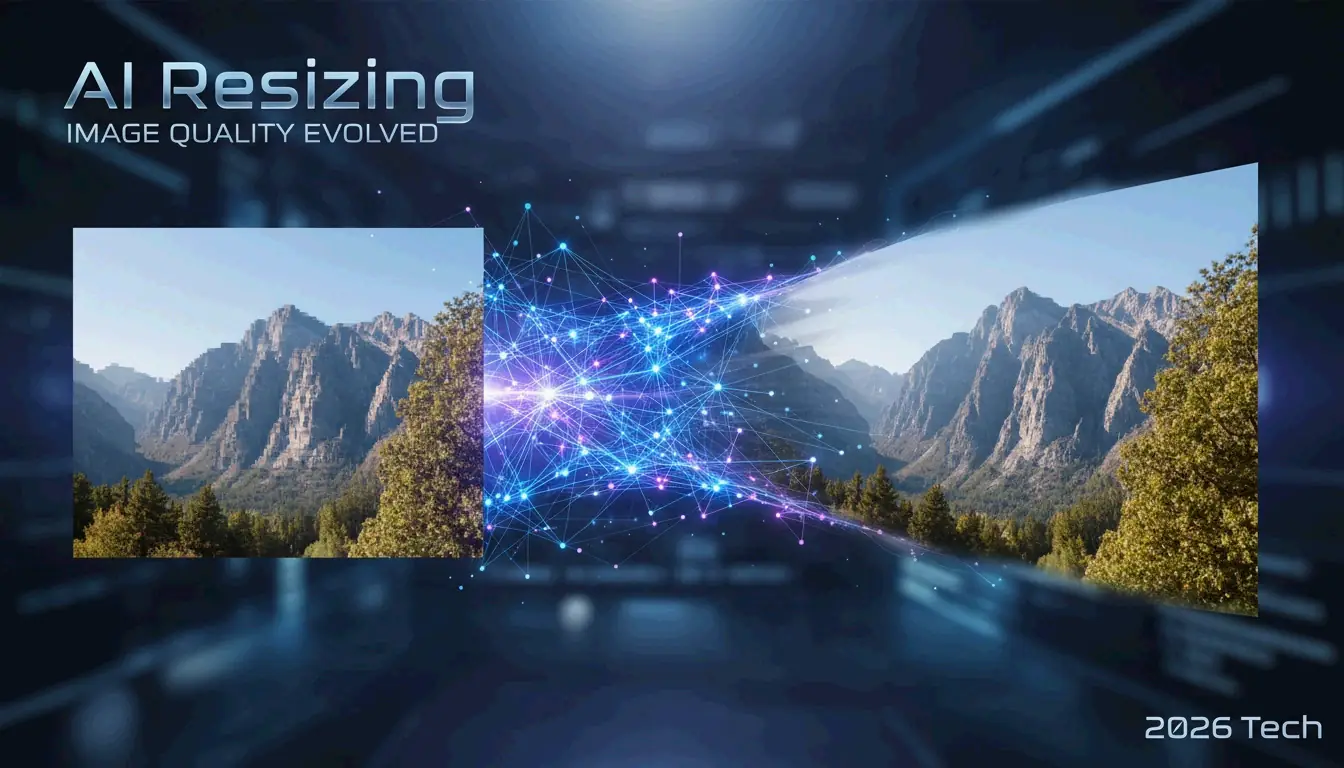
The most significant advancement in 2026 is the AI Image Resizer/Extender, which enables “uncropping.” Rather than cutting off edges, AI models reconstruct the scene to fit new dimensions. This is ideal for converting a vertical 9:16 smartphone photo into a wide 16:9 cinematic header.
Andrew Dyuzhov, a technology writer at AI Hub, explains: “AI image resizers differ from traditional ones by generating new content to extend images, rather than cropping or stretching — allowing aspect ratio changes without losing any original content.” Modern tools like Overchat AI, powered by the Seedream 5.0 model, reconstruct backgrounds with accuracy that makes the boundary between original and AI-generated content virtually indistinguishable.
The “Uncrop” Revolution: How AI Fills the Gaps
The “Uncrop” process combines Smart Cropping with generative fill to identify the focal point of a photo. When converting a horizontal image to vertical, traditional cropping might discard 80% of the scene. AI avoids this loss by “imagining” what should exist outside the frame based on existing textures and lighting. The Seedream 5.0 engine supports over 10 different aspect ratios, enabling one photo to be resized for Instagram, LinkedIn, and ultrawide monitors without compromising composition.
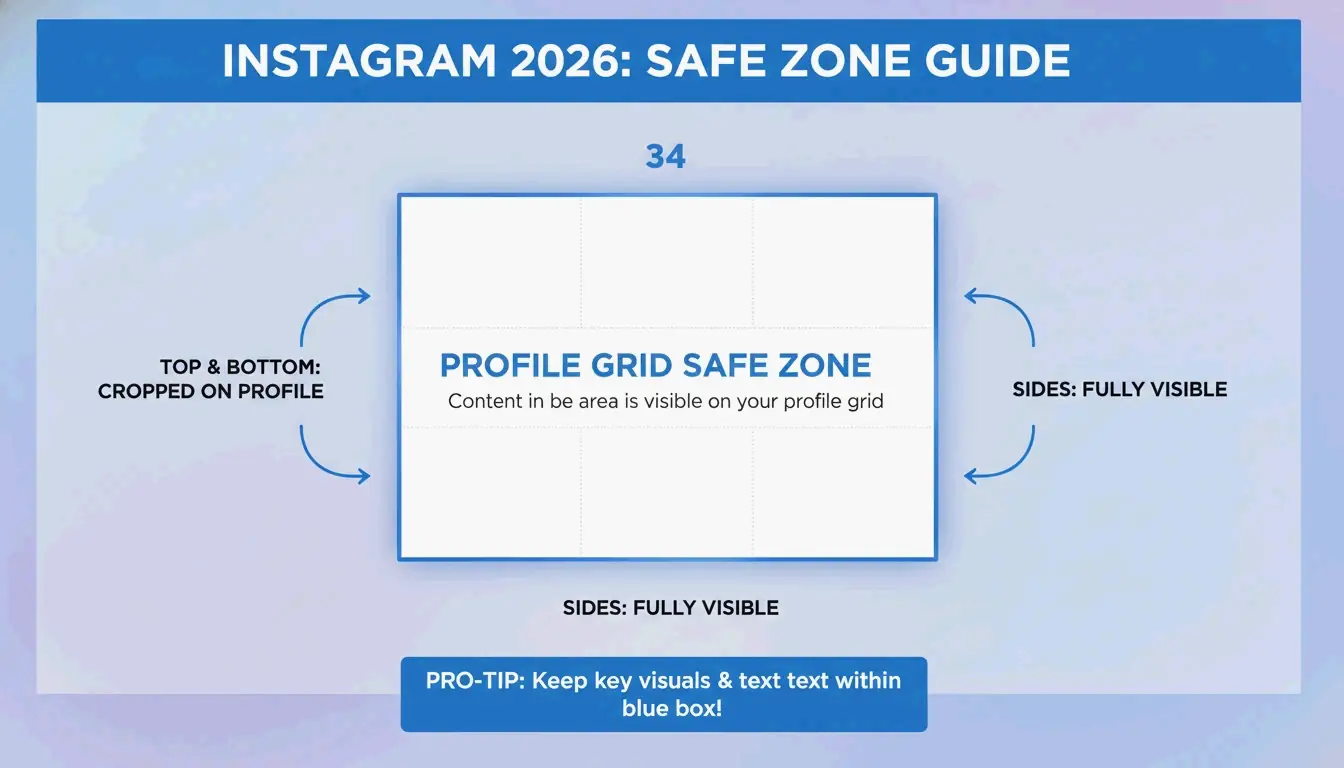
2026 Social Media Cheat Sheet: Correct Image Sizes
Social media platforms enforce strict dimension requirements. Non-compliant images are auto-compressed, often resulting in visible quality degradation.
| Platform | Format | Dimensions | Ratio |
|---|---|---|---|
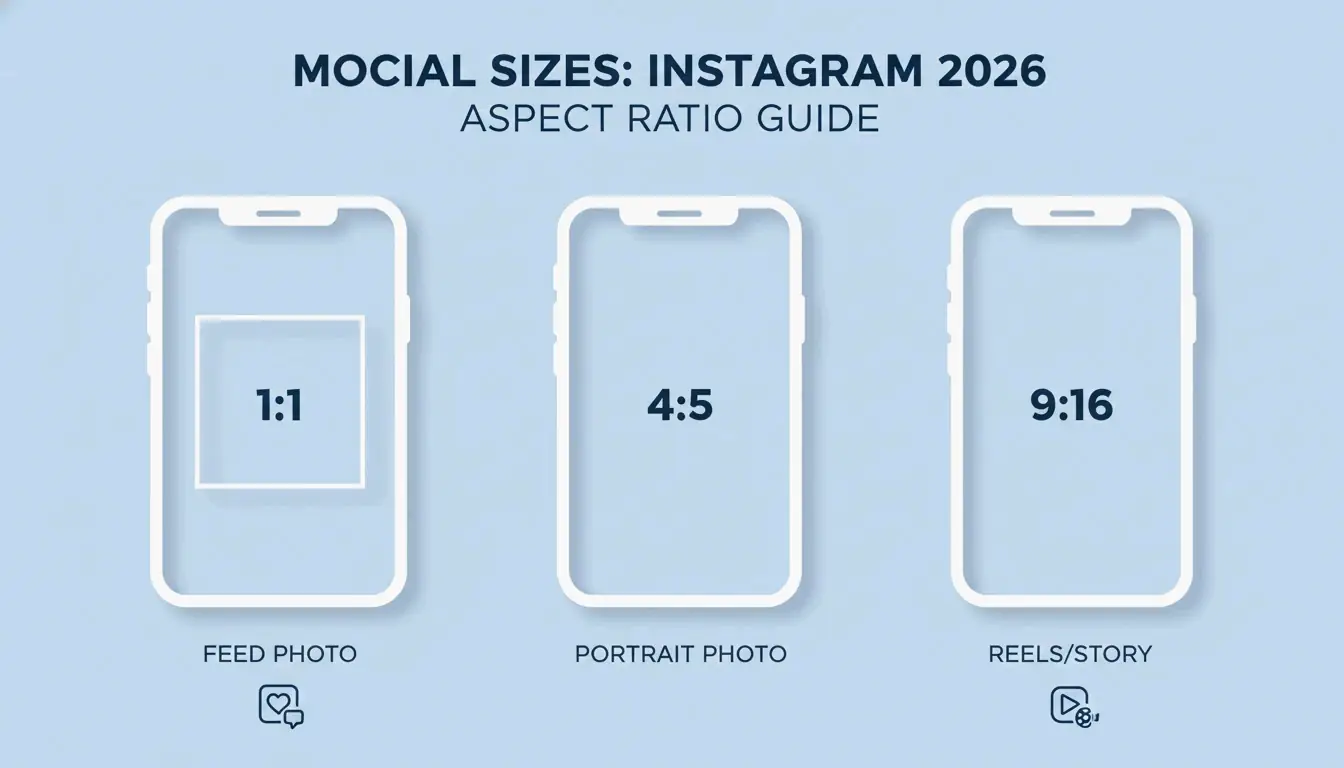
| Instagram Feed (Portrait) | Post | 1080 x 1350 px | 4:5 |
| Instagram Feed (Square) | Post | 1080 x 1080 px | 1:1 |
| Instagram Stories & Reels | Story/Reel | 1080 x 1920 px | 9:16 |
| LinkedIn Banners | Banner | 1128 x 191 px | Custom |
With AVIF support becoming standard for web optimization in 2026, many professionals use it for social media content to achieve better color fidelity at smaller file sizes. For print, DPI (Dots Per Inch) is the critical metric: 300 DPI for high-quality prints, 72-96 DPI for screen display.
Conclusion
The best resizing strategy in 2026 combines two approaches: traditional local tools for fast bulk work, and AI tools for creative layout changes. For daily social media posts or private photos, a browser-based tool like Birme processes images on your device with full privacy. For professional work requiring aspect ratio changes without edge loss, AI extenders like Overchat AI deliver superior results. Selecting the right tool for each task — whether you need precise pixel control or AI expansion — ensures your visuals look professional across every platform.
FAQ
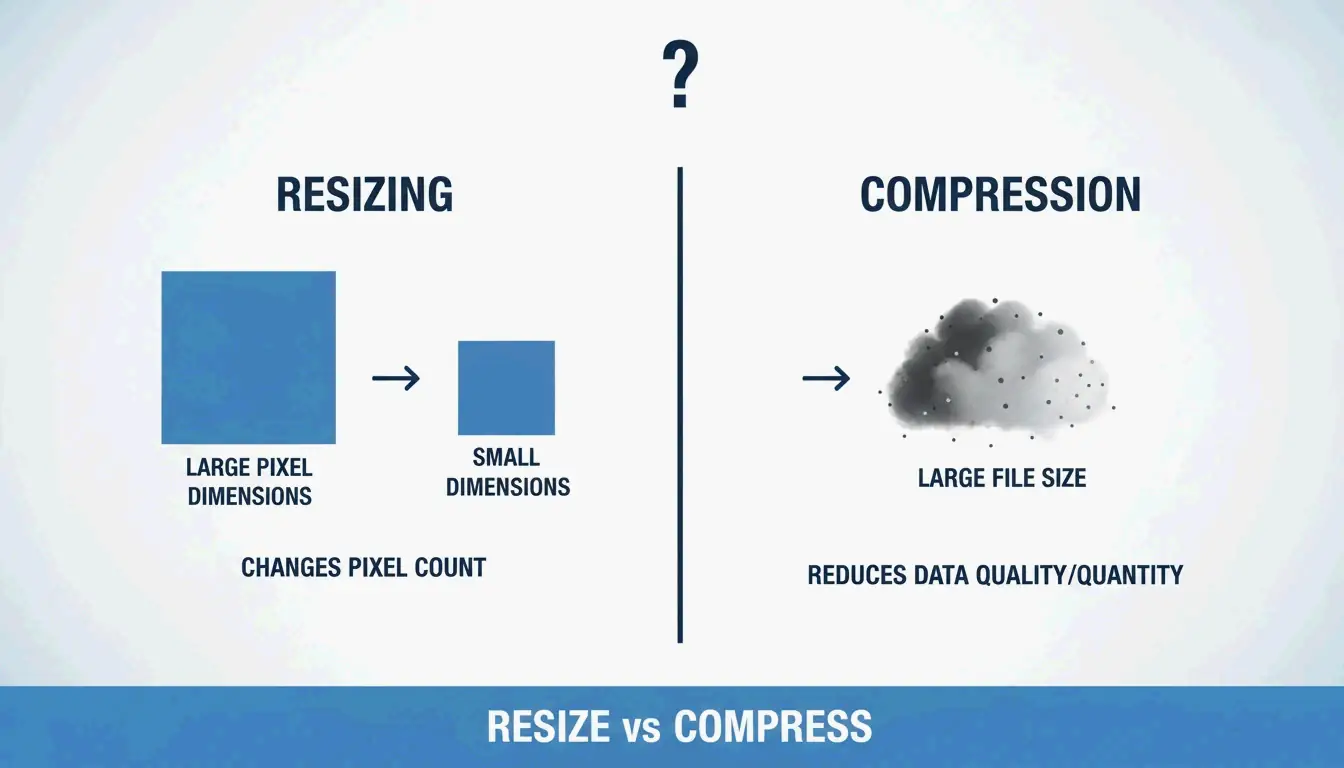
What is the difference between resizing and cropping?
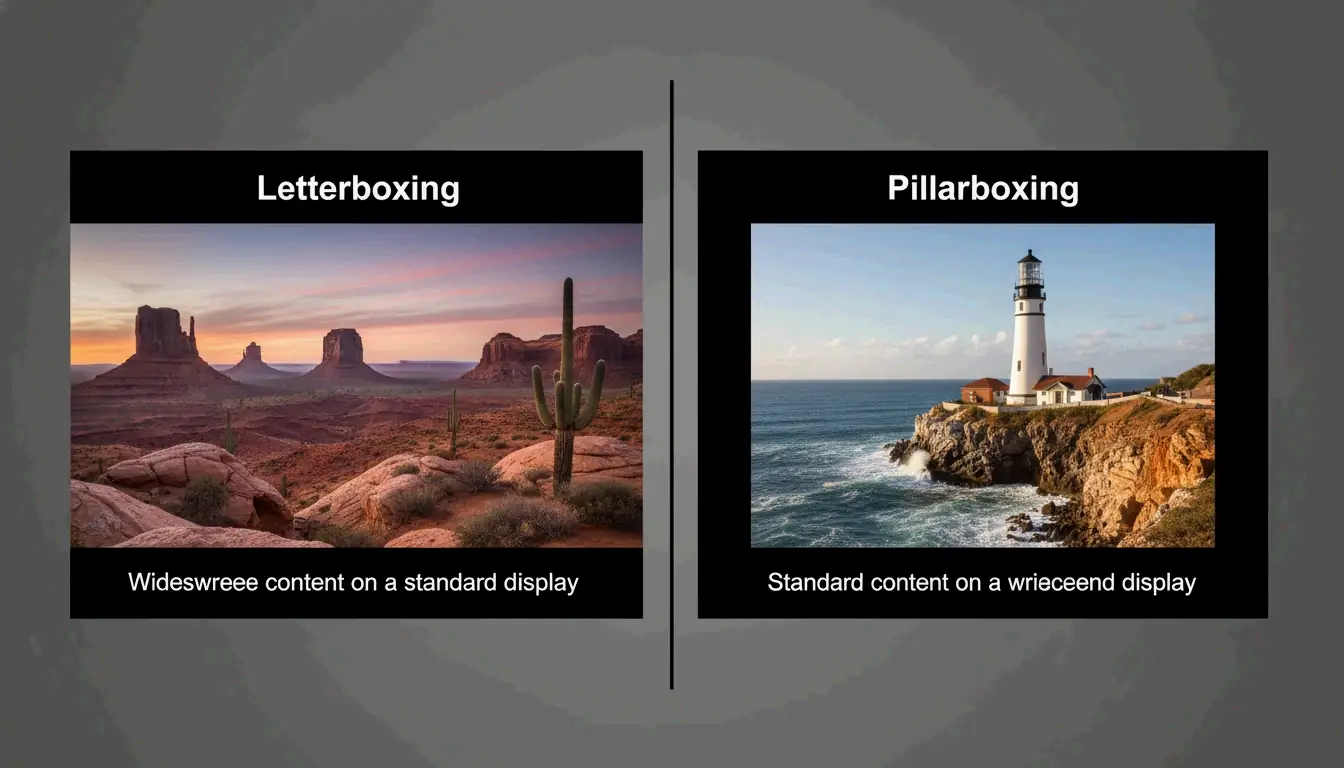
Resizing changes the total pixel count or physical scale of the image, making the file smaller or larger while preserving the entire scene. Cropping removes outer portions of the image to change the focus or aspect ratio. Resizing maintains all original content; cropping intentionally discards pixels to achieve a specific shape.
How can I resize a photo for Instagram without losing quality?
Use a 4:5 aspect ratio (1080×1350 pixels) for feed posts, as this occupies the most screen space. Export at 80-90% JPEG quality. This range prevents Instagram’s aggressive server-side compression algorithms from over-compressing your image, which is the primary cause of post-upload blurriness.
Is it safe to use online image resizers for private photos?
It is safe only if the tool uses “client-side” or “browser-based” processing. Tools like Birme use JavaScript to process images directly on your computer — photos are never uploaded to a server. Avoid uploading sensitive data to platforms that require cloud uploads unless they provide a clear, verifiable data deletion policy.
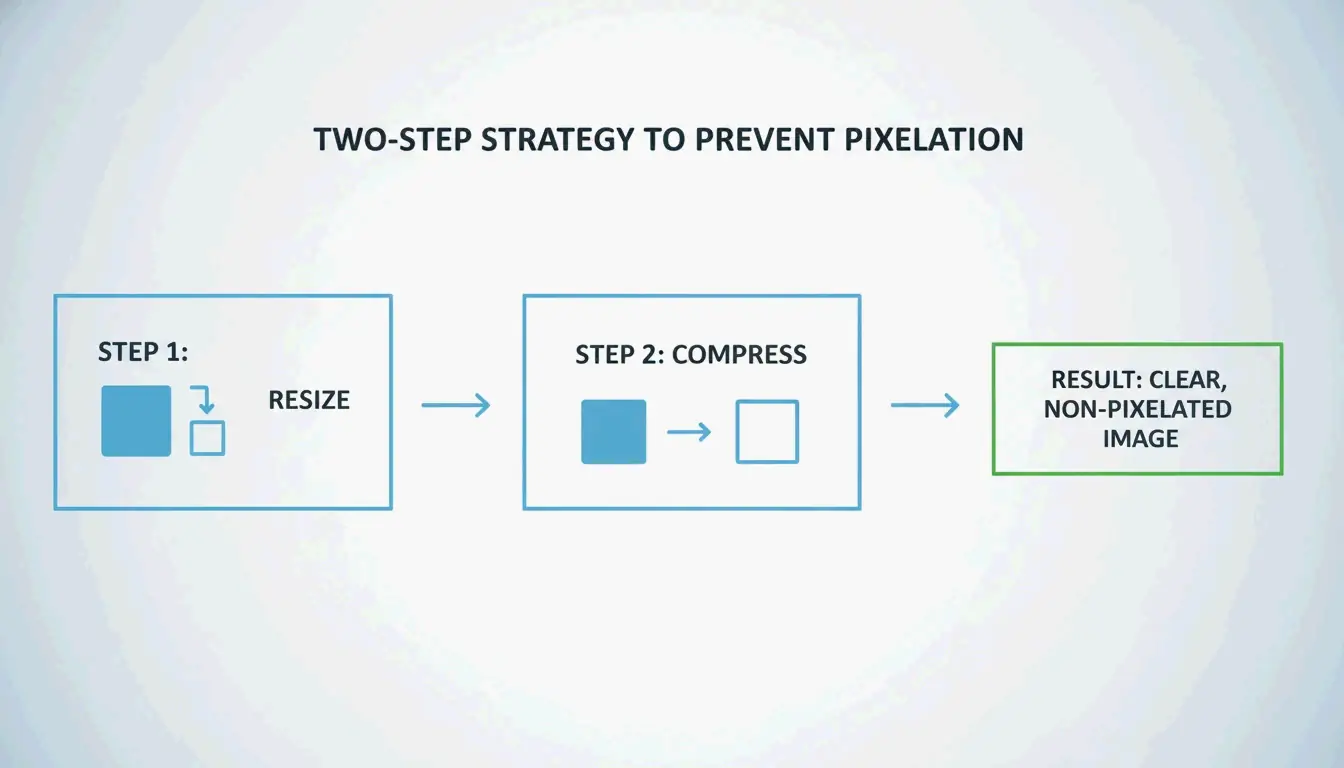
Why do my photos look pixelated or blurry after resizing?
Pixelation typically occurs when upscaling a small image beyond its original resolution, forcing the software to interpolate missing data. To prevent this, keep new dimensions within 150% of the original size. If you must go larger, use an AI Upscaler, which employs machine learning to reconstruct details rather than simply stretching existing pixels.