Category: Story

  • Why You Need to Remove EXIF Data Before Publishing Images on Social Media

    Why You Need to Remove EXIF Data Before Publishing Images on Social Media

    As of May 2026, you should remove EXIF data before publishing images on social media because many platforms retain your GPS coordinates in their internal databases for tracking, even if they hide them from public view. Specific sharing methods like WhatsApp “Document” mode and third-party scheduling tools often skip the cleaning process entirely, leaving your precise location visible to recipients or hackers.

    The Hidden Risks: Why You Need to Remove EXIF Before Publishing

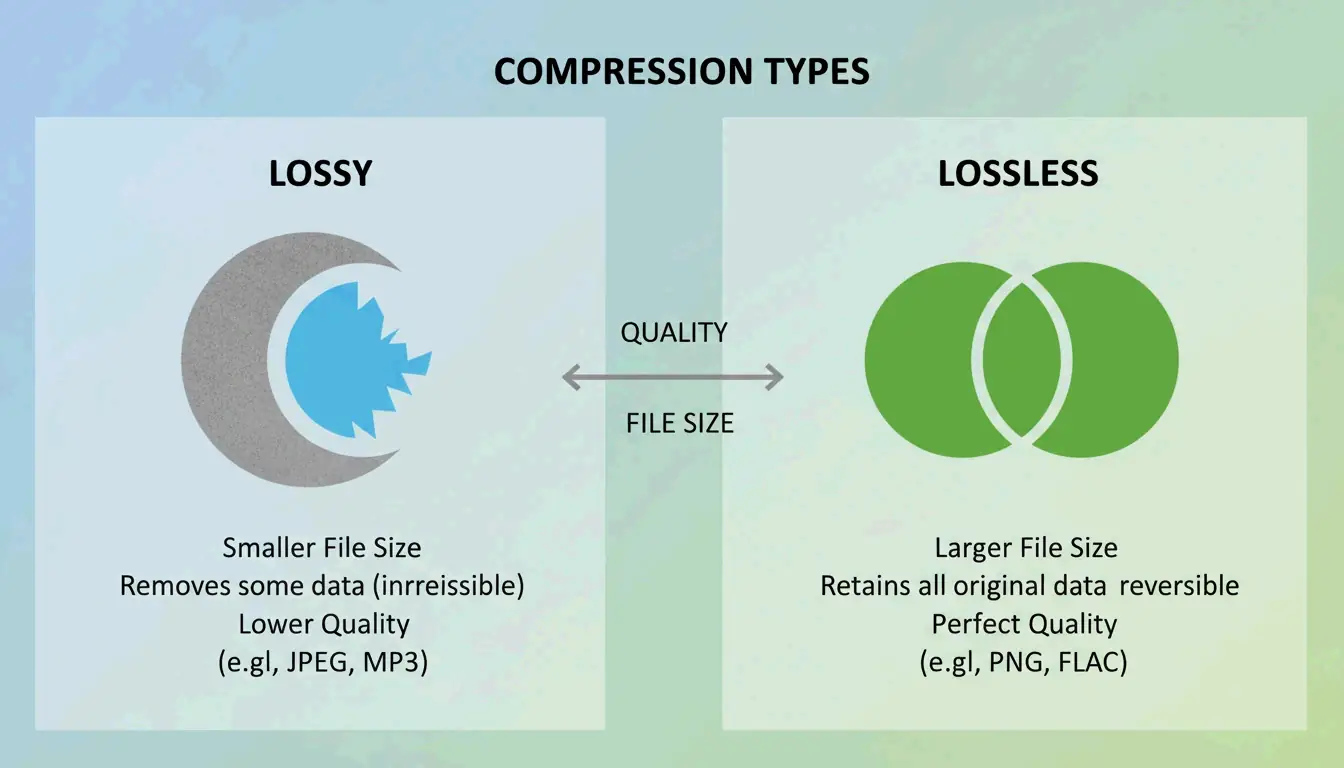
    The main reason to strip metadata is that EXIF (Exchangeable Image File Format) acts like a digital fingerprint. It often contains GPS Coordinates that can pinpoint exactly where you were within a few meters. While big names like Instagram and X (Twitter) claim to protect you by filtering images, this is usually just a surface-level fix that does not apply to the data the companies keep for themselves.

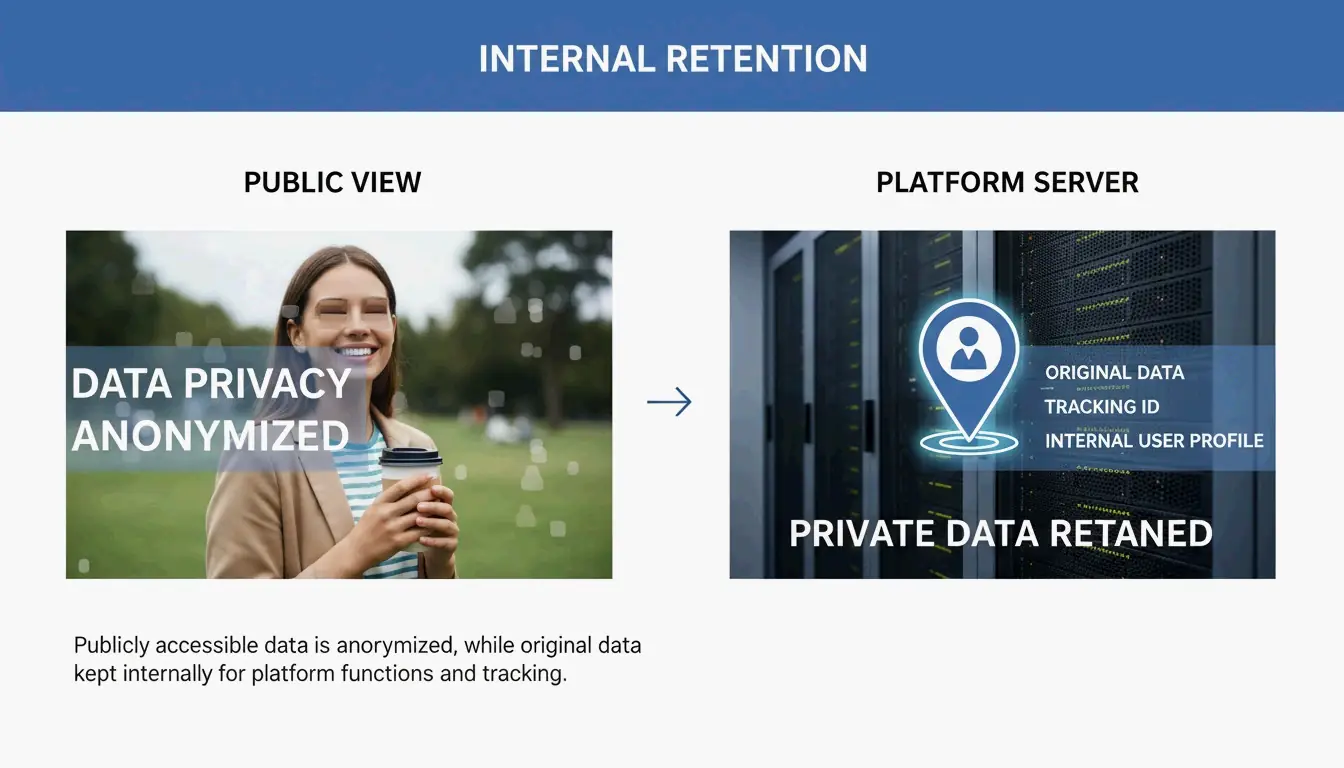
    Understanding the “Internal Retention” Trap

    A major risk in 2026 is that “stripping” data for the public does not mean the data is actually deleted. According to Fastio, the moment you upload a photo, the platform grabs the original, full file. Internal Retention policies at companies like Meta and X allow them to store your original GPS data for ad targeting and behavioral tracking, even if your followers never see those details.

    The contrast between what the public sees vs. what the platform stores

    Relying on a platform to clean your files is a reactive move that can fail. Take the Reddit HEIC Metadata Leak (Vulnerability #1069039) mentioned by SammaPix. In that case, photos in the HEIC format were converted to PNG during upload but accidentally kept their GPS tags. This exposed users’ home locations until a patch was finally released. If you remove the data on your own device first, the platform never gets that sensitive information to begin with.

    When Social Media Fails: Why Automatic Stripping Is Not Guaranteed

    You cannot just assume an upload button is a privacy filter. In 2026, whether your metadata stays or goes depends on how you share the file. Testing by MetaClean shows that while public feeds are mostly safe, private channels are much riskier.

    Sharing Method Platform EXIF Stripped? Risk Level
    Public feed post Instagram / Facebook Yes Low
    Standard photo share WhatsApp Yes Low
    Document mode WhatsApp No High — 100% metadata preserved
    “Best quality” DM Instagram / X Unreliable (23% GPS leak rate) Medium-High
    API upload (Buffer, Hootsuite) X (Twitter) Unreliable (30% device info retained) Medium-High
    • WhatsApp Document Mode: This is a major privacy trap. According to SammaPix, when you send a photo as a “Document” to keep the quality high, the app preserves 100% of the metadata, including your exact GPS location.
    • Direct Messages (DMs): On Instagram and X (Twitter), DM systems are not always as strict as the public feed. Tests show that sending photos in “best quality” or original format via DM can leak GPS data in about 23% of cases.

    The Social Media Manager’s Blindspot: API Posting Risks

    If you manage social media professionally, automation is your biggest danger zone. API Uploads — the tech used by tools like Buffer, Hootsuite, and Sprinklr — often bypass the standard cleaning steps built into official mobile apps. MetaClean’s 2026 testing found that images posted via the X API kept device model info in roughly 30% of cases, and GPS stripping was much less reliable than manual uploads. If you schedule content, you need to clean your files before they hit your queue.

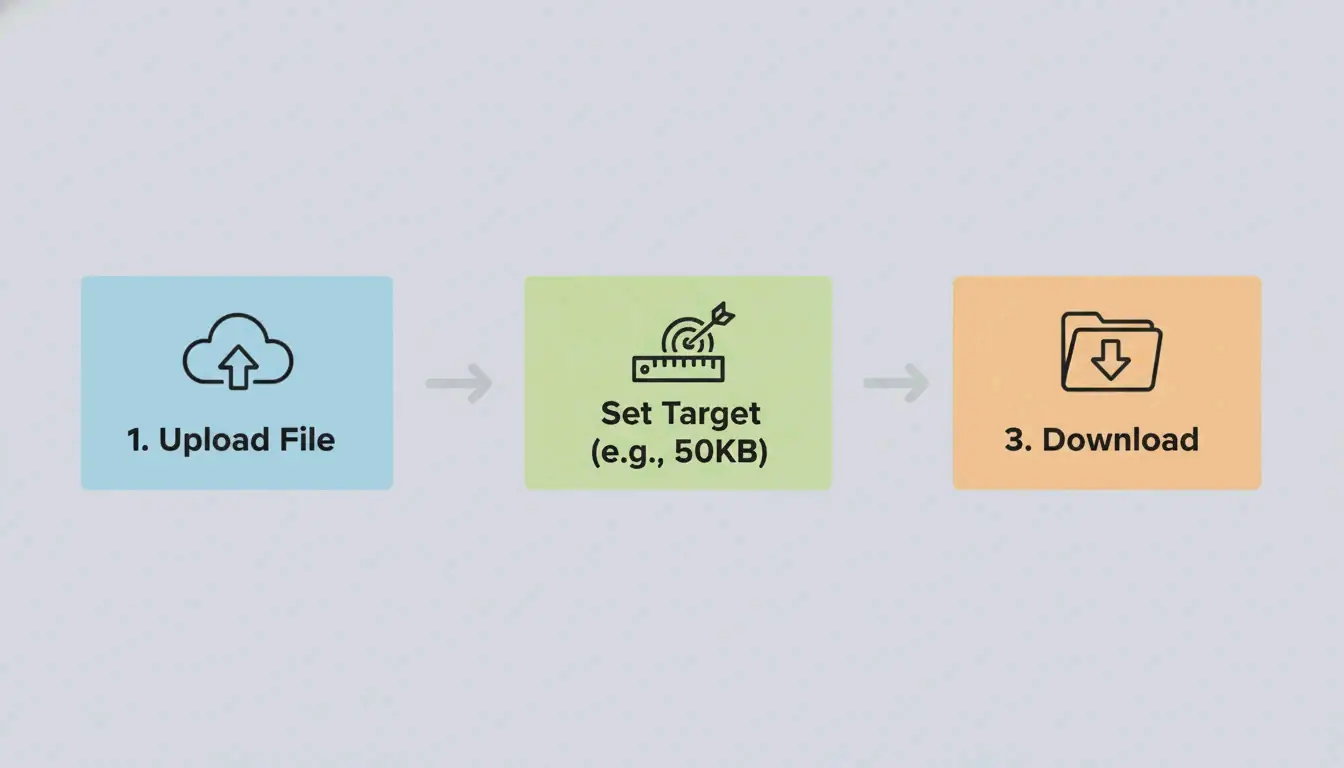
    How to Remove EXIF Data: Step-by-Step Guide for Every Device

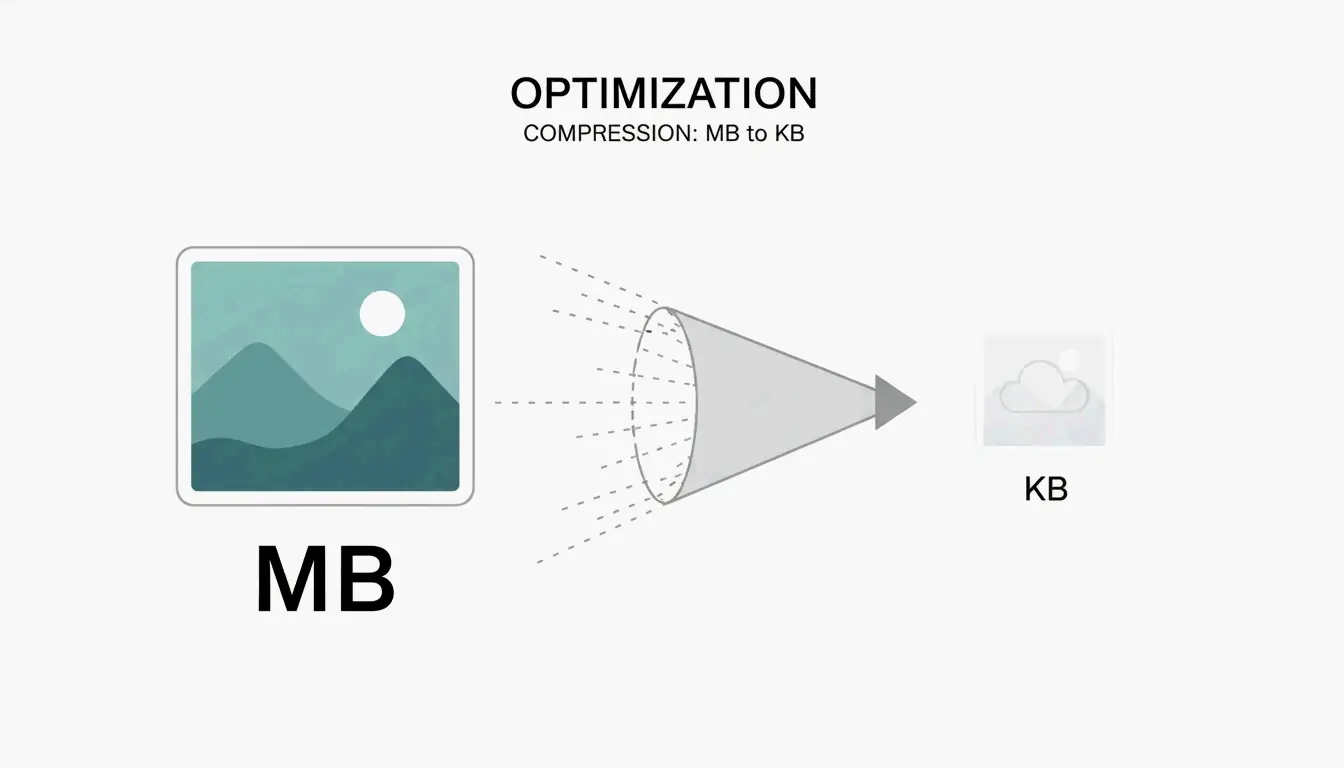
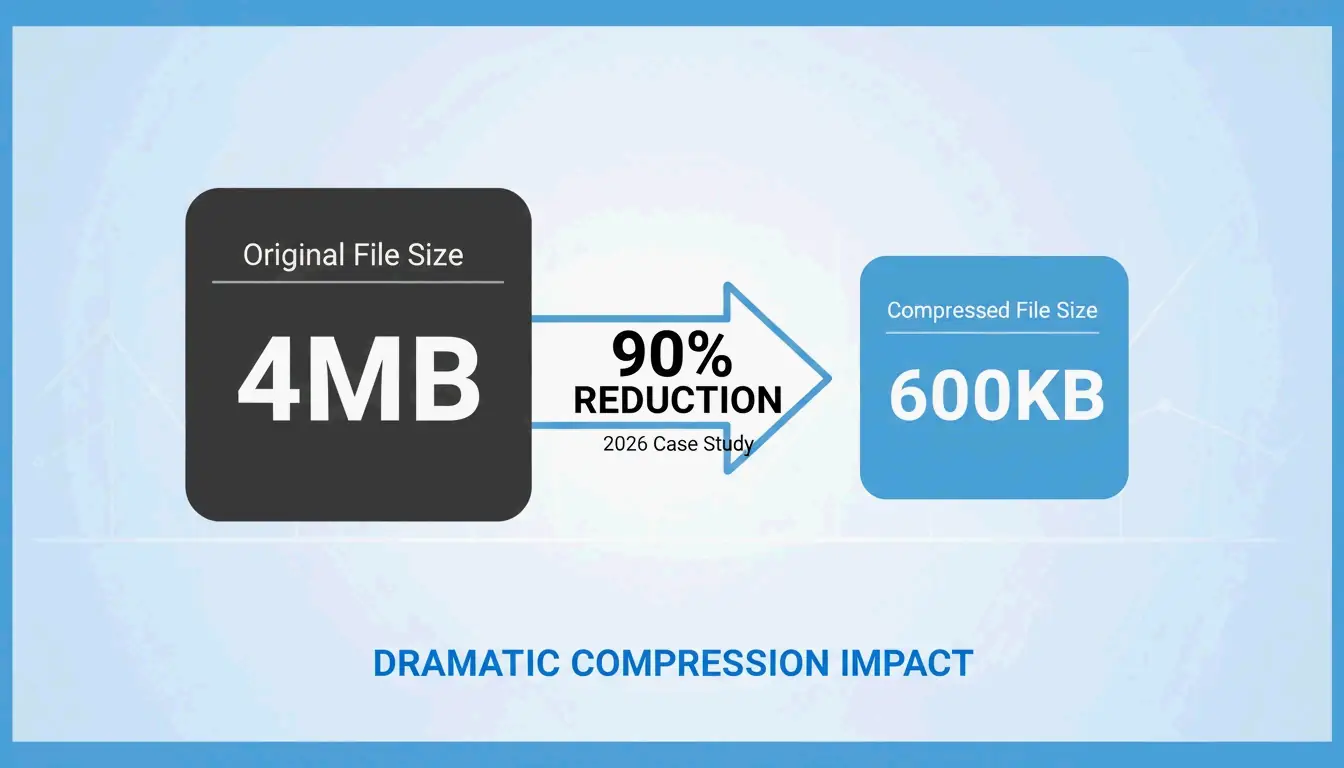
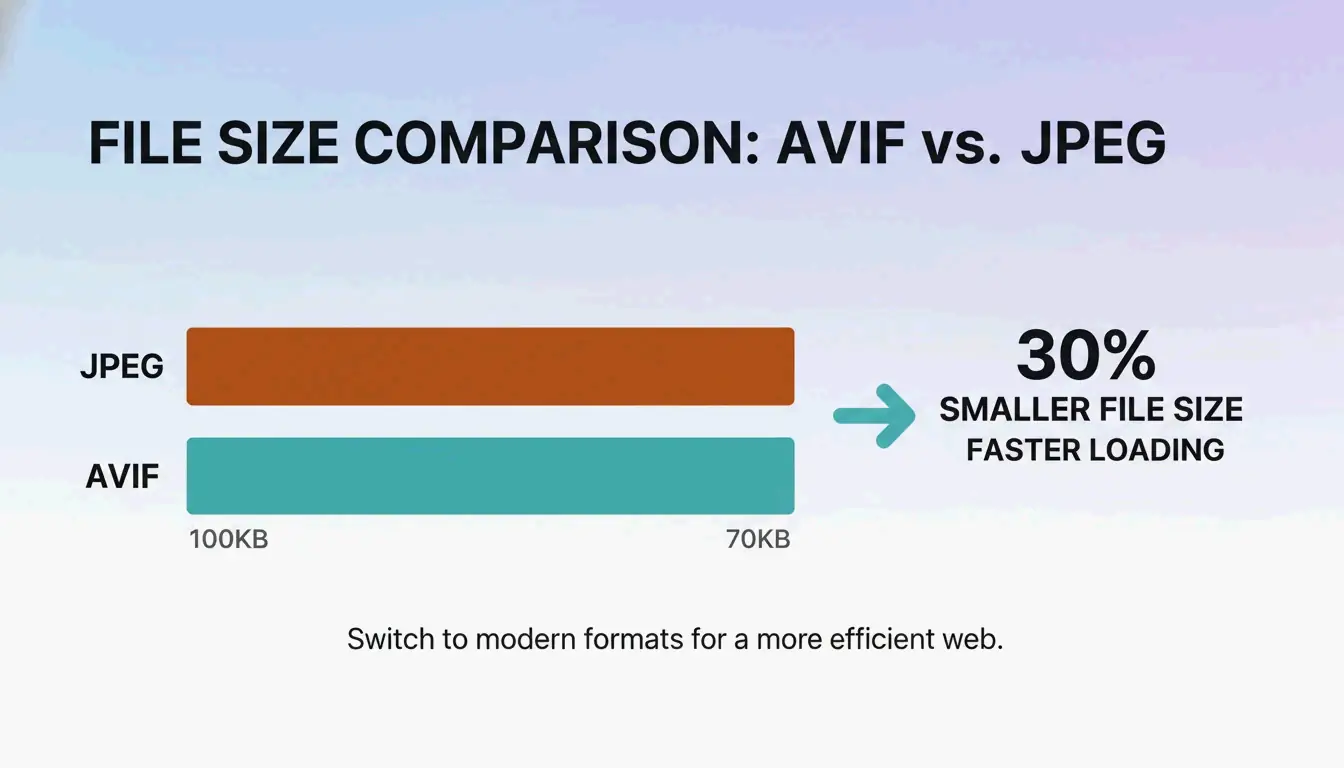
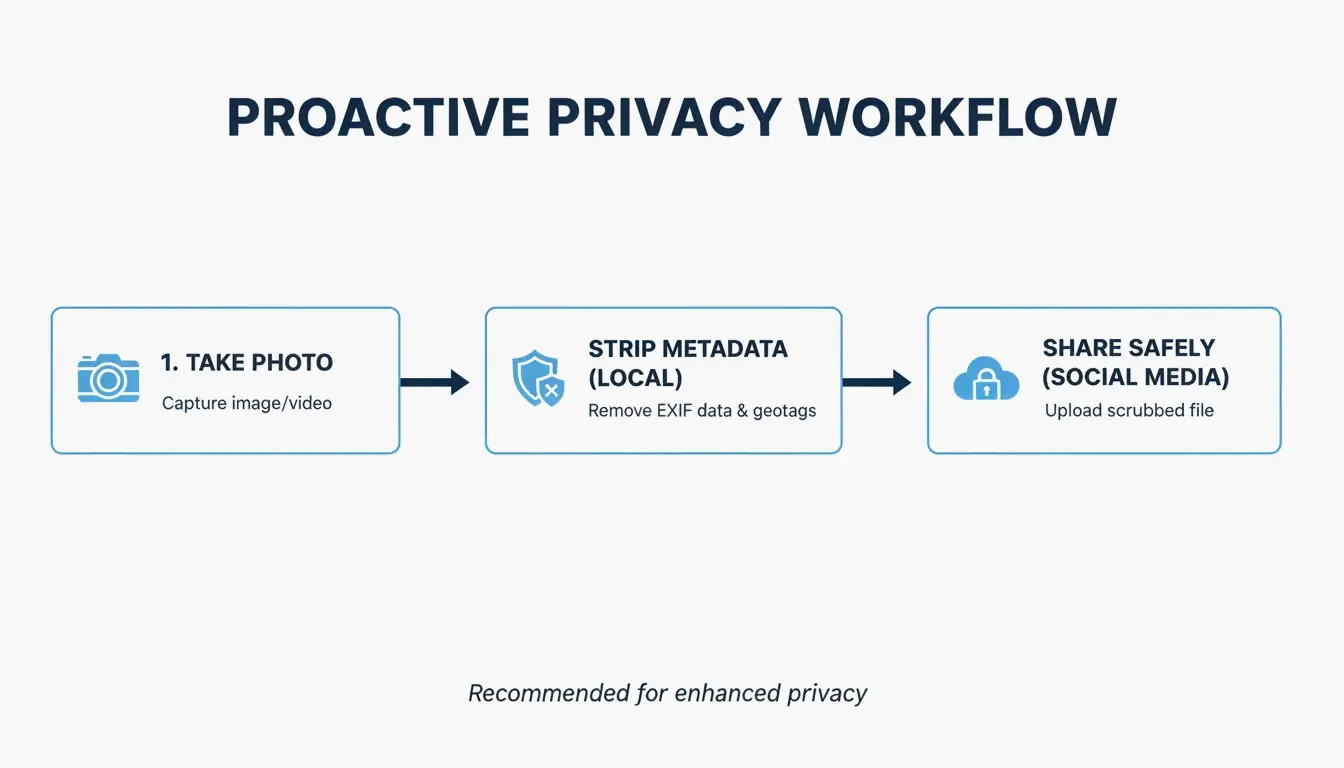
    To stay private, handle the metadata removal locally before the file ever leaves your phone or computer. As a bonus, ImgTweak notes that stripping metadata can shrink your file size by 10-20% without hurting image quality.

    Device Method Steps
    Windows Properties panel Right-click > Properties > Details > “Remove Properties and Personal Information”
    Mac Preview app Open in Preview > Tools > Show Inspector > GPS tab > “Remove Location Info”
    iOS Share Sheet Tap Share > Options > toggle off “Location”
    Android Gallery share Look for “Remove location data” toggle in share settings
    Pro/Power User ExifTool CLI Run exiftool -all= image.jpg to wipe every hidden header

    Recommended 3-step privacy workflow

    Pro-Level Auditing: For power users, ExifTool is still the best option. The command exiftool -all= image.jpg completely wipes every hidden header in the file — EXIF, XMP, IPTC, and MakerNotes.

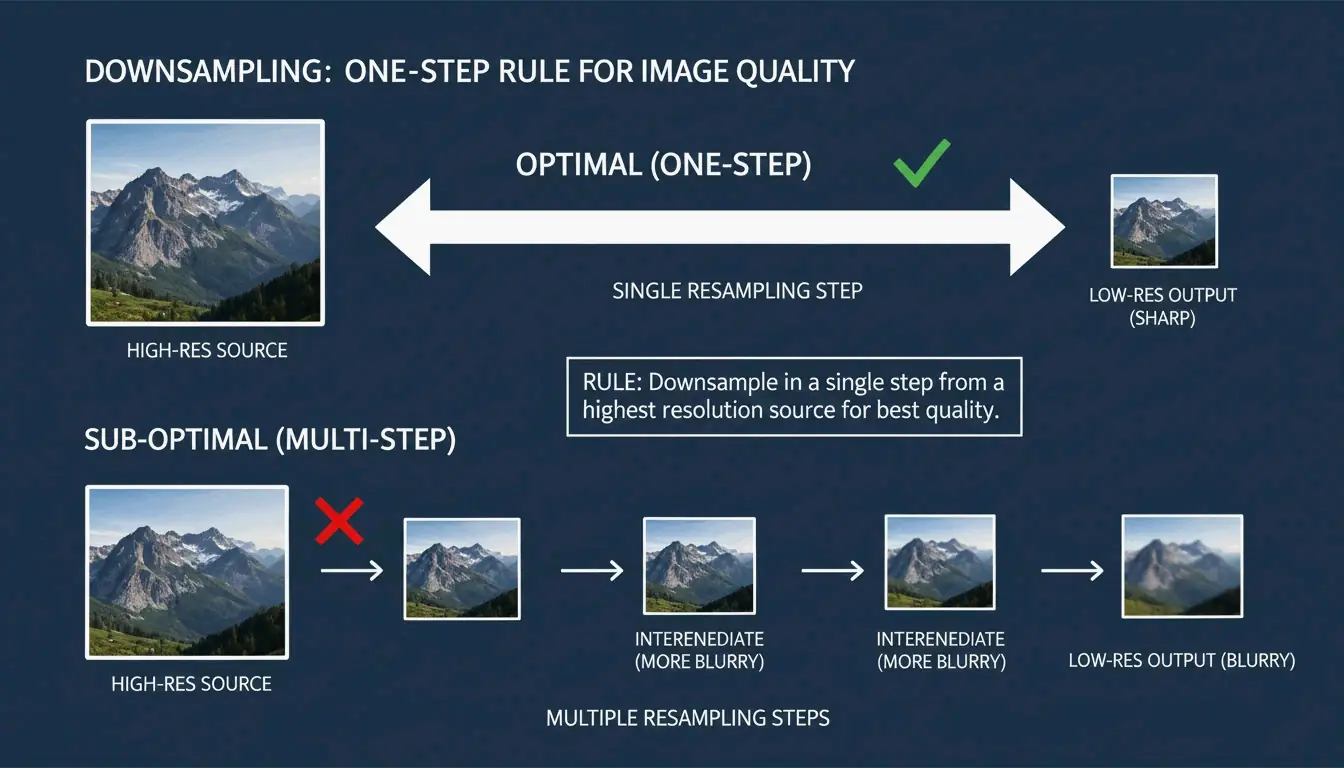
    Screenshotting vs. Stripping: Privacy vs. Image Quality

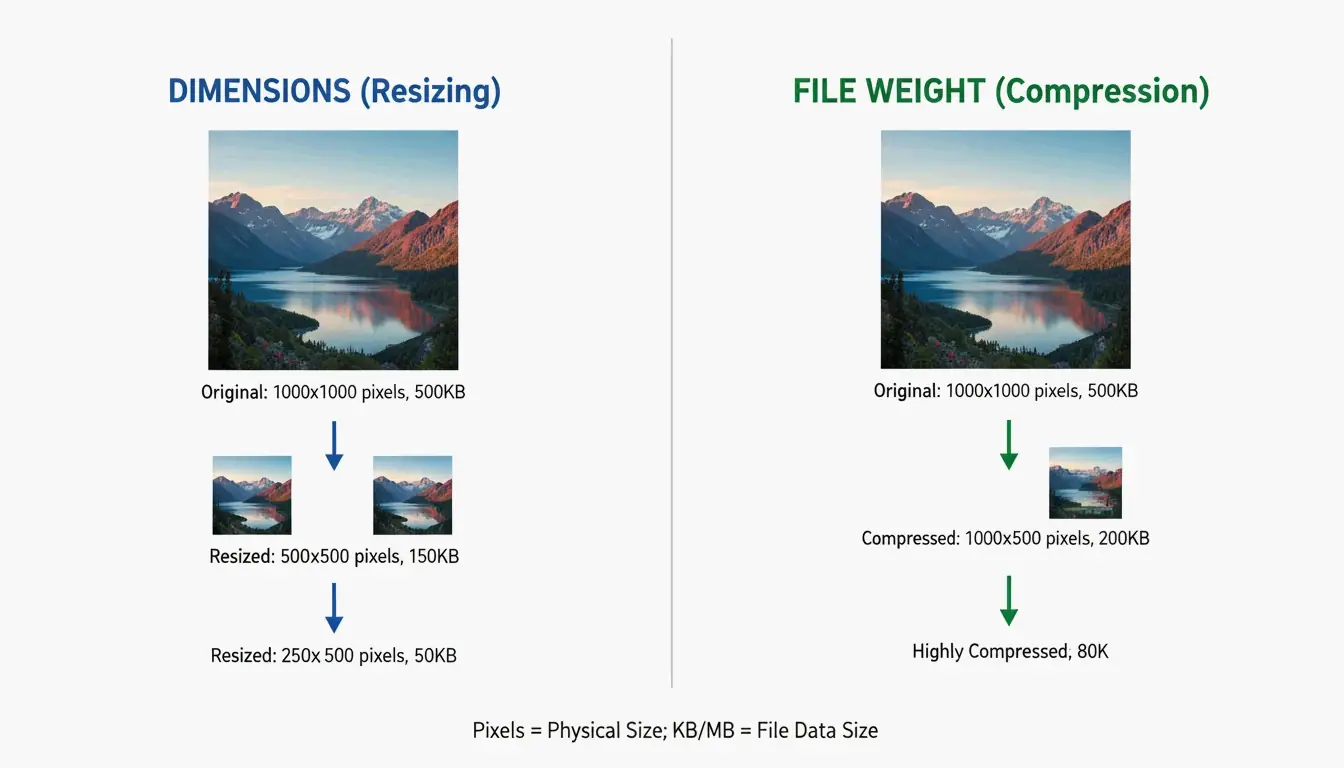
    Many people take a screenshot of a photo to “strip” the data. Since a screenshot is a brand-new file, it will not have the old EXIF info. This works for privacy, but it kills your resolution. A high-quality 48MP photo can drop to just 2-4MP. It is better to use a dedicated stripping tool so you can keep your high-res pixels while ditching the hidden tracking data.

    Method EXIF Removed? Resolution Preserved? Speed
    Screenshot Yes No (drops to 2-4MP) Instant
    ExifTool Yes Yes Fast (CLI)
    OS built-in tools Yes (partial) Yes Quick
    Dedicated app (e.g., ImageOptim) Yes (complete) Yes Moderate

    Privacy Leaders: Comparing Platform Metadata Policies in 2026

    The 2026 privacy landscape shows a big gap between “privacy-first” apps and data-hungry networks. According to the MetaClean 2026 Platform Comparison, Signal is the gold standard. It is the only major app that wipes all EXIF data before sending and stores nothing on its servers.

    Platform Public Feed DMs/Messaging Internal Retention Overall Rating
    Signal N/A Full strip None stored Best
    Instagram / Facebook Stripped for public Partial Retained for ad targeting Moderate
    WhatsApp N/A Stripped (photo mode) Retained by Meta Moderate
    X (Twitter) Stripped Unreliable Retained Moderate
    iMessage N/A Not stripped Stored on device/iCloud Poor
    Email (Gmail/Outlook) N/A Not stripped Stored on servers Poor

    On the other hand, Instagram and Facebook use a “Strip for the Public, Keep for the AI” approach. They hide your location from other users but use it themselves to build a profile on you. Meanwhile, iMessage and standard Email (Gmail/Outlook) offer almost no protection — they send the original file with all GPS data intact to whoever receives it.

    Conclusion

    Social media platforms might promise privacy, but EXIF data is still a massive loophole in 2026. Automatic cleaning is inconsistent, particularly when using professional scheduling tools, sending files as “documents,” or using high-quality DM settings. Most platforms also continue to harvest your location for their own use even after hiding it from the public. To truly protect your physical safety, use a metadata scrubber or a privacy-focused app like Signal before you share. Do not assume the platform is looking out for you; take control of your data before you hit upload.

    FAQ

    Does taking a screenshot remove EXIF data?

    Yes, taking a screenshot creates an entirely new image file that does not carry the original photo’s metadata. However, there is a significant trade-off: you will lose substantial image resolution and quality compared to using professional stripping tools that remove data while preserving the original pixels.

    Does WhatsApp remove GPS location when sending photos?

    It depends entirely on the sending mode. In 2026, standard “Photo mode” strips most data, but “Document mode” leaks 100% of EXIF data, including GPS. Additionally, “Best quality” mode is unreliable, with testing showing that GPS coordinates survive in roughly 23% of cases.

    Can law enforcement use EXIF data even if I delete the post?

    Yes. Most social media platforms retain the original uploaded file — including all its metadata — on their internal servers even after a post is deleted from public view. This retained data can be accessed by law enforcement through legal subpoenas or court orders directed at the platform.

  • Gemini Nano Banana 2 Image Watermark Remover: Best Tools and Techniques for 2026

    Gemini Nano Banana 2 Image Watermark Remover: Best Tools and Techniques for 2026

    To remove a Gemini Nano Banana 2 watermark in 2026, look for software specializing in Reverse Alpha Blending, such as GeminiWatermarkTool (offline) or GeminiWatermarkRemover.io. These tools offer pixel-perfect restoration of the visible 4-pointed star, though invisible SynthID and C2PA metadata will typically remain embedded for AI tracking.

    The 2026 Standard: How to Remove Gemini Nano Banana 2 Watermarks

    By 2026, the “Nano Banana” 4-pointed star has become the universal symbol for Google’s Gemini-generated content. These are not just simple “stamps” placed over an image; they are integrated using a process called alpha compositing. If you use a generic AI “eraser,” you will often end up with blurry smudges. To get a clean result, you need a workflow that reverses the math behind the original blend.

    Standard AI inpainting usually “guesses” what pixels should look like based on the background. In contrast, Reverse Alpha Blending subtracts the watermark’s values to recover what is underneath. This keeps fine details — like skin pores or the weave of a fabric — crisp and untouched.

    Comparison of standard AI guessing vs. Reverse Alpha Blending subtraction

    Step 1: Identify the Watermark Scale and Alpha Map

    The first step in a professional 2026 workflow is figuring out which version of the watermark you are dealing with. Technical guides from allenk’s GeminiWatermarkTool show that Google uses two main sizes based on the image resolution:

    Watermark Variant Image Size Position Dimensions
    Small (48x48px) Width or height <= 1024px 32px from bottom-right corner 48 x 48 pixels
    Large (96x96px) Width and height > 1024px 64px margin from bottom-right 96 x 96 pixels

    Modern tools like GeminiWatermarkRemover.io now use “Smart Detection” — a three-stage matching process — to lock onto these exact coordinates automatically.

    Step 2: Applying Reverse Alpha Blending for Lossless Restoration

    Once the size is confirmed, the tool applies an inverse formula: Original = (Watermarked - Alpha * Logo) / (1 - Alpha). By using the exact transparency templates (alpha maps) Google uses, the software calculates the original color of the hidden pixels.

    For most users, this just means selecting “Reverse Alpha” mode in your settings. This method is “deterministic,” which means it gives you the same high-quality result every time, as long as the image has not been heavily compressed or resized.

    Best Tools for Gemini Nano Banana 2 Removal in 2026

    Your choice of tool depends on how many images you have and your privacy needs. In 2026, more people are moving toward local, offline processing to keep their AI-generated assets off third-party servers.

    The Pro Choice: GeminiWatermarkTool (CLI and Desktop)

    For developers and power users, GeminiWatermarkTool (allenk) is the top recommendation. It is a portable C++ app that works entirely offline. According to allenk’s documentation, it hits a restoration accuracy of plus or minus 1 per channel, making the removal invisible even if you zoom in 100%.

    The 2026 update includes a GPU-boosted feature called FDnCNN (Fast Discrete Convolutional Neural Network). This helps clean up any tiny “sparkle” artifacts left behind if the image was compressed. Thanks to Vulkan acceleration, it processes these areas in less than 5ms.

    Browser-Based Solutions: GeminiWatermarkRemover.io vs PixPretty

    Tool Type Privacy Best For
    GeminiWatermarkRemover.io Browser (client-side) 100% local Pixel-accurate removal of Nano Banana 2 star
    PixPretty AI Object Remover Browser + AI Cloud-assisted Watermarks on complex textures (hair, grass)

    If you just need a quick fix without installing software, GeminiWatermarkRemover.io is the best online option for pixel-accurate results. It runs 100% in your browser (client-side), so your image never actually leaves your computer. As noted by Emma Collins, PixPretty is a better choice if the watermark is sitting on top of something messy, like hair or grass. It combines reverse blending with heavy-duty AI retouching to fill in the gaps.

    Automated Workflows: Integrating MCP Servers and Claude Code

    A big change in 2026 is how we automate this. Using the Model Context Protocol (MCP), developers can link GeminiWatermarkTool directly to AI agents like Claude or Cursor. This allows an AI agent to “see” a watermarked image and automatically clean it with a simple remove_watermark command before it ever reaches your final document or UI mockup.

    Simplified automation: AI Agent to MCP Server to Clean Image

    Beyond the Star: Understanding SynthID and C2PA Metadata

    It is important to remember that the visible “Nano Banana” star is only one layer of tracking. Removing the star does not make the image untraceable.

    The Reality of SynthID

    SynthID, created by Google DeepMind, is an invisible watermark woven into the actual pixel frequencies. As Allen Kuo explains, SynthID is incredibly tough to get rid of because it is spread across the whole image. Most editing tools — even those that remove the visible star — will not scramble the SynthID enough to hide it from Google’s scanners.

    Layer Type Removable? Detection
    Nano Banana star Visible (alpha composite) Yes, via reverse blending Human eye
    SynthID Invisible (pixel frequency) Extremely difficult Google scanners
    C2PA metadata Cryptographic manifest Yes, via metadata scrubber C2PA-compliant platforms

    C2PA Compliance and Metadata Scrubbers

    Gemini images also carry C2PA metadata, which triggers “Made with AI” labels on sites like Instagram. While pixel-removal tools focus on the image itself, professional workflows in 2026 often use a separate “Metadata Scrubber” to wipe these digital manifests for internal company presentations.

    Hybrid Techniques for Resized or Compressed Images

    Reverse Alpha Blending is perfect on paper, but it needs “pixel-perfect” alignment. If an image was shrunk for a website or saved as a low-quality JPEG, the math fails, often leaving a faint “ghost” of the star.

    Software Inpainting: When to use NS vs. TELEA algorithms

    When the math does not work perfectly, hybrid tools use “Inpainting” to tidy up. Choose your algorithm based on the background:

    Algorithm Best For How It Works
    Navier-Stokes (NS) Smooth areas (skies, blurred backgrounds) Flows surrounding colors into the spot
    TELEA Textured surfaces (concrete, wood, fabric) Fast pixel interpolation from boundaries

    Comparison of NS (Smooth) vs TELEA (Textured) application scenarios

    The “Smart Crop” Fail-Safe

    If the background is just too complex to fix, the Smart Crop Method is the most reliable backup. Tools like Wilnexo automate this by cutting a precise 56px to 128px strip off the bottom. It gets rid of the watermark completely, though it will slightly change the shape of your image.

    Conclusion

    The “Nano Banana” 2 watermark can be mathematically reversed with tools like GeminiWatermarkTool, but the invisible SynthID tracking is a permanent part of Google’s ecosystem. For the best results in 2026, use Reverse Alpha Blending rather than generic erasers to keep your image textures sharp. For pros, remember to use a C2PA-compliant scrubber if you need to clear the metadata. Just keep in mind: a clean-looking image is not the same as an anonymous one — SynthID can still be detected by specialized software even after the star is gone.

    FAQ

    Does upgrading to Gemini Advanced or Pro remove all watermarks automatically?

    No, Google maintains watermarks for AI safety compliance across all tiers, including paid subscriptions. Advanced and Pro users in 2026 still see the “Nano Banana” star on generated outputs. While some regions may offer “watermark-free” downloads for specific enterprise tiers, the default behavior for Gemini remains to include visible and invisible markers.

    Why can’t SynthID invisible watermarks be removed by standard editing tools?

    SynthID is embedded in the pixel frequency domain rather than being a surface-level overlay. It is adversarially trained to resist common transformations. Standard editing actions — such as cropping the visible star, adjusting colors, or adding noise — do not disrupt the underlying mathematical pattern enough to prevent AI detectors from identifying the image’s synthetic origin.

    Is it illegal to remove Gemini watermarks for professional client presentations?

    Legality depends on your jurisdiction and Google’s specific Terms of Service. Generally, removing watermarks for internal use or personal presentations is permitted. However, commercial redistribution may require “AI-generated” disclosure per C2PA standards. It is recommended to consult local intellectual property laws if you intend to use cleaned images for public-facing commercial advertisements.

  • The Principle of Removing Watermarks from Images: AI Algorithms vs Traditional Methods

    The Principle of Removing Watermarks from Images: AI Algorithms vs Traditional Methods

    As of May 2026, the principle of removing watermarks from images has shifted from manual cloning to AI algorithms like generative inpainting. While traditional methods rely on manual pixel replication, modern AI predicts missing data using GANs and Diffusion Models to recreate textures naturally. This evolution offers superior 8K quality and saves professionals over 4.5 hours weekly.

    Core Principles: How AI Algorithms vs Traditional Methods Remove Watermarks

    The real difference between AI algorithms and traditional methods is how they fill in the blanks. Traditional logic treats a watermark like a physical blemish to be covered up or a mathematical layer to be reversed. AI, however, sees the watermarked area as a “contextual gap.” It looks at the rest of the image to imagine what should be there, rather than just trying to scrub something off.

    According to a TechTrends Report, professionals using AI-native tools save about 4.5 hours every week compared to those still stuck with manual, frame-by-frame cloning.

    Method How It Works Best For Speed
    Manual cloning Copy-paste pixels from nearby area Simple, flat backgrounds Slow (manual)
    Reverse alpha blending Solve mathematical equation to recover originals Semi-transparent known watermarks Fast (automated)
    Cropping Cut off the watermark area Edge-positioned watermarks Instant
    AI inpainting Neural network generates replacement content Complex backgrounds, textures Fast (GPU-assisted)

    Traditional Logic: Solving the Alpha Compositing Equation

    Traditional tools often rely on Reverse Alpha Blending to bring back the original pixels. Think of it as a math problem. The software assumes the image follows a specific formula: Watermarked = alpha * Logo + (1 - alpha) * Original. If the tool can figure out the transparency (alpha) and the colors of the logo, it can calculate what the “Original” pixels were.

    Visual breakdown of the Alpha Compositing equation

    As seen in the Gemini Watermark Remover project, this works well for semi-transparent logos where the properties are known. But if the math is even slightly off, you are left with a “ghost” image or a blurry patch. Other old-school tactics include “Cloning” — literally stamp-copying pixels from one spot to another — or simply “Cropping” the edges of the photo to cut the watermark out entirely.

    AI Logic: Contextual Awareness via Deep Learning

    AI-driven removal uses AI Inpainting to build entirely new pixels. Instead of just moving existing data around, AI models study patterns, lighting, and textures to “hallucinate” a realistic background. Tools like Pixelbin use these deep learning models to detect and remove marks automatically, so you do not have to do it by hand.

    By 2026, this technology has moved to edge computing and high-speed cloud connections. This allows complex neural networks to clean up high-resolution media almost instantly. Unlike a simple blur, AI inpainting keeps the original grain and detail of the shot, making the fix nearly impossible to spot.

    The Technical Deep-Dive: Generative Adversarial Networks (GANs) and Diffusion Models

    In 2026, the tech battle between watermark creators and removers is fought using two main types of AI architecture: GANs and Diffusion Models.

    GANs and Discriminator Architectures

    Generative Adversarial Networks (GANs) work like a competition between two AI models. One (the encoder) tries to rebuild the missing background, while the other (the discriminator) tries to catch the mistake by comparing it to a real image. This “argument” between the two forces the AI to create incredibly realistic textures. As Side-Line points out, GANs are a staple in modern “encoder-decoder” setups, helping to hide or remove identifiers with minimal impact on how the image looks.

    GAN architecture: the adversarial logic of generator vs. discriminator

    Diffusion Models: The 2026 Gold Standard

    Diffusion Models are now the go-to for high-quality reconstruction. They work by “denoising” an image. Since a watermark is essentially a structured pattern that does not belong in a “natural” image, the model treats the watermark as noise and cleans it away.

    Research from NeurIPS Researchers shows that even invisible watermarks can be removed using these models without ruining the image quality. To check the results, experts look at PSNR and SSIM metrics. A top-tier AI restoration, like those using the ROBIN Framework, can hit an SSIM score of 0.98. At that level, the output is basically identical to the original, non-watermarked file.

    AI Architecture Strength Quality Metric Limitation
    GANs Fast, realistic textures Good PSNR Can create artifacts in complex scenes
    Diffusion Models Highest fidelity SSIM up to 0.98 Slower processing
    Hybrid (GAN + Diffusion) Balanced speed and quality PSNR + SSIM Requires more compute

    Is Removal Truly Lossless? Understanding Reverse Alpha Blending

    Marketing teams love the word “lossless,” but the reality is more nuanced.

    Reverse Alpha Blending is mathematically lossless, but only if you have the exact mask and alpha values. Older methods using Discrete Cosine Transform (DCT) often struggle when an image is compressed. Because DCT marks follow fixed math rules, they are easy targets for removal attacks that know exactly how those rules work.

    AI “hallucination” is not technically lossless because it is creating new pixels rather than finding the old ones. However, in the 2026 landscape — where 85% of pro video suites use generative fill according to the Global Digital Media Institute — the results are considered “perceptually lossless.” Thanks to 6G speeds, we can now process 8K media without the messy compression artifacts that used to ruin these edits.

    The 2026 Arms Race: C2PA Standard and Watermark Forgery

    As removal tools get better, the industry is fighting back with new standards, though new risks like WMCopier have also appeared.

    • WMCopier and Forgery: Research from Zhejiang University (2025) highlighted WMCopier, a tool that can “strip” a watermark from one image and “paste” it onto another. This makes it easy to forge ownership, making illicit content look like it came from a legitimate source.
    • C2PA Standard: To stop this, the C2PA Standard was created. It pairs watermarks with cryptographically signed metadata. Even if an AI removes the visual logo, a hardware-level signature stays in the file’s data to prove where it came from.
    • Fidelity-Robustness Trade-off: This is the big challenge. If you make a watermark too strong (robustness), it starts to look ugly (low fidelity). Modern defenses like Adversarial Robustness Testing (ROBIN) now train watermarks specifically to survive the “regeneration attacks” used by diffusion models.

    Core comparison: Fidelity vs. Robustness trade-off

    Conclusion

    Watermark removal has come a long way from basic pixel-copying to advanced neural reconstruction. While math-based methods like Reverse Alpha Blending still have a place for simple overlays, AI Generative Inpainting is the only real choice for the complex, high-res media of 2026. We are now in an era of the “Fidelity-Robustness Trade-off,” where the goal is to make markers invisible to people but obvious to forensic software. For pros, tools like Pixelbin are essential for speed, but it is always wise to check outputs against C2PA standards to stay ethical and prove your content is the real deal.

    FAQ

    Does removing a watermark with AI affect the final image resolution?

    Modern AI algorithms in 2026 maintain the native resolution of the image. By using super-resolution upscaling and contextual inpainting, tools like Pixelbin fill the watermark gap without changing the pixel dimensions. Unlike traditional cropping, which reduces the frame size, AI reconstruction ensures the final output remains high-definition or 8K.

    Can AI remove invisible forensic watermarks like SynthID?

    While AI can easily remove visible layers, forensic markers like Google’s SynthID are embedded deep within the pixel distribution. Diffusion-based “regeneration attacks” can attenuate these signals, but they are often difficult to strip entirely without degrading image quality. Furthermore, C2PA-compliant metadata provides a secondary layer of protection that persists even if the visual pixels are altered.

    What is the fidelity-robustness trade-off in digital watermarking?

    The fidelity-robustness trade-off is the balance between making a watermark invisible to the human eye (fidelity) and making it difficult to remove (robustness). AI has disrupted this balance; traditional frequency-domain marks are now easily detected and removed by neural networks, forcing developers to use adversarial training to hide watermarks in regions that AI models are less likely to modify.

  • How to Convert and Compress Photos Format: 2026 Guide to Faster Web Performance

    How to Convert and Compress Photos Format: 2026 Guide to Faster Web Performance

    To convert and compress photos format in 2026, use browser-native tools like PixConvert or professional software like Adobe Photoshop. Simply upload your images, select a next-gen format such as AVIF or WebP, and set the quality slider to 70-80%. This process shrinks file sizes to meet Core Web Vitals standards while keeping your visuals sharp for professional use.

    How to Convert and Compress Photos Format: The 3-Step Workflow

    Optimizing digital images is all about finding the “sweet spot” between a small file size and a clear picture. It is a business necessity, too: according to Salsify 2025, 42% of shoppers will walk away from a purchase if product images are missing or low-quality.

    Step 1: Choosing Your Conversion Tool (Local vs. Online)

    First, decide where you want to process your files. If you are handling sensitive documents, local software like Adobe Photoshop or even Microsoft Paint keeps everything on your hard drive for maximum security. However, if you prefer the convenience of the web, tools like PixConvert and ToolPix now use WebAssembly technology. This means they process images directly in your browser’s RAM — your photos are never actually uploaded to a cloud server.

    Tool Type Examples Privacy Level Speed
    Desktop software Adobe Photoshop, MS Paint Highest (offline) Moderate
    WASM browser tools PixConvert, ToolPix High (local RAM) Fast
    Cloud-based Various online converters Lower (server upload) Fastest

    Step 2: Selecting Lossy vs. Lossless Compression

    Understanding the difference between these two methods helps you maintain professional standards:

    • Lossy Compression: This strips away pixel data that the human eye cannot really see. It results in much smaller files and is the standard for JPEG/JPG and next-gen formats.
    • Lossless Compression: This shrinks the file without removing any data at all. It is the best choice for logos or images you plan to edit again later.
    • The 70-80% Rule: For most websites, setting your quality between 70% and 80% is ideal. If you drop below 60%, you will likely start seeing “artifacts” — those ugly blurs or grainy patches in the image.

    A simple comparison of Lossy vs. Lossless compression

    Why WebP and AVIF are Essential for 2026 SEO

    By 2026, search engine rankings are tied closely to how users experience your site. Google’s Core Web Vitals (LCP) require your main content to load within 2.5 seconds. Since heavy images are usually what slow a page down, switching to next-gen formats is one of the fastest ways to hit that speed target.

    AVIF has become the top choice in 2026. It compresses files much better than WebP or the old-school JPEG. While WebP is still a great upgrade, AVIF can often shave off an extra 20-30% in file size without making the photo look worse.

    Format Compression vs JPEG Browser Support (2026) Transparency Best Use
    JPEG Baseline 100% No Universal compatibility
    WebP 25-35% smaller 97%+ Yes General web optimization
    AVIF 50-70% smaller 93%+ Yes Maximum compression for modern sites
    PNG Larger than JPEG 100% Yes Logos, text graphics

    The payoff for these technical tweaks is real. Illustrate Digital’s 2023 Global Page Speed Report found that a B2B site loading in one second has a conversion rate five times higher than a site taking 10 seconds. Today, almost every browser supports AVIF and WebP, though WordPress users might still want a plugin like Imagify to handle “fallbacks” for very old browser versions.

    A simple visualization of AVIF vs. JPEG file size efficiency

    Batch Processing: Converting Thousands of Images Simultaneously

    If you are an e-commerce manager or a photographer, you do not have time to click through images one by one. Modern tools now use your computer’s CPU and GPU to handle heavy workloads fast.

    Data from HitPaw shows that professional converters can batch process 200-333 images per minute. This means you can optimize a library of over 1,000 photos in less than five minutes. For webmasters, the Imagify plugin automates this by optimizing images the moment you upload them to your media library, letting the server do the heavy lifting in the background.

    Batch Processing Performance:

    Tool Images per Minute Input Formats Output Formats
    Adobe Photoshop (Batch) 50-100 All major All major
    HitPaw Image Converter 200-333 JPG, PNG, WebP, AVIF JPG, PNG, WebP, AVIF
    Imagify (WordPress) Auto on upload JPG, PNG WebP, AVIF
    Microsoft PowerToys 100+ JPG, PNG JPG, PNG

    Professional Tools: Adobe Photoshop vs. WebAssembly Solutions

    Your workflow usually comes down to a choice between heavy-duty desktop software and fast, privacy-focused web tools.

    Adobe Photoshop remains the gold standard for total control. By using the “Export As” function, you can tweak the DPI (Dots Per Inch) — standardized at 72 DPI for web and 300 DPI for print — and watch the estimated file size change in real-time as you move the quality slider.

    On the other hand, WebAssembly tools like PixConvert offer speed without the monthly subscription. Many of these tools include a “Target File Size” feature: you tell the tool you need a 50KB file, and its engine automatically figures out the best dimensions and quality to get you there.

    Target Size Cheat Sheet: Amazon, Shopify, and Government Portals

    Platform Recommended Format Size Constraint Key Action
    Shopify / Amazon WebP / AVIF Under 200 KB Prioritize LCP speed
    Gov Portals (e.g., SSC/UPSC) JPG 20 KB — 50 KB Use “Target Size” tool
    Professional Print TIFF / JPG 300 DPI Disable lossy compression
    Social Media WebP / AVIF Platform-specific Use batch converter

    Conclusion

    Switching to next-gen formats like AVIF while keeping a sensible compression ratio is the best move for both SEO and user experience in 2026. Moving away from old JPEGs helps you satisfy Google’s Core Web Vitals and hit that 2.5-second loading goal. To get started, check your current site speed, then use a batch processor or a WebAssembly tool to convert your library to AVIF at 75% quality. This simple change can go a long way in keeping visitors on your site and boosting your conversions.

    FAQ

    What is the best compression level to maintain image quality?

    For most web images, 70-80% is the “sweet spot.” This range reduces file size significantly while keeping visual artifacts invisible to the human eye. If you go below 60%, you will likely see banding or noise. When using AVIF, you can often drop to 50-60% and still achieve better visual results than a high-quality JPG.

    How can I compress a photo to a specific size, like 50KB?

    You should use a tool with a “Target File Size” feature, such as IMG Size Reducer. These tools use binary search logic to automatically adjust the quality slider until the file meets your exact KB requirement. If the quality becomes too poor at 50KB, try reducing the pixel dimensions (width and height) before applying further compression.

    Are online image compressors safe for private documents?

    Standard cloud-based tools that upload your files to a server may pose a privacy risk. For sensitive data, look for “Client-Side” or WebAssembly-powered tools like PixConvert or ToolPix, which process images locally in your browser RAM. Alternatively, use local software like Adobe Photoshop or Microsoft Paint to ensure your files never leave your device.

  • How to Compress Image Size in KB and MB: 2026 Guide to Fast and Lossless Optimization

    How to Compress Image Size in KB and MB: 2026 Guide to Fast and Lossless Optimization

    As of May 2026, the quickest way to compress image size in KB and MB is by using WASM-based online tools like ImResizer or pdfFiller. These platforms process your files directly in your browser, which keeps your data private and secure. Simply upload your JPG or PNG, enter your target size (like 50KB), and download the result. For large batches of photos, offline software remains the best choice for maintaining consistent quality.

    Quick Steps: How to Compress Image Size in KB and MB for Instant Uploads

    If you need to shrink a file from several megabytes down to a few kilobytes, you need a tool with “target-size” settings. Most modern web compressors now use WebAssembly (WASM) technology. This means the actual compression happens on your own computer rather than a distant server, making the process both faster and safer.

    The Standard Compression Workflow

    1. Pick Your Tool: Use a platform like ImResizer or pdfFiller that lets you set specific KB or MB goals.
    2. Upload and Set Limits: Select your JPG / JPEG or PNG file. Keep in mind the standard conversion: 1 MB = 1024 KB, as noted by SmartToolsWala. If you have a 2MB file but the upload limit is 100KB, set that as your target.
    3. Process and Download: Hit the “Target Size” button. The algorithm will automatically tweak the quality and dimensions to meet your exact limit.

    3-step visualization of the compression process

    The “Final Inch” Checklist: Why Your File is Still 1KB Over

    Government websites and exam portals are often very strict, usually requiring files between 20KB and 200KB. If your image is still just over the limit, check for hidden metadata. Removing thumbnails and preview data can often shave off those last few bytes you need to hit a 50KB or 100KB threshold.

    Common File Size Targets:

    Use Case Typical Limit Strategy
    Government form (e.g., SSC/UPSC) 20-50 KB Target-size tool + strip EXIF
    Visa / passport photo 50-100 KB 96 DPI + aggressive lossy compression
    Email attachment (per image) Under 1 MB 80% JPEG quality
    Web hero image Under 200 KB WebP/AVIF at 75%

    Online vs Offline Tools: Which Should You Choose in 2026?

    Deciding between a browser tool and desktop software depends on how many photos you have and how much privacy you need. In 2026, browser-based tools are almost as fast as desktop ones because they process files locally.

    Online Tools for Speed and Accessibility

    Sites like pdfFiller, which has over 12,500 verified reviews, are great for quick, one-off jobs. Many of these tools now respect GPC (Global Privacy Control) signals, so your session is not tracked. They are the go-to option if you are on a phone or a public computer and need to fix a JPG / JPEG for a visa form or job application.

    Offline Software for Batch Processing and Privacy

    If you are a professional dealing with thousands of images, offline software like Batch Picture Resizer is a better bet. It uses your computer’s full processing power to finish bulk tasks in minutes. Because it works without an internet connection, it is the safest way to handle sensitive company files.

    Tool Type Speed Privacy Batch Support Best For
    WASM browser tools Fast Local processing Limited Quick single-file edits
    Server-side tools Fastest Files uploaded to server Yes Large batches, non-sensitive
    Offline software Moderate Full offline Yes Sensitive files, bulk work

    How to Maintain Image Quality and Resolution During Compression

    Keeping your Image Quality / Resolution sharp while shrinking the file size is all about choosing the right method: Lossy or Lossless.

    Lossy (JPG) vs. Lossless (PNG)

    • JPG / JPEG: This uses “lossy” compression. It throws away data that the human eye cannot really see to make the file much smaller. It is perfect for standard photos.
    • PNG: This uses “lossless” compression, meaning it keeps every bit of original data. The image stays perfectly clear, but the file size will be much larger than a JPG.

    Simple visual comparison of JPG vs PNG file size and clarity

    Format Compression Typical Size (1080px photo) Transparency Best For
    JPEG Lossy 150-300 KB No Photos, web
    PNG Lossless 1-3 MB Yes Logos, screenshots
    WebP Both 100-200 KB Yes Web optimization
    AVIF Both 80-150 KB Yes Next-gen web

    The 2026 Shift: Adopting WebP

    By 2026, WebP has become the new standard. ImResizer reports that WebP can make files 30% smaller than JPEGs without losing visual quality. Most browsers and websites now accept this format without any issues.

    The “Upscaling” Myth

    It is a technical reality that you cannot really turn a tiny KB file back into a high-quality MB file. As ImResizer points out, while tools can “inflate” a file size by adding empty data, they cannot bring back lost detail. Always keep your original high-resolution photos safe before you start compressing.

    Advanced Tactics: Stripping EXIF Data to Save Extra Space

    Images often hide “extra” info called EXIF Data, which includes things like camera settings, GPS location, and the date the photo was taken. This can add 5KB to 50KB to your file size.

    Tools like the EclixTech Photo Compressor give you the option to strip this data. Removing it helps with two things:

    1. Privacy: No one can see exactly where or when you took the photo.
    2. Size Limits: If you are struggling to meet a tiny 20KB limit for a government form, cutting 10KB of metadata can make the difference.

    EXIF Data Size Breakdown:

    Data Type Typical Size Privacy Risk
    GPS coordinates 2-5 KB High — reveals exact location
    Camera model + settings 1-3 KB Low
    Date and time 0.5-1 KB Medium
    Thumbnail preview 5-20 KB Low (but adds to file size)

    Conclusion

    To successfully compress image size in KB and MB, you just need to pick the right format (like WebP or JPG) and the right tool for the job. For a quick government upload or a social media post, WASM-based tools like ImResizer or pdfFiller are fast, secure, and do not require an account. If you are a professional photographer or a business owner who needs to process huge batches of files, investing in offline software is the best way to keep your quality standards high.

    FAQ

    Is it safe to upload my private photos to online compressors?

    Most reputable tools now use SSL encryption to protect data during transfer. Furthermore, a major 2026 update in web technology means many top-tier tools now use WASM (WebAssembly) for local browser processing. This means your photo is processed on your own device and never actually reaches a remote server, providing maximum privacy.

    Can I increase an image size back to MB after compressing it to KB?

    Technically, you can increase the file size by adding “padding” data or upscaling the dimensions, but you cannot restore the visual detail lost during the initial compression. To avoid blurry results, always perform your edits on the original high-resolution file rather than trying to upscale a previously compressed version.

    What is the difference between lossy and lossless image compression?

    Lossy compression (used in JPG files) removes certain bits of data to shrink the file size significantly, which may lead to a slight loss in quality. Lossless compression (used in PNG and some WebP files) keeps all original data intact, ensuring the image looks exactly like the original, though the resulting file size will be larger than a lossy version.

  • How to Compress Photos and Save Space – The 2026 Ultimate Guide to Storage Optimization

    How to Compress Photos and Save Space – The 2026 Ultimate Guide to Storage Optimization

    Compressing photos to save space in 2026 starts with built-in settings like iPhone’s HEIC format or Google Photos’ Storage Saver. For maximum efficiency, use AI-powered tools to convert images to WebP or AVIF, applying lossy compression at 75-85% quality to reduce file sizes by up to 80% while maintaining visual clarity.

    Quick Wins: How to Compress Photos and Save Space on Any Device

    Shrinking your digital library begins with changing how devices capture and store files. According to Business.com, modern compression tools can cut standard JPEG sizes by 40-60% without visible quality loss. A few system-level settings stop storage bloat before it starts.

    Mobile: Enabling High Efficiency Formats

    iPhone (HEIC):
    1. Open Settings > Camera > Formats
    2. Select High Efficiency
    3. New photos save as HEIC automatically

    As Popular Outdoor Sports notes, HEIC files are approximately 50% smaller than traditional JPEGs at equivalent visual quality.

    Android (Google Photos Storage Saver):
    1. Open Google Photos app settings
    2. Enable Storage Saver
    3. Google auto-compresses uploads to a “High Quality” level

    Check your Android camera app’s “Advanced Picture Options” for a high-efficiency format toggle.

    Desktop: Quick Resizing without Extra Apps

    OS Tool Steps
    Windows Microsoft Paint Open image, click “Resize,” lower percentage or pixels, save as JPEG
    macOS Preview app Open photo, go to Tools > Adjust Size, scale down, then File > Export with quality slider

    A simple side-by-side comparison of file size reduction (e.g., JPEG vs HEIC).

    Smart Storage Cleanup: Downgrade Your Cloud Subscription Tier

    Cleaning up your current library can reduce a 2TB cloud plan to a much cheaper 200GB tier. The strategy focuses on finding “bloat” photos — screenshots, accidental burst shots, and duplicates.

    Quick cleanup process:

    Step Action Tool
    1. Find junk Identify blurry shots, large videos Google Photos / iCloud “Review and Delete”
    2. Delete bloat Remove screenshots, duplicates Built-in cleanup tools
    3. Batch compress Compress remaining library Ashampoo Image Compressor
    4. Verify savings Check total storage used Cloud dashboard

    Alice at Popular Outdoor Sports notes that managing bulky files is becoming a necessity as cloud storage costs rise. Ashampoo Image Compressor supports drag-and-drop batch processing of thousands of images, cutting total size by up to 80%.

    Lossy vs. Lossless: Which Compression Method Should You Choose?

    Method How It Works Size Savings Best For
    Lossy Removes data invisible to the human eye 50-80% Social media, cloud backups, JPEG, HEIC
    Lossless Preserves every pixel, removes redundancy 20-40% Logos, text graphics, PNG, TIFF, archival

    PDFFlare reports that lossy settings can save 50-80% of storage space while maintaining acceptable visual quality for social media and cloud backups.

    Quality directly affects business outcomes. Salsify’s 2025 Consumer Research Report found that 42% of shoppers abandon a purchase if images are missing or look low-quality. In 2026, WebP and AVIF offer significantly better compression-to-quality ratios than JPEG.

    2026 format comparison:

    Format Compression Efficiency Visual Quality Use Case
    JPEG Baseline Good Universal compatibility
    HEIC ~50% smaller than JPEG Equivalent to JPEG Apple ecosystem
    WebP 25-30% smaller than JPEG Better than JPEG Web performance
    AVIF 30-50% smaller than JPEG Best in class Modern web, maximum savings

    AI-Enhanced Compression: The 2026 Tech Revolution

    The key shift in 2026 is Visual Saliency AI. Unlike traditional algorithms that compress the entire image uniformly, AI tools identify the most important parts — faces, foreground subjects — and keep those areas sharp while aggressively compressing backgrounds where artifacts are less noticeable.

    AI "Visual Saliency" concept: focus on subject vs background compression.

    AI compression tool landscape (2026):

    Tool Type Key Feature
    Adobe Photoshop Professional Neural filters for precision web optimization
    Ashampoo Image Compressor Consumer/batch Processes huge DSLR photos (50-75MB each) into compact files

    AI compression can shrink 50-75MB DSLR photos to a fraction of their original size while preserving “hero” elements — the subject, key details, and visual impact of the shot.

    Compressing for Specific Needs: Web, Email, and Forms

    Different platforms require different compression strategies:

    Web SEO

    To meet Google’s Core Web Vitals (LCP) standards, images must load fast. Illustrate Digital reports that a one-second load time on B2B sites leads to conversion rates five times higher than sites taking 10 seconds.

    Target Recommended Setting
    Hero images Under 200KB, WebP or AVIF
    Thumbnails Under 30KB
    Quality 75-85%

    Government Forms

    Official sites impose strict limits. IRCC Canada guidelines require files under 2MB, recommending scan resolution at 96 DPI.

    Email Attachments

    Keep quality at 70-80% to maintain individual images under 1MB, staying well within the common 25MB attachment limit.

    Use Case Quality DPI Max File Size
    Web SEO 75-85% 72 Under 200KB (hero)
    Government forms 80% 96 Under 2MB
    Email 70-80% 72 Under 1MB per image

    Conclusion

    Compressing photos no longer requires choosing between quality and size. Modern formats like HEIC and AI-based tools deliver both. By switching to WebP and AVIF, you can cut storage needs by up to 80% without losing visual detail. Start by enabling “High Efficiency” in your phone’s camera settings, then use an AI batch compressor to audit your cloud storage. These small changes save money on monthly subscriptions and ensure room for new photos.

    FAQ

    Does compressing a photo reduce its print quality?

    Yes, when using aggressive lossy compression. For physical prints, maintain a high resolution — at least 300 DPI. Use lossless compression or high-quality JPEG settings (90%+) to ensure the printed image remains sharp and free of pixelation artifacts.

    How do I batch compress multiple photos on a Mac?

    Use the native Quick Actions feature in Finder:
    1. Select all photos to compress
    2. Right-click and navigate to Quick Actions > Convert Image
    3. Choose “Small” or “Medium” size
    4. Select your preferred format

    This saves significant space instantly without opening a separate application.

    What is the difference between HEIC and JPEG for storage?

    HEIC (High Efficiency Image Format) uses HEVC encoding to produce files roughly 50% smaller than JPEGs at the same visual quality. JPEG offers broader compatibility with older software, while HEIC is the preferred standard for modern Apple and Android ecosystems to maximize storage efficiency.

  • How to Compress and Resize Images for Web and Social Media (2026 Guide)

    How to Compress and Resize Images for Web and Social Media (2026 Guide)

    Compressing and resizing images effectively in 2026 requires tools like Adobe Photoshop, Microsoft PowerToys, or browser-based platforms like Imgresizer.io. Adjust pixel dimensions for your target platform and set JPEG quality to 70-80%, or switch to AVIF format to reduce file weight without losing visual clarity.

    Mastering the Balance: How to Compress and Resize Images Without Quality Loss

    Optimizing visuals for the web is a two-step process: adjust physical dimensions (resizing), then reduce data density (compression). According to Business.com, standard JPEG compression typically cuts file size by 40-60%, striking a balance between professional quality and lightweight files.

    Step 1: Adjusting Pixel Dimensions (Resizing)

    Resizing changes the total pixel count to match where the image will be displayed. If your website hero banner is 1200px wide, uploading a 4000px original wastes bandwidth.

    Always lock the Aspect Ratio. Without it, images appear stretched or squashed. Tools like EverydayTools let you set the width while automatically calculating the height to maintain proper proportions.

    A simple visual metaphor for aspect ratio: a frame maintaining its proportions vs. one that is distorted.

    Step 2: Applying Compression Algorithms

    Once dimensions are set, compression reduces file size further.

    Compression Type How It Works File Size Impact Best For
    Lossy (JPEG 70-80%) Strips high-frequency data invisible to the eye 50-70% smaller Web, social media
    Lossless (PNG, WebP lossless) Removes redundancy without data loss 20-40% smaller Logos, text graphics, archival

    In 2026, the standard JPEG / JPG quality setting is 70-80%. This removes fine details the human eye cannot distinguish without creating visible artifacts.

    Why Image Optimization is Critical for Core Web Vitals (LCP)

    Image optimization is a basic SEO requirement in 2026. Google’s Core Web Vitals use Largest Contentful Paint (LCP) to measure how quickly the largest visual element (typically a hero image) loads. Large, unoptimized images are the primary cause of slow LCP scores, which directly hurt search rankings.

    The business impact is measurable:

    Load Time Conversion Impact Source
    1 second 5x higher conversion than 10s sites Illustrate Digital
    3+ seconds 53% of mobile users abandon Industry benchmark
    10 seconds Lowest conversion rates Illustrate Digital

    A 2026 report from the Baymard Institute found that 62% of e-commerce sites still struggle with slow visuals, leading to frustrated users and high bounce rates.

    A minimalist comparison showing the direct correlation between page load speed and conversion rates.

    AVIF vs. WebP: Which Format Should You Choose in 2026?

    Format Efficiency vs. JPEG Detail Preservation Browser Support (2026)
    WebP 25-30% smaller Good Broad
    AVIF 30-50% smaller Better (high-detail areas) Growing, modern browsers
    JPEG Baseline Standard Universal

    AVIF has become the preferred next-gen format for SEO in 2026. It is approximately 25-30% more efficient than WebP and preserves high-detail areas more effectively. The recommended approach is a “fallback” system: serve AVIF when supported, fall back to WebP or JPEG for older browsers.

    Best Tools to Compress and Resize Images: From Pro to Privacy-First

    Quality directly affects revenue. Salsify’s 2025 Consumer Research Report found that 42% of shoppers abandon a purchase if product images are missing or look low-quality.

    Offline and Bulk Processing for Windows/Mac

    Tool Platform Key Feature Best For
    Adobe Photoshop Win/Mac Color profiles, batch exports, full control Professional work
    Microsoft PowerToys Windows Right-click resize in File Explorer, bulk presets Fast batch processing

    Microsoft PowerToys adds a shortcut to File Explorer for right-click bulk resizing of hundreds of images using “Fit,” “Fill,” or “Stretch” presets.

    Zero-Upload Web Tools for Maximum Privacy

    For sensitive client assets, privacy is paramount. Tools like Imgresizer.io and EverydayTools use the HTML Canvas API, processing images entirely inside your browser’s memory. Since nothing is uploaded to a server, these “Zero-Upload” tools are the safest option for compression and format conversion.

    Automation and AI: Using MCP and Code for Image Processing

    Image optimization is moving toward automation. Developers can build custom resizers using HTML Canvas and JavaScript:

    Method API Call Use Case
    Draw to canvas drawImage() at specific sizes Resizing
    Export as data URL toDataURL() Quick format conversion
    Export as blob toBlob() Quality-controlled file export

    The AI Workflow: Resizing via Chat Prompts

    A major 2026 trend is the Model Context Protocol (MCP). As noted by Iteration Layer, MCP lets AI assistants like Claude or Cursor connect directly to image tools. Instead of opening a separate app, you can instruct the AI: “Resize this PNG to 800×600, convert it to WebP, and keep it under 200KB.” The AI handles the math and conversion without leaving your code editor.

    A simple 3-step AI-driven workflow: User Prompt -> AI Processing -> Optimized Image.

    Conclusion

    Image optimization is a two-part job: resizing dimensions and compressing data. In 2026, using next-gen formats like AVIF and local-processing tools is the best approach for both privacy and SEO. Check your site’s LCP on PageSpeed Insights, then use a bulk tool like Microsoft PowerToys or an AI-driven MCP workflow to replace heavy JPEGs with lean, fast AVIF files.

    FAQ

    How can I resize an image without uploading it to a server for privacy?

    Use browser-based tools that utilize the HTML Canvas API, such as Imgresizer.io. These tools process images locally in your browser’s memory — the file never leaves your device. Alternatively, use offline software like Microsoft PowerToys or Adobe Photoshop to handle all processing on your local hard drive.

    What is the difference between Lossy and Lossless compression for JPEGs?

    Lossy compression permanently removes subtle data to reduce file size significantly. A 75% quality setting is the “sweet spot” for web performance. Lossless compression reduces size without removing any data, allowing full restoration to the original state. Lossless is better for professional archiving but results in larger files.

    What are the recommended dimensions for social media in 2026?

    Platform Content Type Dimensions Notes
    Instagram Square posts 1080x1080px Standard feed
    Instagram Portrait posts 1080x1350px Maximum engagement
    Facebook Cover photos 820x312px Desktop and mobile
    LinkedIn Company pages 1128x191px Banner format

    For high-DPI or Retina displays, export at 2x these dimensions (e.g., 2160x2160px for Instagram square) to ensure sharpness on modern mobile screens.

  • How to Change Photos Size Fast – 2026 Guide for Web, iOS, and Android

    How to Change Photos Size Fast – 2026 Guide for Web, iOS, and Android

    Changing photos size in 2026 is fastest with free web-based tools like BIRME or Img2Go for bulk processing, or native tools like the updated iOS “Preview” and Android “Google Photos.” Upload your image, set target pixels or percentage, lock the aspect ratio, and download the optimized file.

    Quick Ways to Change Photos Size Without Quality Loss

    When you need to change photos size, first decide between Pixels vs. Percentage:

    Method Best For Example
    Resize by pixels Exact dimensions for web forms, social headers Set width to 1080px
    Scale by percentage Quick proportional shrinking of large files Reduce to 50%

    Standard 4-step resizing process:

    Step Action Detail
    1. Upload Select source file JPG, PNG, WebP, or AVIF
    2. Define Constraints Enter width/height or scale Lock aspect ratio
    3. Format Selection Choose output format WebP for better compression
    4. Download Save optimized file Check file size meets target

    Simple 4-step resizing workflow

    BIRME recommends an 80% quality balance as the “golden rule” for web optimization. This setting cuts file size significantly while maintaining visual quality that helps pages load faster on mobile devices.

    Why Maintaining Aspect Ratio is Non-Negotiable

    Locking the Aspect Ratio ensures width and height adjust proportionally. Without this lock, images appear “squashed” or stretched. Modern tools like Toolnox include an aspect ratio lock by default.

    How to Batch Resize Multiple Images Efficiently

    Batch Resize / Bulk Resizing tools handle large volumes efficiently. BIRME serves over 50,000 monthly users (2026) and processes hundreds of images at once with a single rule set — essential for online stores and professional portfolios.

    Compression alongside resizing manages File Size (KB/MB) effectively. In a 2026 case study, users of Photo and Picture Resizer achieved a 90% file size reduction, shrinking 4MB high-res photos to approximately 400KB — well under the 5MB attachment limits of most email services.

    Metric Before After
    File size 4MB ~400KB
    Reduction 90%
    Email-compatible No (over 5MB combined) Yes

    File size reduction comparison: 4MB vs 400KB

    Native 2026 Methods: Resizing on iOS and Android

    Mobile devices now handle resizing without extra apps:

    iOS 2026 Updates:
    – The iOS Preview app (built into Files) supports direct resizing
    – Select an image in Files, tap “Quick Actions,” and pick dimensions
    – No need to email photos to yourself to trigger size prompts

    Android 2026 Updates:
    Google Photos uses AI for image size management
    – “AI Enhance” and “Auto Frame” help recompose shots
    – Always choose “Save as copy” to preserve originals

    Manage your EXIF Data carefully. Apps like Image Size — Photo Resizer let you keep or remove metadata like GPS location and camera settings to protect your privacy.

    Does Google Photos Preserve Quality?

    Google Photos uses smart compression to maintain visual quality. Key behavior:

    • Save overwrites the original file
    • Save as copy creates a new file alongside the original
    • The “AI Enhance” feature (US availability, 2026) suggests multiple resized versions so you can pick the clearest one

    2026 Image Dimension Cheat Sheet for Social and E-Commerce

    Platform Content Type Dimensions Aspect Ratio
    Amazon/eBay Product photos 2000x2000px 1:1 (square)
    Instagram Feed posts 1080x1080px 1:1 (square)
    Instagram Portrait posts 1080x1350px 4:5
    TikTok/Instagram Reels 1080x1920px 9:16 (vertical)
    Facebook Cover photo 820x312px 205:78
    LinkedIn Company page 1128x191px ~6:1
    YouTube Banner 2048x1152px 16:9

    Smart Cropping / Auto Focal Point technology uses “smartcrop” libraries to identify the most important parts of a photo — faces, textures, key subjects — and keeps them centered while trimming less important edges.

    AI Upscaling vs. Traditional Resizing: When to Use What

    Method Direction Quality Use Case
    Traditional resizing Downscale only High Web optimization, thumbnails
    Traditional resizing Upscale Low (pixelated) Avoid
    AI Super-resolution Upscale High (generative fill) Enlarging small images
    AI Uncrop/Generative Fill Expand borders High (invented data) Changing aspect ratio, extending scenes

    Standard resizing cannot create new image data — it only stretches existing pixels, producing “interpolation artifacts.” The 2026 industry standard for enlarging images is Generative Fill and AI Uncrop, which fill in new data to expand borders or boost resolution.

    The BIRME Developer advises using an AI “superpixel” tool when photos look blurry after enlargement. Tools like Airbrush can transform a portrait into a wide landscape by generating a realistic matching background.

    Visualizing AI generative fill vs pixel stretching

    Conclusion

    Changing photo size in 2026 comes down to three principles: maintaining the correct aspect ratio, using modern formats like WebP or AVIF, and picking the right tool for your device. Whether using iOS Preview features, Google Photos AI tools, or bulk web processors like BIRME, the goal is lighter files without sacrificing visual quality.

    For web developers, the 80% quality rule keeps sites fast. For mobile users, 2026 native updates make space-saving possible without extra apps. By matching dimensions to current platform standards, content stays sharp and professional on every screen.

    FAQ

    How do I resize photos on iPhone without installing a third-party app?

    In 2026, use the built-in Files app. Open the app, find your image, long-press it, and select “Quick Actions,” then “Resize.” Choose from Small, Medium, or Large presets, or enter custom pixel dimensions. The Shortcuts app also supports creating an automated resizing tool for your entire Photos library.

    What is the recommended image quality (JPG/WebP) for fast website loading?

    For most websites, 80% quality offers the best balance between visual fidelity and file size. Use WebP or AVIF formats for better compression ratios. Target under 200KB for large hero images and under 30KB for small thumbnails to keep your site fast and mobile-friendly.

    Why do my photos look pixelated or blurry after I increase their size?

    Standard resizing cannot create new image data — it only stretches existing pixels, producing “interpolation artifacts.” This is most noticeable when enlarging beyond the original dimensions. To enlarge images without losing clarity, use AI Super-resolution or upscaling tools that employ generative AI to fill in missing details.

  • Best Change Image Size App Options for 2026: Resize Pixels and KB Instantly

    Best Change Image Size App Options for 2026: Resize Pixels and KB Instantly

    To change image size in 2026, the most reliable methods are using the “Image Size” app on iOS/Android for pixel-perfect adjustments or BIRME.net for bulk processing. Just upload your photo, set your new dimensions while keeping the aspect ratio locked, and save. For official document uploads, aim for 96-150 DPI to keep file sizes under 2MB.

    How to Use a Change Image Size App: The 3-Step Framework

    Choosing the right change image size app usually comes down to what device you are using and how many photos you have. If you are on your phone, dedicated apps like “Image Size — Photo Resizer” (iOS and Android) give you exact control over pixels, millimeters, or inches. If you are on a computer, browser-based tools like BIRME are often faster because they process images locally, which also keeps your data private.

    The process follows these three steps:

    1. Pick Your Tool: Use a mobile app for a quick single edit, or a web-based batch tool if you have dozens of photos to resize at once.
    2. Set Your Dimensions: Type in the width or height you need. Make sure the aspect ratio — often shown as a small chain link icon — is locked. This prevents your image from looking stretched or “squashed.”
    3. Choose the Format: Pick your output file type. JPEG, JPG, and PNG are still the standard go-tos, but WebP is becoming the favorite for websites because it makes files much smaller without losing quality.

    Simple 3-step process: Tool to Dimensions to Format

    The developer of BIRME points out that finding the right balance between clarity and file size is key. An 80% quality setting is usually the “sweet spot” for web use; you rarely need to go above 90% unless you need perfect high-fidelity prints.

    Maintaining Aspect Ratio to Prevent Distortion

    To keep your photos looking right, always lock the aspect ratio before you touch the dimensions. In the “Image Size” app, tapping the chain icon between the width and height boxes ensures that if you change one number, the other adjusts automatically. If you skip this, you might end up with distorted images — a frequent headache noted by the creator of BIRME when users upload “squeezed” photos to WordPress sites.

    The Decision Matrix: Resize Pixels vs. Compress KB/MB

    Knowing whether to change the physical dimensions (pixels) or the file weight (KB/MB) is important for meeting specific upload rules.

    Your Goal Action Example
    Fit social media layout Resize pixels Set Instagram post to 1080x1080px
    Meet email attachment limit Compress KB/MB Shrink 5MB photo to under 1MB
    Government portal upload Both combined 96 DPI + target 50KB JPG
    Website hero banner Resize + compress 1200px wide at 80% quality

    Side-by-side comparison: Dimension Resizing vs. File Compression

    Your Resolution (DPI) also affects the final file size. According to Canada IRCC, official document uploads often have a 2MB limit. They suggest scanning documents at a lower resolution, like 96 DPI or 150 DPI. This keeps the file small enough to upload while ensuring the text stays clear and readable.

    Why Batch Processing is Essential for Efficiency

    When you have hundreds of images to deal with, Batch Processing is a lifesaver. Tools like BIRME (which handles over 50,000 users a month according to BIRME.net) let you drop an entire folder of photos into your browser and apply the same settings to all of them at once.

    Modern batch tools now use Smart Cropping (or Auto Focal detection). This technology uses libraries like “smartcrop” to scan an image for important details like faces, lines, or curves. It identifies the “focal point” so that when the image is resized or cropped to a new shape, the most important part of the photo stays centered and does not get cut off.

    No-App Methods: Resizing on iOS 26 and Android Native Tools

    By 2026, you can often resize images without downloading a separate change image size app by using the tools already on your phone.

    Platform Native Method Steps
    iOS 26 Shortcuts app Create “Resize Image” shortcut in Share menu
    iOS (classic) Mail app trick Email photo to yourself, choose Small/Medium/Large
    Android Gallery + Google Photos Use built-in resize in share settings
    Windows Paint / Photos app Resize > Set percentage or pixels

    Android’s native Gallery and the iOS “Preview” tool also offer basic resizing. However, many people still prefer dedicated apps because native tools sometimes lack the ability to set a specific KB target or handle 50 photos at once.

    Next-Gen Formats: Support for WebP and AVIF

    The way we save images is changing. While JPEG, JPG, and PNG work everywhere, WebP and AVIF are the new standards for high performance.

    Format Compression Browser Support Best For
    JPEG Lossy, 80% quality standard Universal General photos
    PNG Lossless Universal Logos, transparency
    WebP Lossy/Lossless 97%+ browsers Web optimization
    AVIF Lossy, 50% smaller than JPEG 93%+ browsers Next-gen web delivery

    AVIF is particularly impressive, offering much smaller file sizes than JPEG while looking just as sharp. Most top-rated resizing apps in 2026 now let you convert old files into these next-gen formats to help websites load faster and save space on your phone.

    Conclusion

    The best change image size app for you depends on what you are trying to do: do you need exact pixel dimensions, bulk processing, or a tiny file for a document upload? For a quick edit on your phone, a dedicated tool like the “Image Size” app offers the best precision for pixels and aspect ratio. For professional web work or large batches, a tool like BIRME.net is the most efficient choice — it is fast, keeps your files private, and does not require uploading anything to a server. Just remember to start with your highest-quality original and keep your quality settings around 80% for the best results.

    FAQ

    Why do my photos look pixelated after resizing?

    Pixelation usually happens when you try to “upscale” a small image (making it bigger than it originally was). The software has to “guess” where to put new pixels, which creates a blurry or blocky look. According to BIRME, setting the quality too low — well below 80% — can also ruin the fine details. To avoid this, always try to start with the highest-resolution original file you have.

    Is it safe to use online image resizers for private photos?

    It is safe as long as you use “client-side” or “local” tools like BIRME. On these sites, your images never actually leave your computer; the resizing happens right inside your browser using JavaScript. You should avoid sites that force you to upload your files to a remote server, especially if you are handling IDs or sensitive documents.

    How can I resize an image on iPhone without downloading a third-party app?

    The easiest way is to use the “Mail” app: email the photo to yourself and choose a smaller size (Small, Medium, or Large) when the prompt appears. You can also use the “Shortcuts” app to build a custom “Resize Image” tool. Another quick trick is to use the “Print” preview — if you pinch out on the print preview screen, you can save that version as a new, often smaller, PDF or image.

  • How to Bulk Resize Photos and Videos in 2026: A Privacy-First Guide

    How to Bulk Resize Photos and Videos in 2026: A Privacy-First Guide

    To bulk resize photos and videos in 2026, the most efficient approach is to use browser-based tools like BIRME or FastTool for images, and local API platforms for video files. Upload your batch, set your dimensions while locking the Aspect Ratio, adjust Compression Quality to 80-90%, and download the optimized results as a ZIP file — all without your data ever leaving your device.

    The 2026 Standard for Bulk Resizing Photos and Videos

    By 2026, media processing has shifted toward a “local-first” approach. Instead of sending private files to a distant server, your computer does the work right inside the browser. This is powered by the Canvas API and HTML5 Canvas, which allow modern browsers to handle heavy image editing at speeds comparable to native software.

    The FastTool Engineering Team highlights a key rule for keeping images sharp: always downsample in one step. If you need to take a 2048px image down to 512px, doing it in a single step produces a cleaner result than resizing multiple times (e.g., 2048 to 1024 to 512), which often causes “ringing” or blurry artifacts.

    Comparison of single-step vs. multi-step resizing quality

    Step 1: Selecting Your Batch Processing Tool

    Your choice depends on how many files you have and how much you care about privacy.

    Scenario Recommended Tool Why
    Privacy-first, under 100 images BIRME or FastTool Browser-local, files never leave your device
    Large batches (hundreds of high-res files) ConvertFT Server-side C++ engines prevent browser freezes
    Mobile on-the-go editing Native iOS/Android tools No installation required

    Step 2: Defining Constraints to Maintain Aspect Ratio

    Nobody wants “squashed” or stretched photos. Always keep the Aspect Ratio locked. Most tools in 2026 let you set a fixed width (like 1200px) and automatically calculate the correct height. If you are prepping images for a specific shape like a square Instagram post, look for “Smart Cropping” — this feature finds the focal point of the photo so you do not accidentally cut off someone’s head.

    Common Aspect Ratio Settings:

    Platform Ratio Pixel Dimensions
    Instagram Feed (Square) 1:1 1080 x 1080px
    Instagram Reels / TikTok 9:16 1080 x 1920px
    YouTube Thumbnail 16:9 1280 x 720px
    Facebook Cover ~2.7:1 820 x 312px

    Step 3: Instant Local Export

    After you hit go, the browser uses canvas.toBlob to re-encode your media. The standard in 2026 is to export everything as a single ZIP file. This is a clever workaround for browser limits that usually block you from downloading dozens of individual files at once, letting you save your entire library with one click.

    Video vs. Photo: Bridging the Gap in Bulk Workflows

    Batch processing photos is mostly about pixels and dimensions, but video adds another layer: bitrate management. A video’s file size depends more on its bitrate (the amount of data processed per second) than its actual resolution. When resizing videos in bulk, your tool needs to adjust the encoding to match the new size. If it does not, you might end up with a tiny 480p video that still has a massive, unnecessary file size.

    Resolution vs. Bitrate: What Video Resizing Actually Means

    Shrinking a video from 4K to 1080p will not help your website load faster if the bitrate stays the same. Modern apps like Resize Now! let you choose specific Output Formats and aspect ratios (like 9:16 for TikTok) while managing these background settings. Whether you are working with MP4, MOV, or WebM, the goal is to get a consistent resolution that fits where you are posting it.

    Modern Standards: Adopting AVIF and HEVC for 2026

    In 2026, old-school JPEGs are taking a backseat to more efficient formats. FastTool notes that WebP and AVIF formats are usually 25-35% smaller than JPEGs or PNGs of the same quality. When resizing your library, converting to AVIF (for images) or HEVC (for videos) ensures your content loads instantly on the latest phones and high-speed networks.

    Format Type Savings vs JPEG Best Use
    AVIF Image 30-50% Web photos, hero images
    WebP Image 25-35% General web use
    HEVC (H.265) Video 40-50% vs H.264 4K/8K video delivery

    File size comparison between JPEG and AVIF/WebP

    Optimizing Compression Quality without Losing Sharpness

    Finding the “sweet spot” for Compression Quality is the secret to professional-looking files. For most websites, a setting between 80% and 90% is ideal. The BIRME guidelines mention that going above 90% rarely looks better to the human eye, but it makes the file size jump up significantly.

    To keep things crisp when shrinking images, 2026 tools use advanced algorithms like Lanczos and Bicubic Resampling. These algorithms calculate new pixel data in a way that prevents the “soft” or blurry edges you see in cheap editors.

    Compression Quality Reference:

    Quality Setting File Size Impact Visual Difference Best For
    90-100% Very large Imperceptible gain vs 85% Print, archival
    80-90% Moderate Barely noticeable loss Web, e-commerce
    70-80% Small Slight softening on close inspection Thumbnails, mobile
    Below 60% Very small Visible artifacts Avoid for professional use

    Case Study: Shopify Store Speed Optimization

    In one case from FastTool, a clothing store owner had 240 product photos shot at 24 megapixels. By bulk resizing them to 2048px wide at 85% JPEG quality, the store’s load time dropped from 4.8 seconds to just 1.9 seconds. That speed boost led to more sales in the very next quarter.

    Metric Before After Change
    Image dimensions 6000 x 4000px 2048px wide -66% width
    Quality 100% (original) 85% JPEG -15% quality
    Page load time 4.8 seconds 1.9 seconds -60%
    Total image weight ~1.4 GB ~45 MB -97%

    Advanced Features: Focal Point Detection and Metadata

    Handling a mix of portrait and landscape shots in one batch used to be a headache. Modern tools now use Focal Point Detection to fix this.

    Solving the Mixed Orientation Problem

    Instead of just cropping the center of every image — which might cut out the product or a person’s face — 2026 tools use the Smartcrop library. This tech analyzes the image for interesting shapes and lines to figure out the most important part of the photo, then centers the crop there automatically.

    Visual demonstration of Smart Cropping vs. Center Cropping

    Privacy First: Handling EXIF Metadata in 2026

    Every smartphone photo contains EXIF Metadata — essentially a digital fingerprint including your GPS location, the time the photo was taken, and your phone model.

    • When to strip it: For social media or public galleries, removing this data is a smart privacy move.
    • When to keep it: Pro photographers often keep EXIF data to protect their copyright or keep track of their camera settings.

    Modern resizers usually give you a simple toggle to either “Strip Metadata” for privacy or “Preserve EXIF” for professional work.

    Conclusion

    By 2026, bulk resizing has evolved. It is no longer just about changing numbers; it is about balancing privacy, using modern formats like AVIF, and using smart detection to make sure your quality stays high on every screen. By sticking to browser-local processing, you can handle sensitive media without worrying about data leaks on a remote server.

    Action Plan: Start by checking your current files to see which ones are slowing you down. Use a browser-local tool to test a few samples and find your best compression-to-quality ratio (usually 80-85%) before you update your whole library. It is a small step that makes a huge difference for your SEO and your visitors.

    FAQ

    Why do my photos look pixelated after resizing?

    Pixelation usually occurs if you attempt to upscale an image beyond its original dimensions. It can also be caused by using incorrect resampling algorithms. For the best results, always downsize rather than enlarge, and ensure your tool uses Lanczos or Bicubic filtering rather than simple linear scaling.

    Is it safe to upload sensitive client photos to an online resizer?

    It depends on the tool’s architecture. To ensure maximum safety, look for “Serverless” or “Local-only” tools (like BIRME or FastTool) that use the Canvas API. These tools process images entirely within your browser, meaning your files never leave your device and are never stored on a remote server.