Category: imagelean

  • How to Compress JPG Files: The 2026 Guide to Faster Loading and High Quality

    How to Compress JPG Files: The 2026 Guide to Faster Loading and High Quality

    The most effective way to compress JPG files in 2026 is a two-step approach: first resize to display dimensions, then apply lossy compression at 75-85% quality. This “double-punch” method typically reduces file sizes by 40-70% while keeping the image visually indistinguishable from the original. Online tools like TinyIMG and native apps like Mac Preview handle this efficiently for any workflow.

    The “Double-Punch” Workflow: How to Compress JPG for Maximum Results

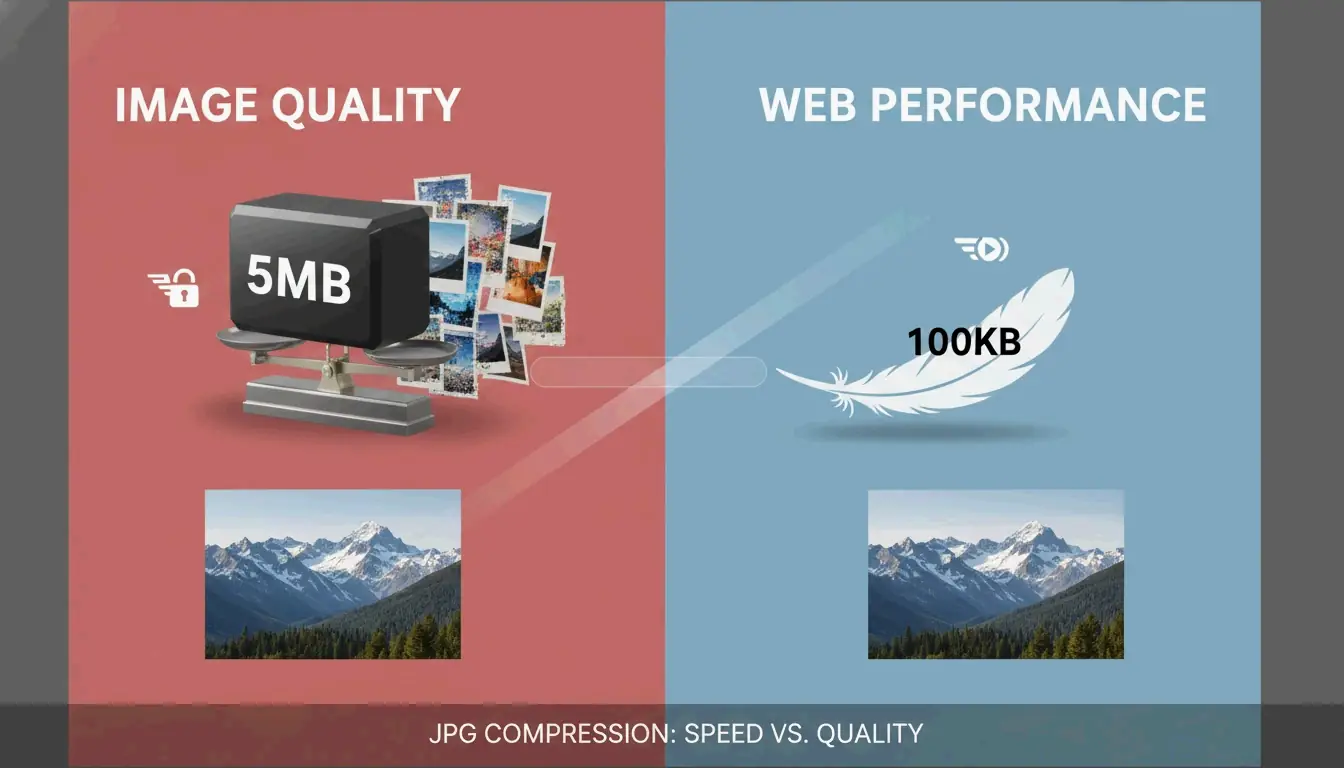
    High-resolution photos from modern smartphones and professional cameras typically range from 5MB to 10MB. Simply hitting “compress” on these files is rarely sufficient for web optimization. To reach a target size like 100KB without introducing blur or artifacts, a two-step strategy is required.

    According to ShortPixel, forcing a 2000px wide image into a 100KB file without resizing first produces visibly pixelated results. The “Double-Punch” method solves this by addressing dimensions before data.
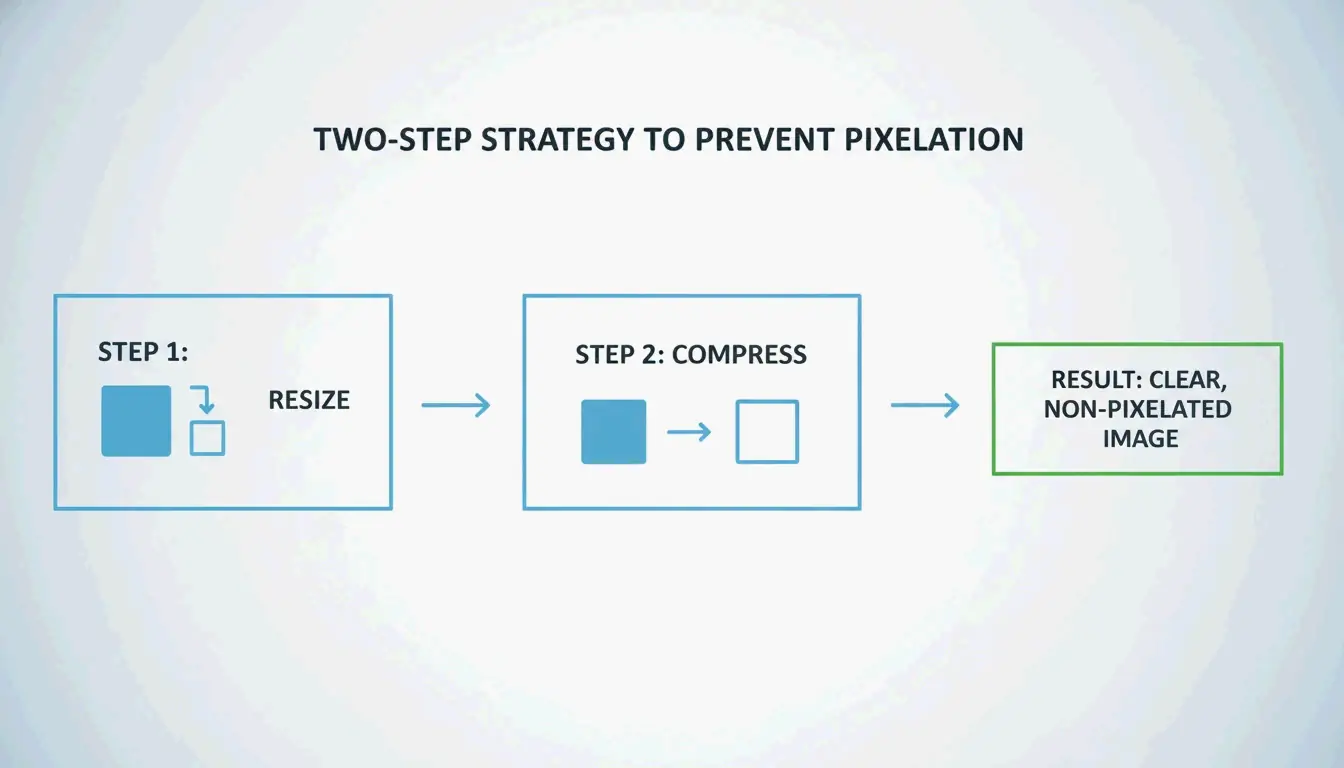
    The 2-step process: Resize then Compress

    Step 1: Resize to Display Dimensions

    Before compressing, set the pixel dimensions to match the actual display size on your site. Common targets:

    Use Case Recommended Width
    Blog hero images 1200px – 2000px
    Thumbnails 400px – 600px
    Profile pictures 200px – 400px

    Shrinking dimensions is the fastest way to reduce file weight.

    Step 2: Apply Lossy Compression

    Once the image is at the correct size, use lossy compression to strip unnecessary data. This process modifies the image’s underlying code to remove details invisible to the human eye. ShortPixel demonstrates that combining a resize to 1200px with smart compression can shrink a 5MB photo to under 100KB — a 98% reduction — while maintaining crispness.

    Finding the Sweet Spot: The 75-85% Quality Rule

    Technical guides from GWAA identify the 75-85% quality range as the professional “sweet spot.” Within this range, file savings reach 40-70% with no perceptible difference from the original in side-by-side comparison.
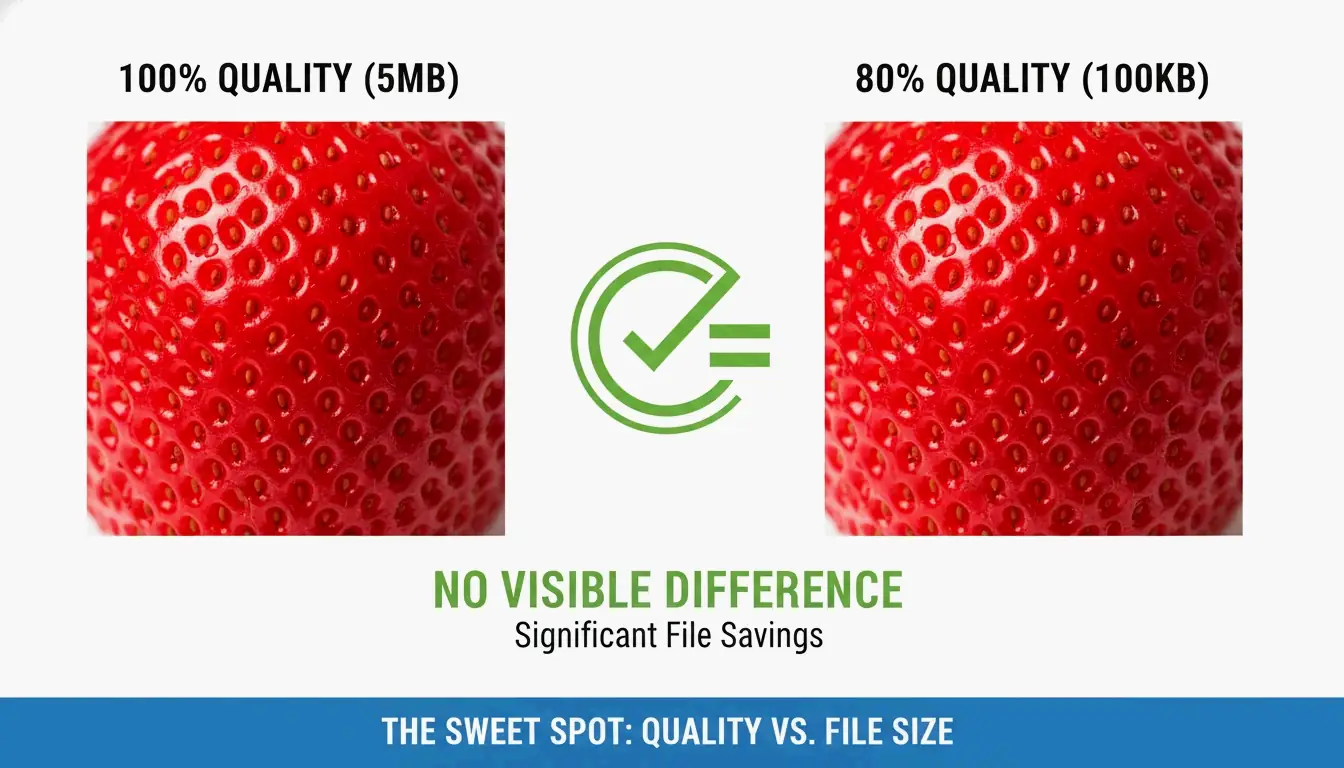
    Side-by-side comparison of 100% vs. 80% quality

    Best Tools to Compress JPG Online: Comparing the Options

    The right tool depends on your priorities: privacy, speed, or batch capacity.

    Tool Processing Location Best For Privacy Level
    TinyIMG Server-side Bulk SEO optimization for Shopify/e-commerce Server-processed, then deleted
    TinyJPG Server-side Quick single-image compression Server-processed, then deleted
    CodeItBro Browser-side (HTML5 Canvas) Privacy-sensitive images Files never leave your device
    FreeToolio Browser-side (HTML5 Canvas) Local-only processing Files never leave your device
    Adobe Express Server-side Manual single-image control Standard cloud policy
    GWAA Server-side Quick web compression Secure servers, auto-delete

    GWAA processes images on secure servers and deletes them after processing. For maximum privacy, browser-side tools like CodeItBro and FreeToolio use HTML5 Canvas to compress images directly on your device.

    How to Compress JPG on Windows and Mac (No Software Needed)

    Both major operating systems include built-in compression tools that require no additional software.

    Windows Photos App

    1. Open your JPG in the Windows Photos app.
    2. Click the three-dot menu and select Resize image.
    3. Adjust the Quality slider to reduce file size.
    4. Save the new version. Windows Paint also offers percentage-based and pixel-based resizing via the “Resize” button.

    Mac Preview

    1. Open the image in Mac Preview.
    2. Navigate to Tools > Adjust Size to change dimensions.
    3. Go to File > Export to access compression options.
    4. Move the Quality slider to see the predicted file size update in real-time.

    Stripping EXIF Metadata

    A significant portion of a JPG’s file size comes from EXIF metadata — hidden information including camera settings, GPS location, and timestamps. Tools like ImageOptim for Mac or the settings within ShortPixel strip this data, saving additional kilobytes without modifying a single pixel of the actual image.

    Beyond JPEG: Should You Use WebP or AVIF in 2026?

    JPG remains the universal standard, but newer formats deliver substantially better efficiency for modern web applications.

    Format Size vs. JPEG Key Features Browser Support (2026)
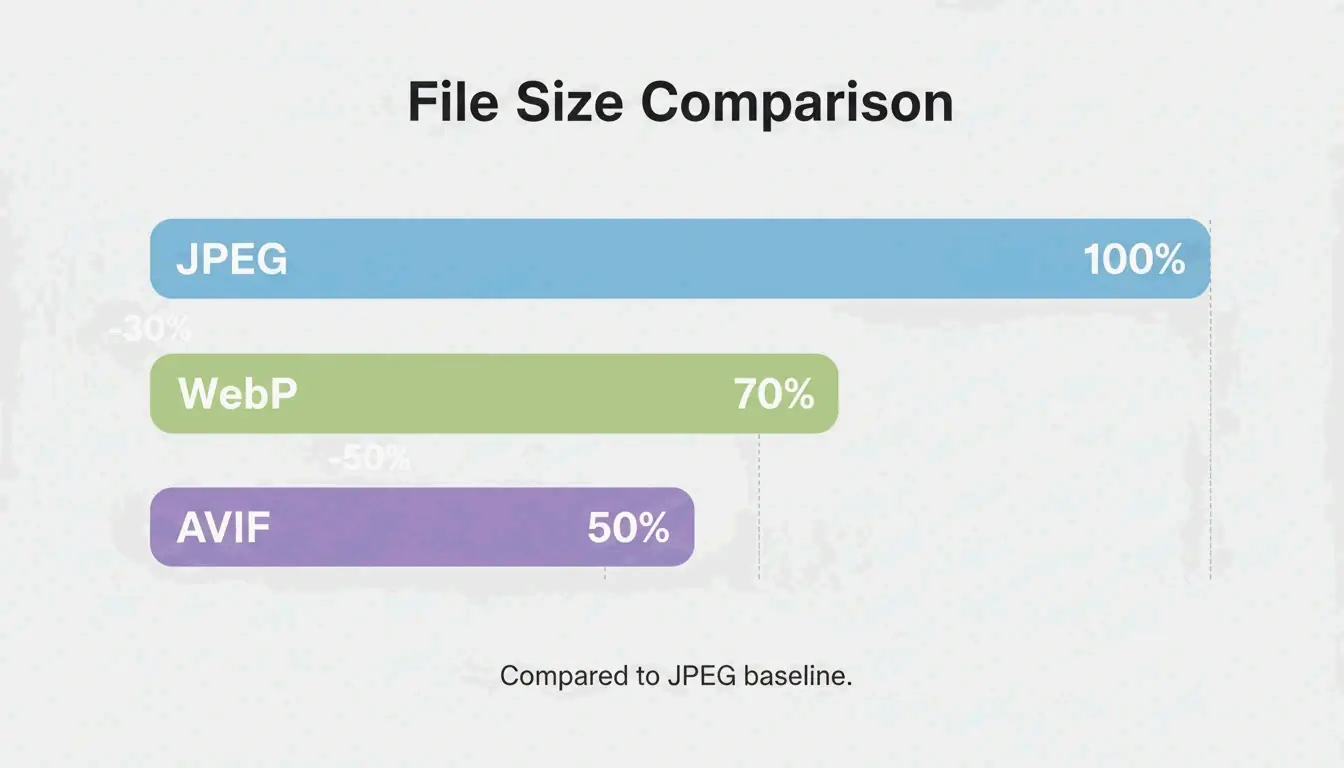
    AVIF 50-60% smaller HDR support, transparency ~93%
    WebP 25-34% smaller Wide compatibility, transparency ~97%
    JPEG Baseline Universal compatibility 100%

    According to Graviton (2026), AVIF is currently the most efficient format available. WebP offers a balance of compression and compatibility, with roughly 25-34% smaller sizes than JPEG based on Google Developers research cited by TinyIMG.

    Switching to these formats directly improves Core Web Vitals, specifically the Largest Contentful Paint (LCP) score. For full compatibility in 2026, developers use the picture element to serve AVIF to modern browsers with a JPG fallback.
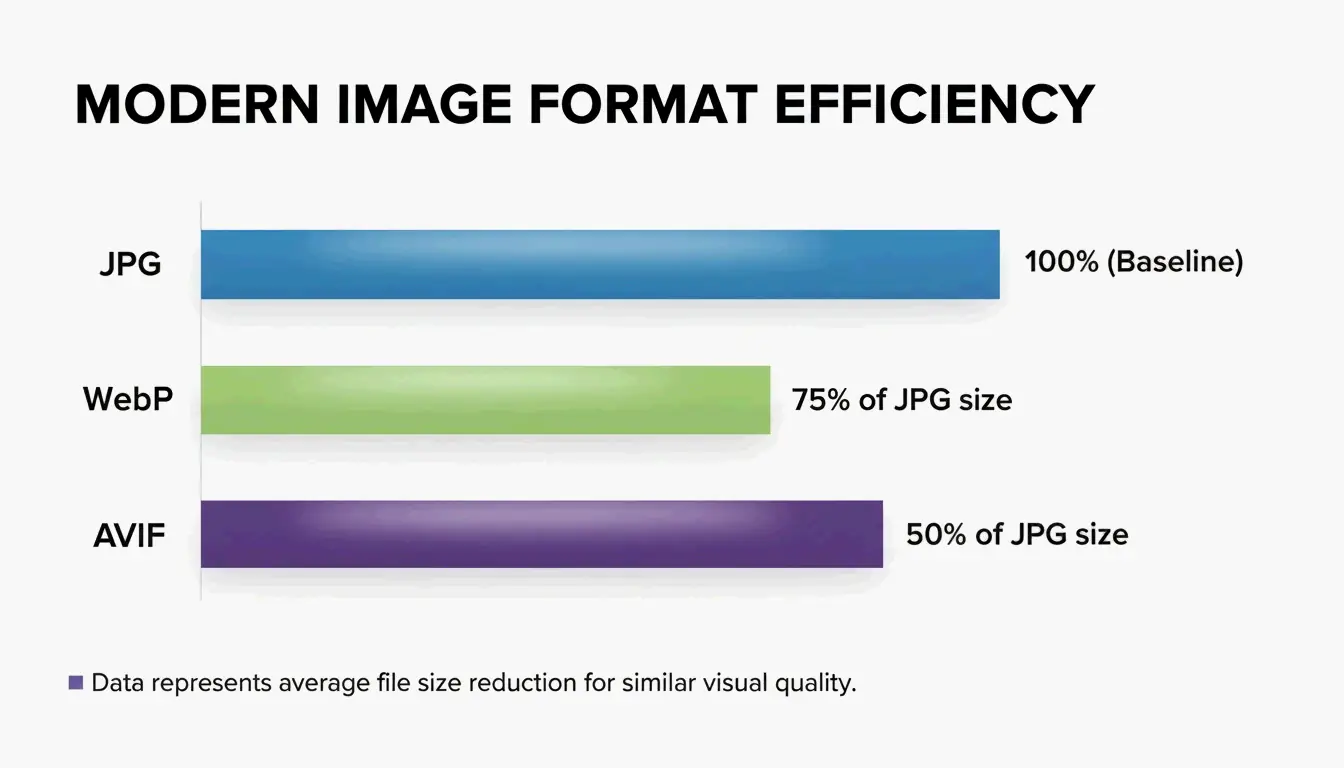
    Comparison of JPG vs. WebP vs. AVIF file efficiency

    The Science of Lossy Compression and Generation Loss

    Understanding compression mechanics leads to better results. JPEG uses the Discrete Cosine Transform (DCT) process, which breaks image data into frequency components. The “lossy” operation occurs during quantization, where the algorithm discards high-frequency details that human vision cannot easily detect. GWAA notes that your quality setting (1-100) directly controls these quantization tables.

    Critical warning: Avoid recompressing already-compressed files. This causes Generation Loss — a compounding degradation where each save cycle adds new blurry artifacts and muddy textures. Always start from your original, uncompressed source file.

    Conclusion

    Mastering JPG compression in 2026 requires balancing dimensions with modern lossy algorithms. By maintaining the 75-85% quality range, resizing for your specific display requirements, and stripping hidden EXIF metadata, you can achieve fast-loading pages without sacrificing visual quality.

    Recommended workflow: Resize first, then use a tool like TinyIMG or ShortPixel for final compression and format conversion before uploading.

    FAQ

    Is 50 KB considered a small image file size for web use?

    Yes, 50 KB is an excellent target for standard blog images, thumbnails, or UI elements. Hero images can safely range between 150-200 KB. Keeping smaller assets at 50 KB ensures rapid loading and optimal Core Web Vitals performance for mobile users.

    Does compressing a JPG file multiple times destroy image quality?

    Yes. This phenomenon is known as “Generation Loss.” Because JPEG uses lossy compression, each save cycle causes the Discrete Cosine Transform (DCT) algorithm to discard additional data. Repeatedly compressing the same file will eventually produce visible artifacts, blurring, and color distortion.

    Can I compress a 5MB high-resolution photo to under 100KB without it looking blurry?

    Yes, but only if you resize the dimensions first. A 4000px image forced into a 100KB limit will appear extremely blurry due to aggressive data stripping. If you first resize to 1200px wide, a 100KB export will remain crisp and clear for web viewing.
  • The Ultimate Guide to Lossless Image Compression: Maximize Quality and Performance in 2026

    The Ultimate Guide to Lossless Image Compression: Maximize Quality and Performance in 2026

    As of March 2026, lossless image compression reduces file sizes by 5-30% — and up to 50% with modern formats like AVIF and WebP — by removing redundant data without sacrificing a single pixel. Unlike lossy methods, lossless compression ensures bit-for-bit reconstruction of the original image, making it essential for logos, text-heavy graphics, and professional workflows that demand pixel-perfect fidelity and optimized Core Web Vitals.

    What Is Lossless Image Compression? Understanding the Mechanics

    Lossless image compression is a technical standard that shrinks a digital file while allowing exact reconstruction of the original data. According to Wikipedia, this works by eliminating statistical redundancy rather than discarding visual details.

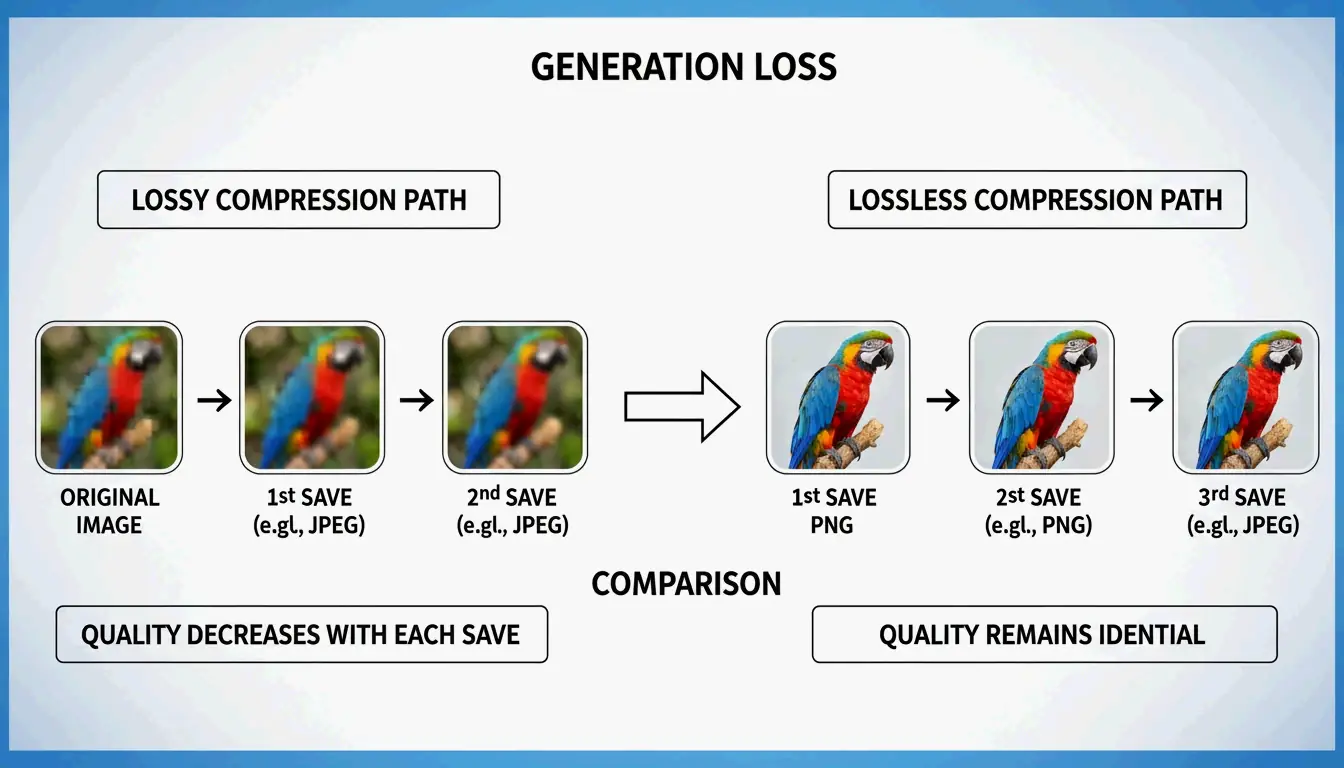
    The core difference is mathematical. Lossy formats like JPEG use the Discrete Cosine Transform (DCT) to approximate pixel values and discard fine details. Lossless compression preserves every R, G, B, and alpha channel value exactly as recorded in the source. This prevents Generation Loss — the progressive quality degradation that occurs when a file is repeatedly opened, edited, and saved in a lossy format. Convertio reports that JPEG quality can visibly degrade after just 3-5 save cycles, while lossless files remain identical regardless of how many times they are saved.

    Comparison of Lossy (data loss) vs. Lossless (data preservation) after multiple saves

    The Science of DEFLATE: How PNGs Stay Sharp

    The most common lossless engine on the web is the DEFLATE algorithm, which powers the PNG format. As Pixotter explains, this operates in two stages:

    1. Filtering: Converts raw pixels into “residuals” (differences between neighboring pixels).
    2. Compression: Packs residuals using LZ77 dictionary matching and Huffman coding.

    This two-stage process is why sharp edges and solid colors in logos remain perfectly crisp in PNG format.

    Lossless WebP vs. PNG: The 2026 Standard for Web Performance

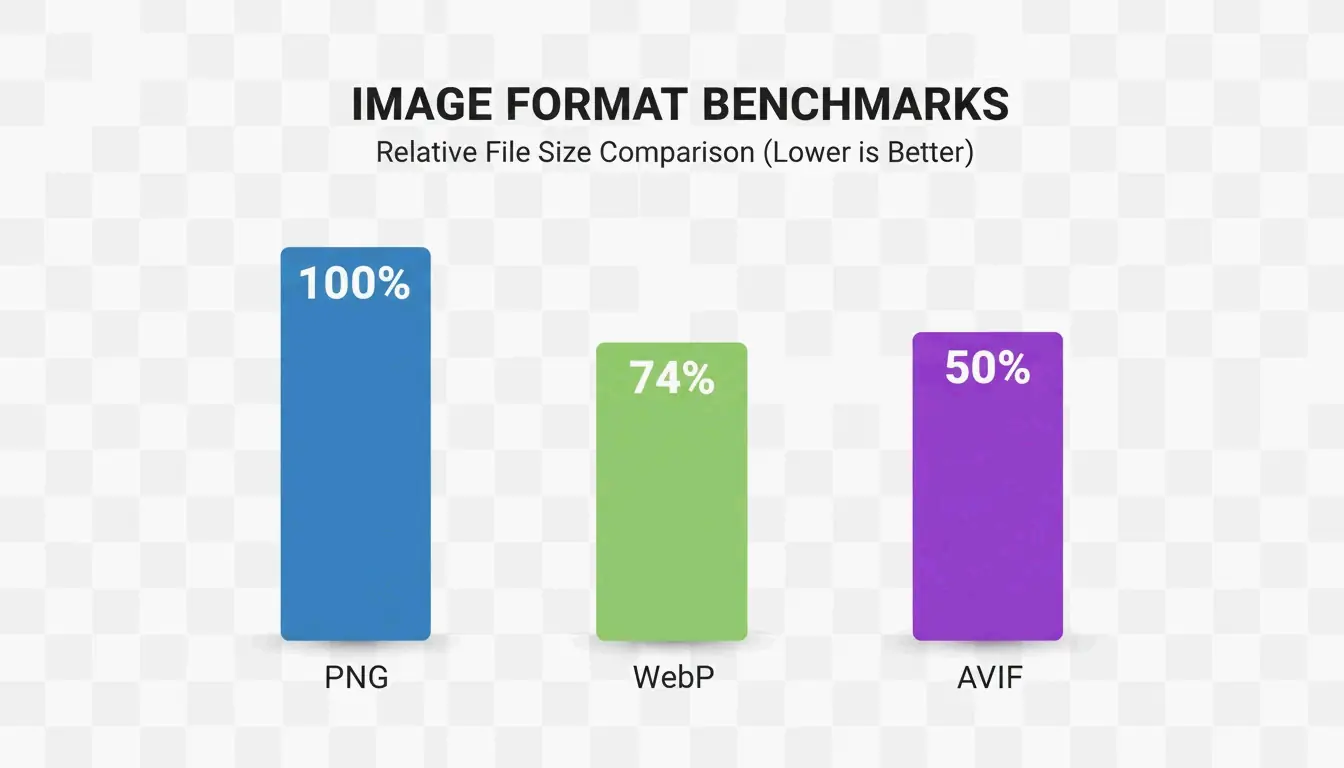
    By 2026, Lossless WebP has largely replaced PNG as the default choice for web graphics. Benchmarks cited by MeloTools show that Lossless WebP produces files approximately 26% smaller than PNGs while maintaining identical pixel-perfect quality.

    Format Compression Ratio Transparency Browser Support (2026) Best Use Case
    PNG Baseline Full alpha 100% Legacy compatibility
    Lossless WebP ~26% smaller than PNG Full alpha 97% Web graphics, logos
    AVIF ~50% smaller than PNG Full alpha 93-95% Maximum compression

    The shift toward WebP is driven by Core Web Vitals targets, specifically Largest Contentful Paint (LCP). Smaller files mean hero images and UI elements load faster, directly improving search rankings. Resizo confirms that switching from PNG to Lossless WebP is the fastest way to save bandwidth without any visible quality loss.

    Is AVIF the Future of Lossless Compression?

    AVIF represents the next efficiency tier. It uses the advanced AV1 encoder to achieve superior compression ratios. According to MeloTools, AVIF can cut total payload sizes by 50% compared to older formats. One case study documented a 73% reduction in total page weight simply by migrating to AVIF and WebP.

    Bar chart comparing file size savings across PNG, WebP, and AVIF

    The trade-off is encoding speed. Data from Pixotter shows that AVIF encoding can be 47x slower than WebP or JPEG. For most production sites, the bandwidth savings justify the processing time. The recommended 2026 approach: serve AVIF to the 93-95% of browsers that support it, with WebP or PNG as a fallback.

    The Decision Matrix: When to Choose Lossless vs. Visually Lossless

    Image Type Recommended Format Quality Setting Rationale
    Logos and UI Graphics Lossless WebP or PNG 100% Prevents ringing artifacts on sharp edges
    Hero Photography Lossy WebP or AVIF 80-85% Visually identical, 10-18x smaller
    Archives / Medical / Legal True Lossless PNG 100% Every bit must be preserved
    Mixed-Content Sites Lossy at 80% quality 80% Sweet spot for quality and size

    Convertio reports that a 36 MB raw image can compress to a 2-4 MB JPEG at quality 85 with no perceptible difference. Additionally, removing EXIF metadata (GPS, camera info) saves 10-25 KB per image without affecting visual quality, as noted by MeloTools.

    Local Tools and Privacy: Compressing Without Data Leaks

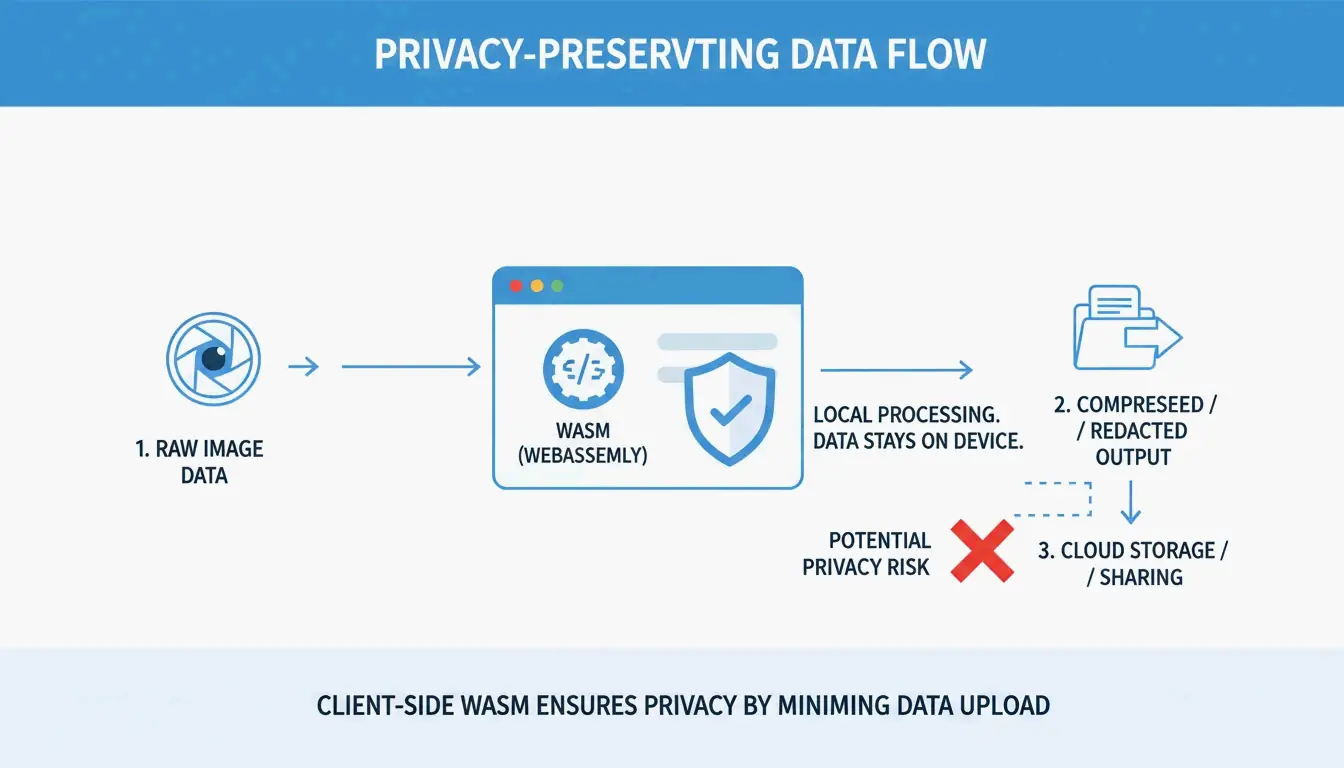
    In high-security fields like healthcare and law, privacy is as critical as file size. Many online compressors upload files to remote servers, creating potential GDPR or HIPAA exposure. MeloTools and Resizo recommend browser-based local processing via WASM. With this method, compression happens entirely in your computer’s memory — the image never leaves your device.

    3-step visualization of local vs. cloud processing for privacy

    Privacy verification test: Open the tool, then disable Wi-Fi. If it continues to function, it uses WASM or HTML5 Canvas and is safe for sensitive documents.

    Conclusion

    In 2026, lossless image compression extends well beyond PNG. WebP and AVIF are now essential for balancing pixel-perfect quality with modern web performance. While PNG remains a reliable fallback, newer formats deliver equivalent quality with significantly less data.

    Actionable steps:

    1. Audit your current image assets.
    2. Migrate sharp UI elements and logos to Lossless WebP for ~26% file size savings.
    3. Use AVIF with proper fallbacks for hero images to boost LCP scores.
    4. Adopt local, browser-based compression tools to protect both performance and privacy.

    FAQ

    Can I convert a lossy JPEG back to a lossless PNG to restore its original quality?

    No. Once data is discarded during lossy compression (JPEG), it is permanently lost. Converting a JPEG to PNG will prevent further quality loss during future saves, but it cannot repair existing artifacts or reconstruct the original pixels that were removed by the JPEG algorithm.

  • How to Compress Image Without Losing Quality (2026): Resize, Compress, Convert

    How to Compress Image Without Losing Quality (2026): Resize, Compress, Convert

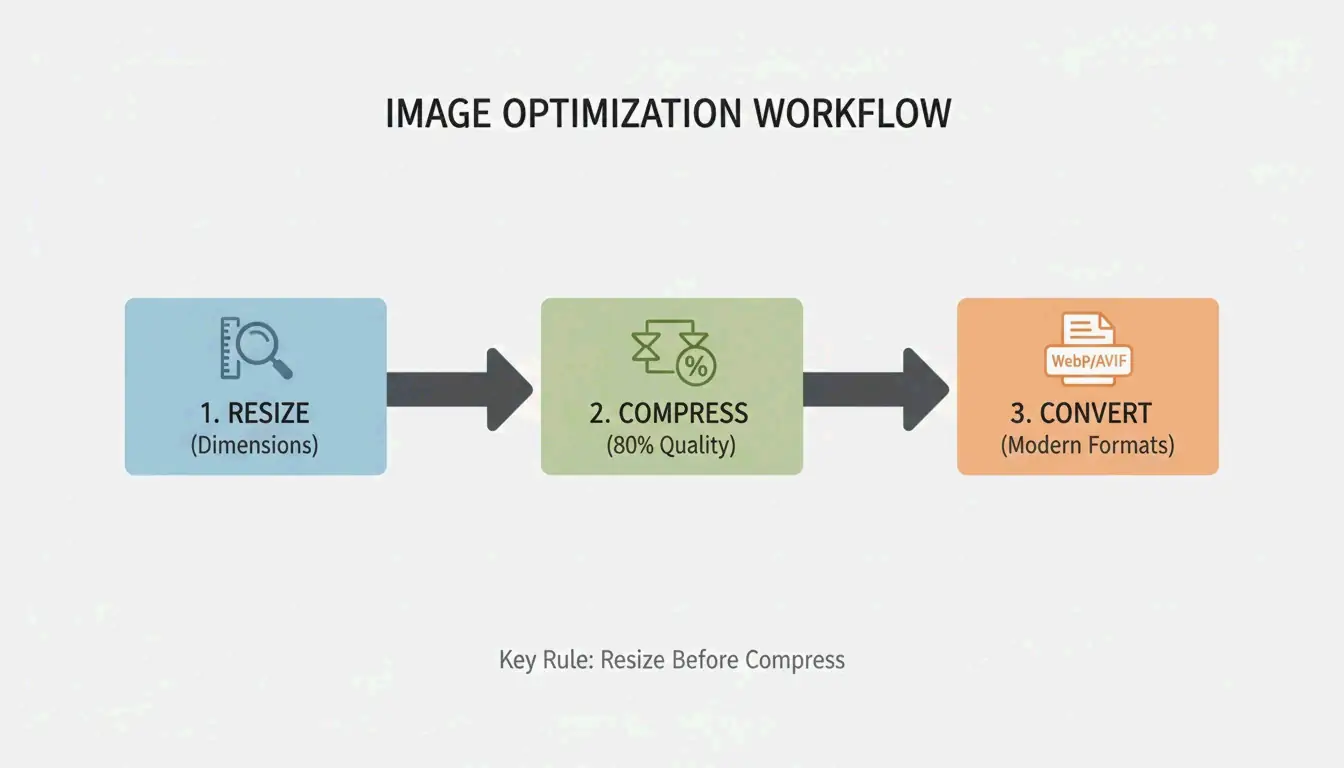
    Resize to display dimensions, compress at 75-85% quality, convert to WebP or AVIF. This 3-step workflow delivers up to 90% file size reduction with no perceptible quality loss. Here is the complete 2026 method.

    3-Step Workflow: Resize → Compress → Convert

    3-step compression workflow

    Step 1: Resize to Display Dimensions

    The largest single optimization is matching pixel dimensions to display size. Modern phones shoot 4000-6000px wide — far beyond web needs. As G Saunders demonstrates, scaling from 18,000px to 800px achieved a 99% file size reduction before any compression.

    Use Case Recommended Width Typical File Size After Resize
    Blog hero image 1200px 200-400 KB
    Product photo 800px 80-200 KB
    Thumbnail 300-400px 20-50 KB
    Social media 1080px 100-300 KB

    Step 2: Apply Lossy Compression at 75-85%

    After resizing, apply lossy compression using encoders like MozJPEG. The 75-85% quality range is the sweet spot. Per Intellure, dropping from 100% to 85% quality cuts file size by 60% with virtually no visible difference.

    Quality Setting File Size Reduction Visual Impact
    90-100% 10-20% Identical to original
    75-85% 50-70% Imperceptible to human eye
    50-70% 70-85% Slight artifacts on close inspection
    Below 50% 85%+ Visible banding and softness

    Step 3: Convert to WebP or AVIF

    Format comparison: JPEG vs WebP vs AVIF file sizes

    Format Size vs. JPEG Browser Support (2026) Best For
    WebP 25-34% smaller 97%+ General web use, LCP images
    AVIF Up to 50% smaller 92%+ Maximum compression
    JPEG Baseline 100% Universal fallback

    Data from Google Developers confirms WebP is 25-34% smaller than JPEG at equivalent quality. AVIF pushes further with up to 50% better compression.

    Also strip non-essential EXIF metadata (GPS, camera settings, timestamps) — saves 5-50 KB per file and protects privacy.

    Lossy vs. Lossless: When to Use Each

    Mode How It Works Savings Use For
    Lossless (PNG, OptiPNG) Preserves every pixel 5-30% Logos, icons, text screenshots, sharp edges
    Lossy (JPEG, WebP, AVIF) Removes imperceptible data 50-80% Photos, hero images, product shots

    For web photographs and complex images, lossy at 75-85% quality is the standard. For logos and text-heavy graphics, use lossless to preserve sharpness.

    SEO Impact: Core Web Vitals and LCP

    Google’s Core Web Vitals use Largest Contentful Paint (LCP) as a ranking signal. Images account for approximately 70% of all LCP elements (web.dev).

    Metric Impact
    53% of mobile users leave if load exceeds 3 seconds Bounce rate directly tied to image weight
    LCP threshold: 2.5 seconds Heavy hero images are the #1 cause of failure
    Page speed is a confirmed ranking factor Optimized images = higher search position

    Quality Verification Checklist

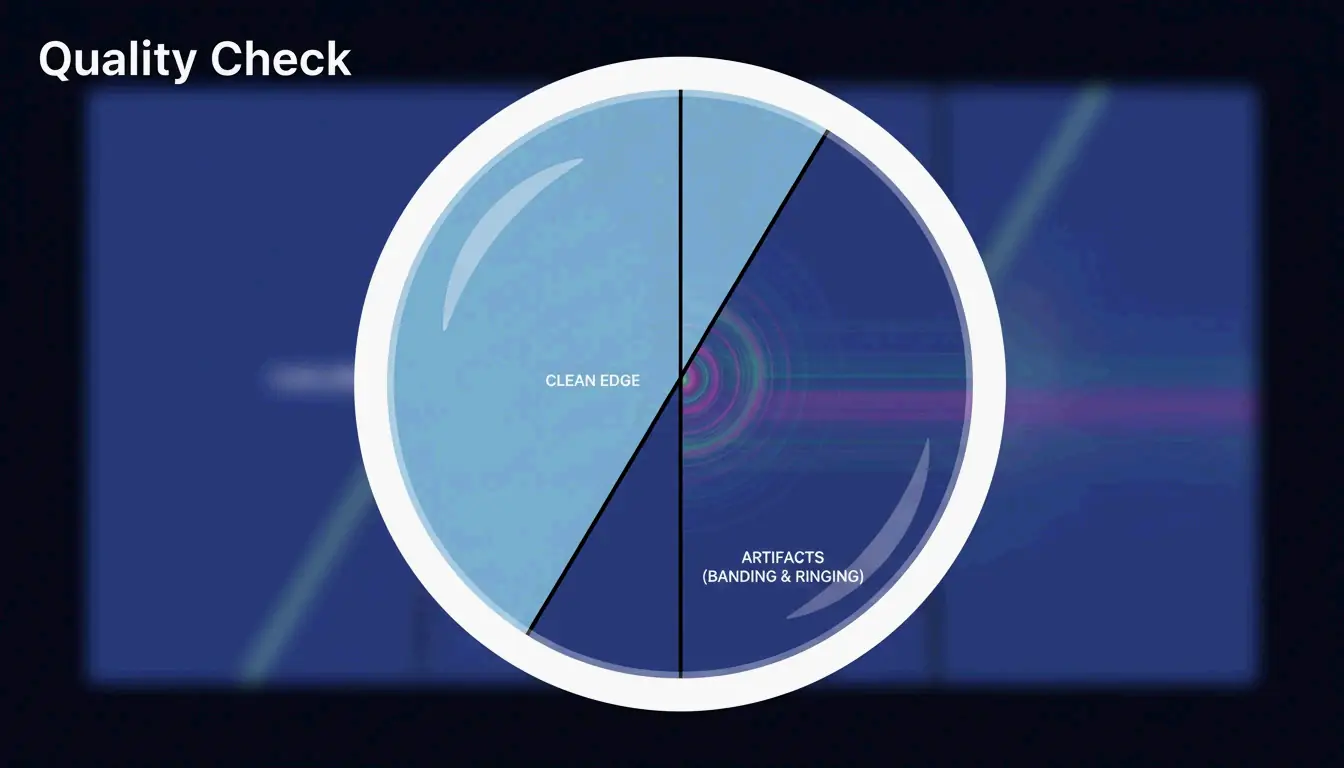
    After compression, zoom to 100% and check for three artifacts:

    Artifact What to Look For Cause
    Banding Stepped color transitions in gradients (e.g., sky) Quality set too low
    Ringing Halos around text or high-contrast edges Over-compression
    Softness Fine details (hair, fabric) turned to blur Excessive lossy reduction

    Visual quality check: focus on detail

    For privacy-conscious workflows, tools like Pixotter and SammaPix use WebAssembly (WASM) for in-browser processing — files never leave your device.

    Conclusion

    Compress images in three steps: resize to display width, apply lossy at 75-85% quality, convert to WebP or AVIF. This workflow delivers up to 90% size reduction with no visible quality loss. Audit your 10 most visited pages — convert hero images to AVIF and target under 200 KB per file.

    FAQ

    Can I compress a PNG without losing any data?

    Yes. Tools like OptiPNG and oxipng optimize the internal DEFLATE algorithm and strip metadata without altering pixels. Savings are modest (5-20%) compared to lossy methods, but pixel-perfect fidelity is preserved.

    Does image compression affect SEO rankings?

    Yes. Page speed is a confirmed Google ranking factor. Images are typically the heaviest page elements. Optimized images improve LCP scores, which directly impacts Core Web Vitals performance and search visibility.

    Is it safe to upload personal photos to online compression tools?

    Use tools with client-side WASM processing — compression happens in your browser, files never touch a server. If using a server-side tool, verify the service deletes files immediately after processing.