Category: imagelean

  • How to Compress Image Size in KB and MB: 2026 Guide to Fast and Lossless Optimization

    How to Compress Image Size in KB and MB: 2026 Guide to Fast and Lossless Optimization

    As of May 2026, the quickest way to compress image size in KB and MB is by using WASM-based online tools like ImResizer or pdfFiller. These platforms process your files directly in your browser, which keeps your data private and secure. Simply upload your JPG or PNG, enter your target size (like 50KB), and download the result. For large batches of photos, offline software remains the best choice for maintaining consistent quality.

    Quick Steps: How to Compress Image Size in KB and MB for Instant Uploads

    If you need to shrink a file from several megabytes down to a few kilobytes, you need a tool with “target-size” settings. Most modern web compressors now use WebAssembly (WASM) technology. This means the actual compression happens on your own computer rather than a distant server, making the process both faster and safer.

    The Standard Compression Workflow

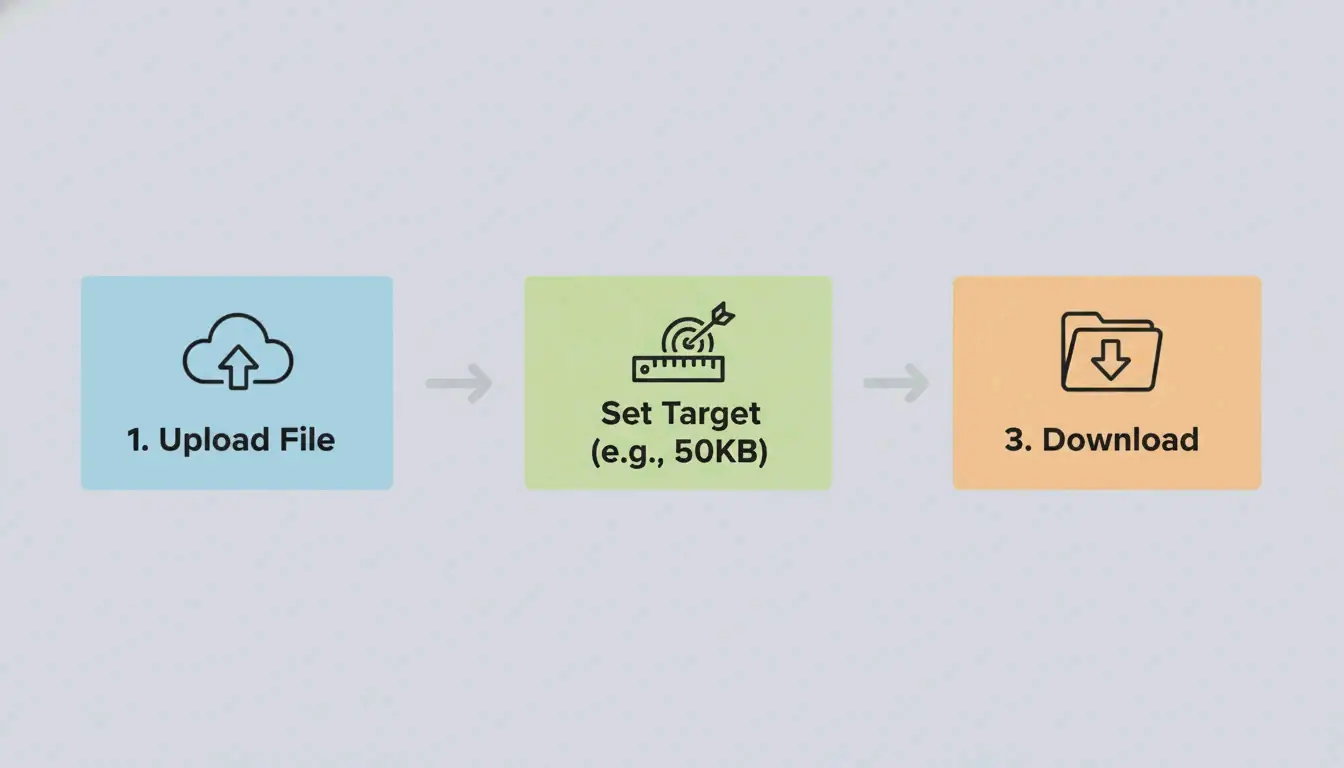
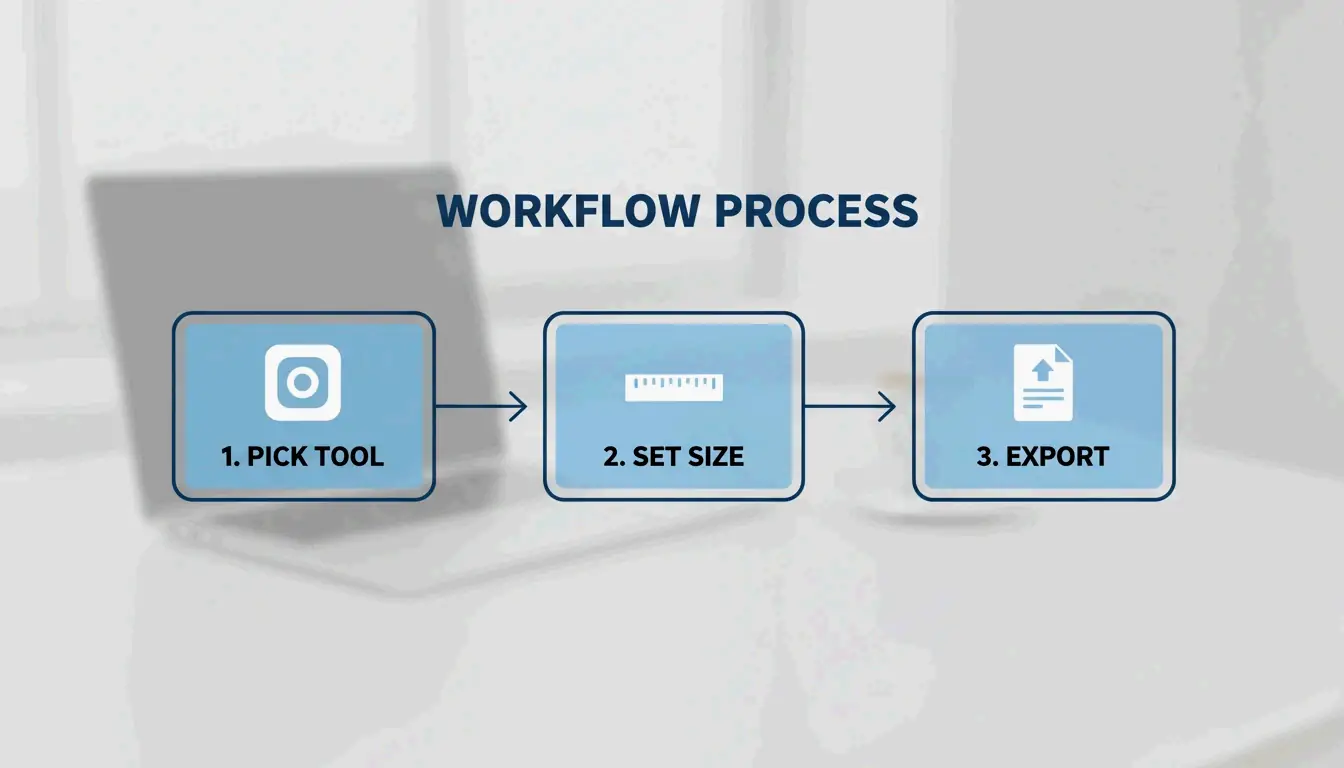
    1. Pick Your Tool: Use a platform like ImResizer or pdfFiller that lets you set specific KB or MB goals.
    2. Upload and Set Limits: Select your JPG / JPEG or PNG file. Keep in mind the standard conversion: 1 MB = 1024 KB, as noted by SmartToolsWala. If you have a 2MB file but the upload limit is 100KB, set that as your target.
    3. Process and Download: Hit the “Target Size” button. The algorithm will automatically tweak the quality and dimensions to meet your exact limit.

    3-step visualization of the compression process

    The “Final Inch” Checklist: Why Your File is Still 1KB Over

    Government websites and exam portals are often very strict, usually requiring files between 20KB and 200KB. If your image is still just over the limit, check for hidden metadata. Removing thumbnails and preview data can often shave off those last few bytes you need to hit a 50KB or 100KB threshold.

    Common File Size Targets:

    Use Case Typical Limit Strategy
    Government form (e.g., SSC/UPSC) 20-50 KB Target-size tool + strip EXIF
    Visa / passport photo 50-100 KB 96 DPI + aggressive lossy compression
    Email attachment (per image) Under 1 MB 80% JPEG quality
    Web hero image Under 200 KB WebP/AVIF at 75%

    Online vs Offline Tools: Which Should You Choose in 2026?

    Deciding between a browser tool and desktop software depends on how many photos you have and how much privacy you need. In 2026, browser-based tools are almost as fast as desktop ones because they process files locally.

    Online Tools for Speed and Accessibility

    Sites like pdfFiller, which has over 12,500 verified reviews, are great for quick, one-off jobs. Many of these tools now respect GPC (Global Privacy Control) signals, so your session is not tracked. They are the go-to option if you are on a phone or a public computer and need to fix a JPG / JPEG for a visa form or job application.

    Offline Software for Batch Processing and Privacy

    If you are a professional dealing with thousands of images, offline software like Batch Picture Resizer is a better bet. It uses your computer’s full processing power to finish bulk tasks in minutes. Because it works without an internet connection, it is the safest way to handle sensitive company files.

    Tool Type Speed Privacy Batch Support Best For
    WASM browser tools Fast Local processing Limited Quick single-file edits
    Server-side tools Fastest Files uploaded to server Yes Large batches, non-sensitive
    Offline software Moderate Full offline Yes Sensitive files, bulk work

    How to Maintain Image Quality and Resolution During Compression

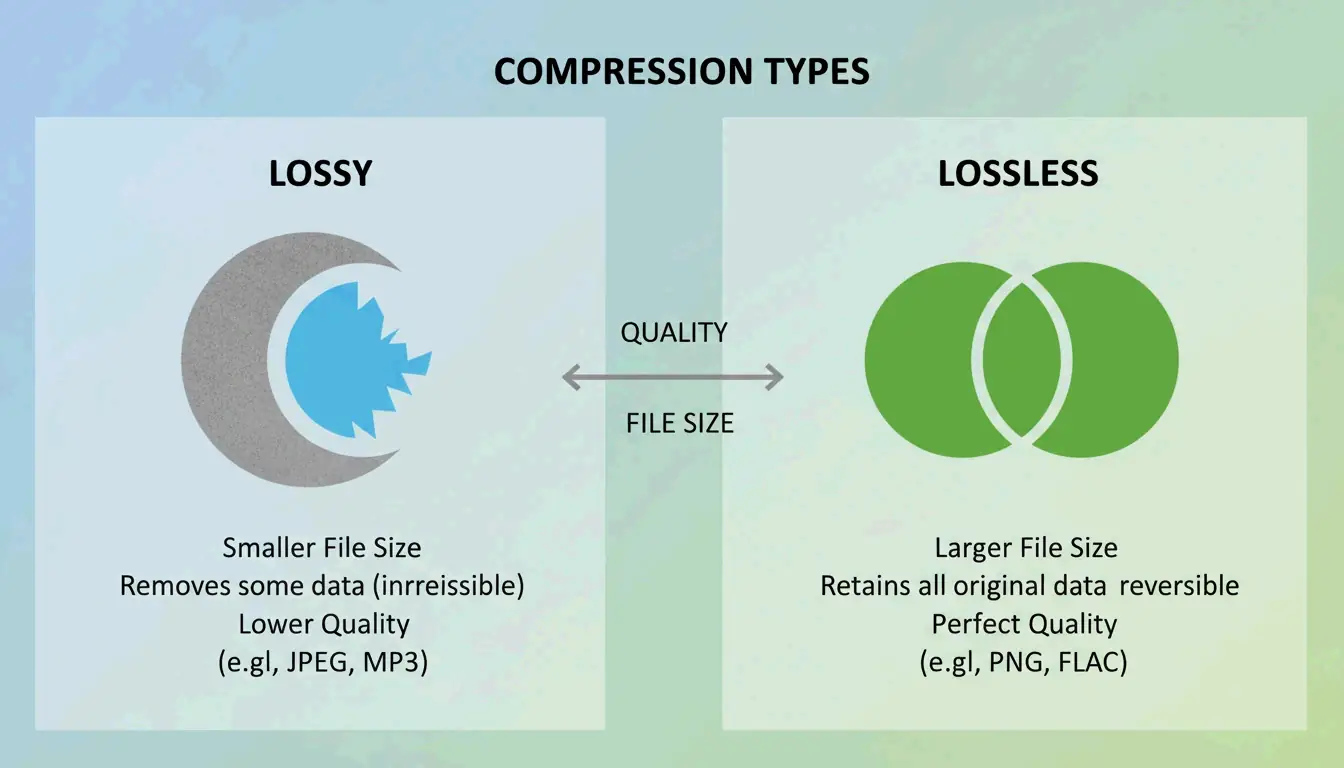
    Keeping your Image Quality / Resolution sharp while shrinking the file size is all about choosing the right method: Lossy or Lossless.

    Lossy (JPG) vs. Lossless (PNG)

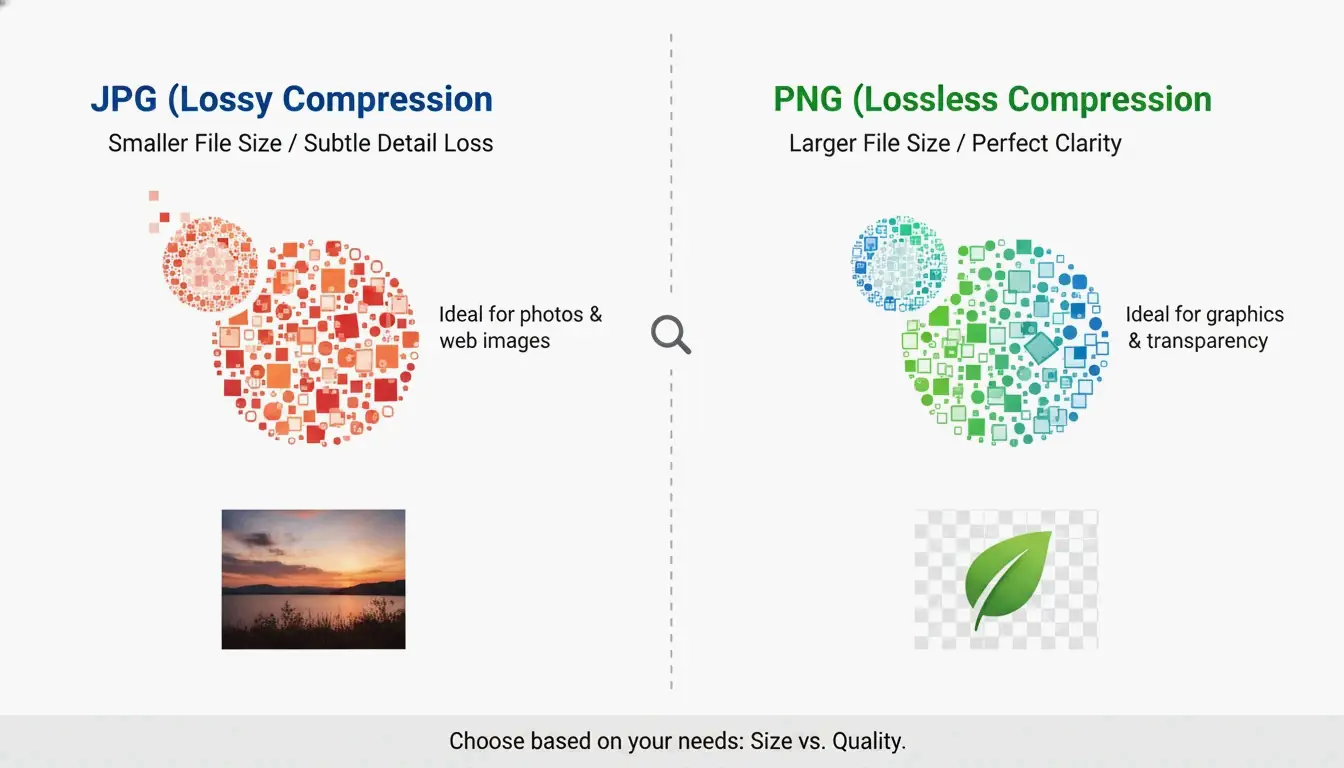
    • JPG / JPEG: This uses “lossy” compression. It throws away data that the human eye cannot really see to make the file much smaller. It is perfect for standard photos.
    • PNG: This uses “lossless” compression, meaning it keeps every bit of original data. The image stays perfectly clear, but the file size will be much larger than a JPG.

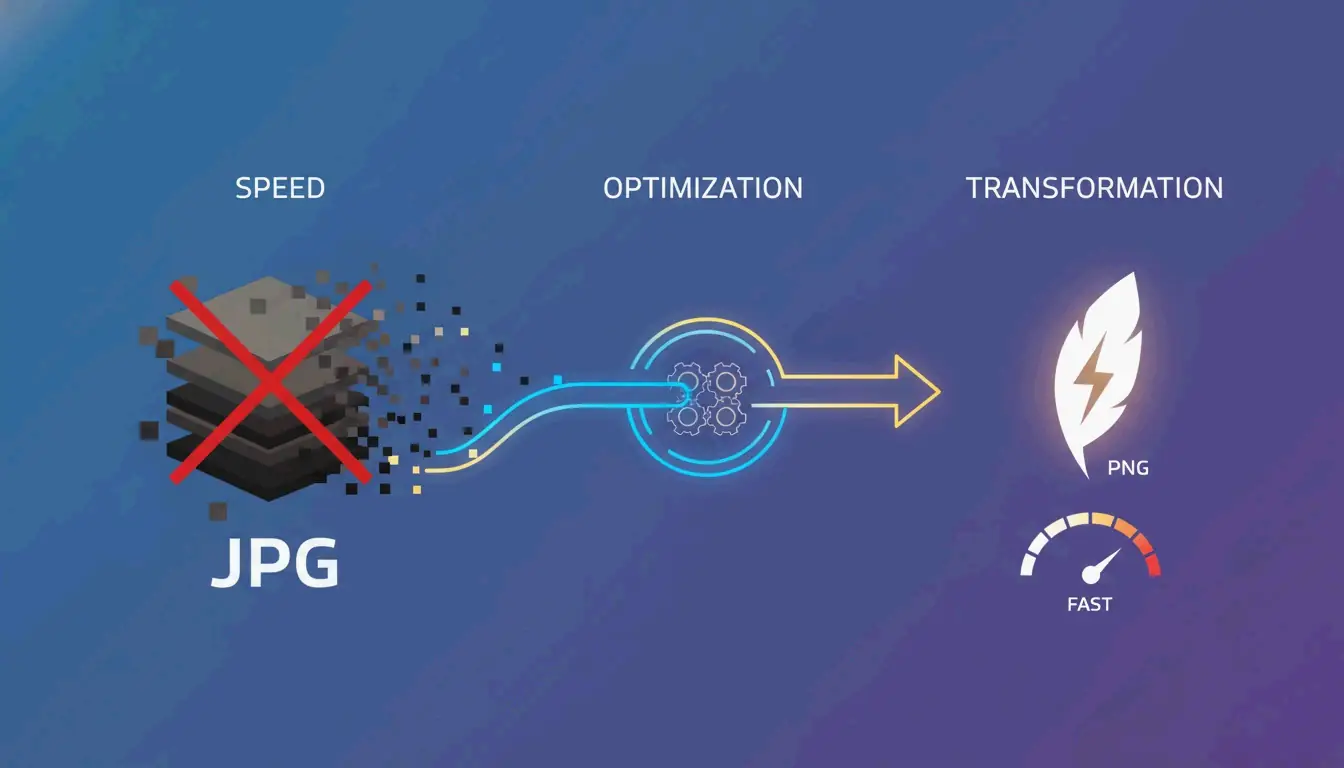
    Simple visual comparison of JPG vs PNG file size and clarity

    Format Compression Typical Size (1080px photo) Transparency Best For
    JPEG Lossy 150-300 KB No Photos, web
    PNG Lossless 1-3 MB Yes Logos, screenshots
    WebP Both 100-200 KB Yes Web optimization
    AVIF Both 80-150 KB Yes Next-gen web

    The 2026 Shift: Adopting WebP

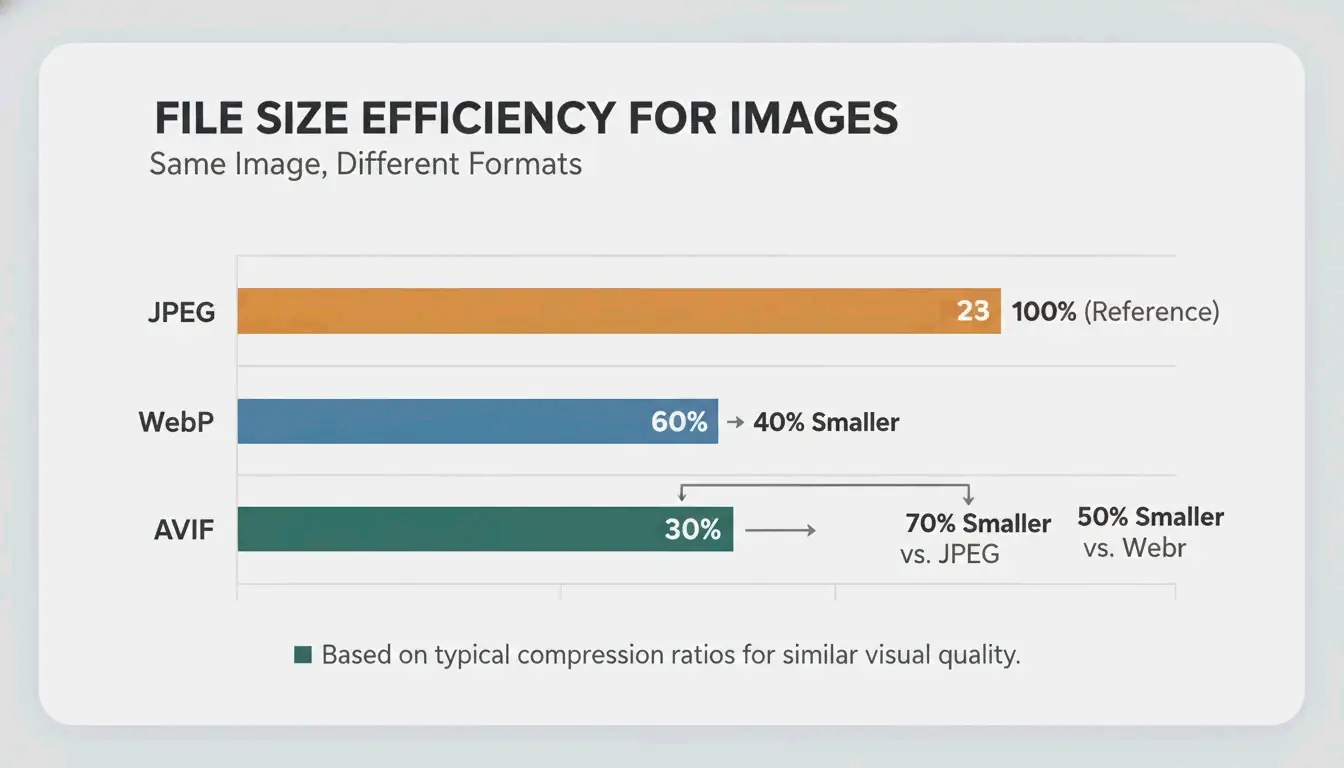
    By 2026, WebP has become the new standard. ImResizer reports that WebP can make files 30% smaller than JPEGs without losing visual quality. Most browsers and websites now accept this format without any issues.

    The “Upscaling” Myth

    It is a technical reality that you cannot really turn a tiny KB file back into a high-quality MB file. As ImResizer points out, while tools can “inflate” a file size by adding empty data, they cannot bring back lost detail. Always keep your original high-resolution photos safe before you start compressing.

    Advanced Tactics: Stripping EXIF Data to Save Extra Space

    Images often hide “extra” info called EXIF Data, which includes things like camera settings, GPS location, and the date the photo was taken. This can add 5KB to 50KB to your file size.

    Tools like the EclixTech Photo Compressor give you the option to strip this data. Removing it helps with two things:

    1. Privacy: No one can see exactly where or when you took the photo.
    2. Size Limits: If you are struggling to meet a tiny 20KB limit for a government form, cutting 10KB of metadata can make the difference.

    EXIF Data Size Breakdown:

    Data Type Typical Size Privacy Risk
    GPS coordinates 2-5 KB High — reveals exact location
    Camera model + settings 1-3 KB Low
    Date and time 0.5-1 KB Medium
    Thumbnail preview 5-20 KB Low (but adds to file size)

    Conclusion

    To successfully compress image size in KB and MB, you just need to pick the right format (like WebP or JPG) and the right tool for the job. For a quick government upload or a social media post, WASM-based tools like ImResizer or pdfFiller are fast, secure, and do not require an account. If you are a professional photographer or a business owner who needs to process huge batches of files, investing in offline software is the best way to keep your quality standards high.

    FAQ

    Is it safe to upload my private photos to online compressors?

    Most reputable tools now use SSL encryption to protect data during transfer. Furthermore, a major 2026 update in web technology means many top-tier tools now use WASM (WebAssembly) for local browser processing. This means your photo is processed on your own device and never actually reaches a remote server, providing maximum privacy.

    Can I increase an image size back to MB after compressing it to KB?

    Technically, you can increase the file size by adding “padding” data or upscaling the dimensions, but you cannot restore the visual detail lost during the initial compression. To avoid blurry results, always perform your edits on the original high-resolution file rather than trying to upscale a previously compressed version.

    What is the difference between lossy and lossless image compression?

    Lossy compression (used in JPG files) removes certain bits of data to shrink the file size significantly, which may lead to a slight loss in quality. Lossless compression (used in PNG and some WebP files) keeps all original data intact, ensuring the image looks exactly like the original, though the resulting file size will be larger than a lossy version.

  • How to Compress Photos and Save Space – The 2026 Ultimate Guide to Storage Optimization

    How to Compress Photos and Save Space – The 2026 Ultimate Guide to Storage Optimization

    Compressing photos to save space in 2026 starts with built-in settings like iPhone’s HEIC format or Google Photos’ Storage Saver. For maximum efficiency, use AI-powered tools to convert images to WebP or AVIF, applying lossy compression at 75-85% quality to reduce file sizes by up to 80% while maintaining visual clarity.

    Quick Wins: How to Compress Photos and Save Space on Any Device

    Shrinking your digital library begins with changing how devices capture and store files. According to Business.com, modern compression tools can cut standard JPEG sizes by 40-60% without visible quality loss. A few system-level settings stop storage bloat before it starts.

    Mobile: Enabling High Efficiency Formats

    iPhone (HEIC):
    1. Open Settings > Camera > Formats
    2. Select High Efficiency
    3. New photos save as HEIC automatically

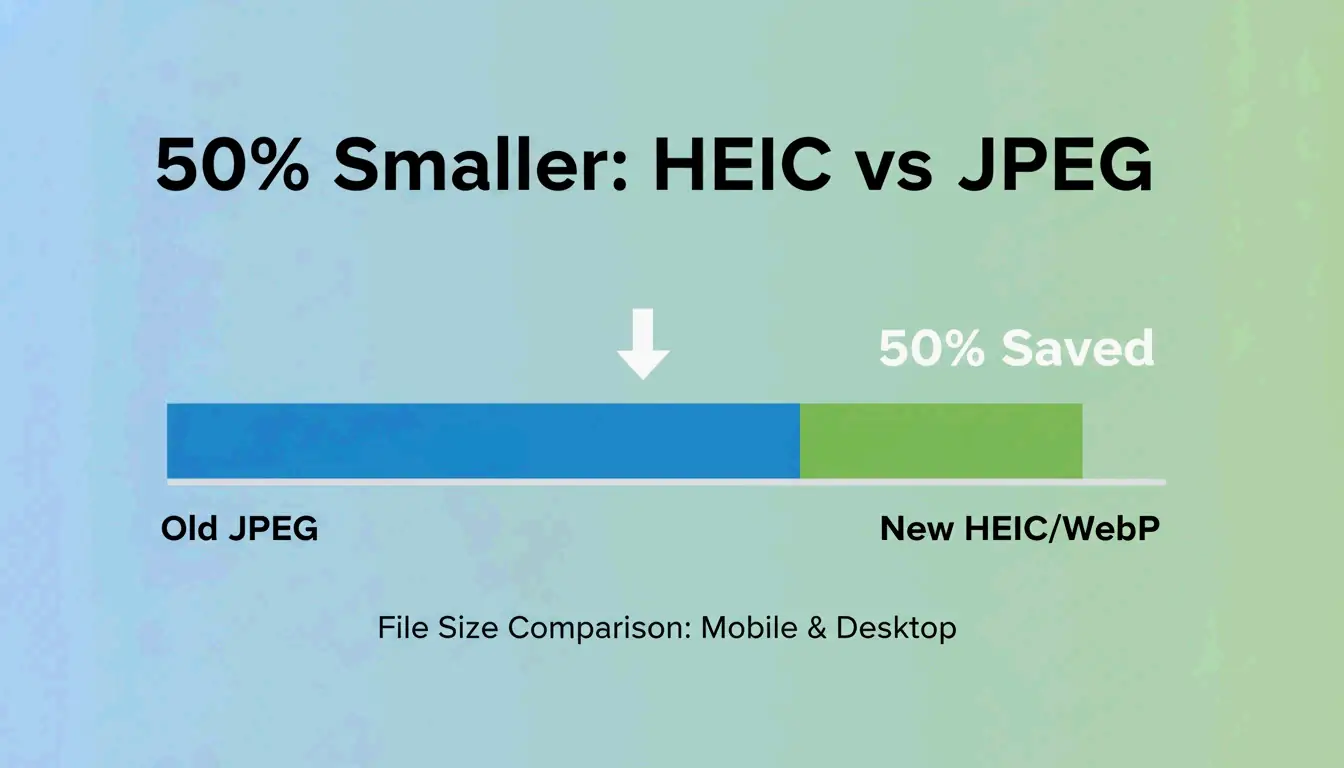
    As Popular Outdoor Sports notes, HEIC files are approximately 50% smaller than traditional JPEGs at equivalent visual quality.

    Android (Google Photos Storage Saver):
    1. Open Google Photos app settings
    2. Enable Storage Saver
    3. Google auto-compresses uploads to a “High Quality” level

    Check your Android camera app’s “Advanced Picture Options” for a high-efficiency format toggle.

    Desktop: Quick Resizing without Extra Apps

    OS Tool Steps
    Windows Microsoft Paint Open image, click “Resize,” lower percentage or pixels, save as JPEG
    macOS Preview app Open photo, go to Tools > Adjust Size, scale down, then File > Export with quality slider

    A simple side-by-side comparison of file size reduction (e.g., JPEG vs HEIC).

    Smart Storage Cleanup: Downgrade Your Cloud Subscription Tier

    Cleaning up your current library can reduce a 2TB cloud plan to a much cheaper 200GB tier. The strategy focuses on finding “bloat” photos — screenshots, accidental burst shots, and duplicates.

    Quick cleanup process:

    Step Action Tool
    1. Find junk Identify blurry shots, large videos Google Photos / iCloud “Review and Delete”
    2. Delete bloat Remove screenshots, duplicates Built-in cleanup tools
    3. Batch compress Compress remaining library Ashampoo Image Compressor
    4. Verify savings Check total storage used Cloud dashboard

    Alice at Popular Outdoor Sports notes that managing bulky files is becoming a necessity as cloud storage costs rise. Ashampoo Image Compressor supports drag-and-drop batch processing of thousands of images, cutting total size by up to 80%.

    Lossy vs. Lossless: Which Compression Method Should You Choose?

    Method How It Works Size Savings Best For
    Lossy Removes data invisible to the human eye 50-80% Social media, cloud backups, JPEG, HEIC
    Lossless Preserves every pixel, removes redundancy 20-40% Logos, text graphics, PNG, TIFF, archival

    PDFFlare reports that lossy settings can save 50-80% of storage space while maintaining acceptable visual quality for social media and cloud backups.

    Quality directly affects business outcomes. Salsify’s 2025 Consumer Research Report found that 42% of shoppers abandon a purchase if images are missing or look low-quality. In 2026, WebP and AVIF offer significantly better compression-to-quality ratios than JPEG.

    2026 format comparison:

    Format Compression Efficiency Visual Quality Use Case
    JPEG Baseline Good Universal compatibility
    HEIC ~50% smaller than JPEG Equivalent to JPEG Apple ecosystem
    WebP 25-30% smaller than JPEG Better than JPEG Web performance
    AVIF 30-50% smaller than JPEG Best in class Modern web, maximum savings

    AI-Enhanced Compression: The 2026 Tech Revolution

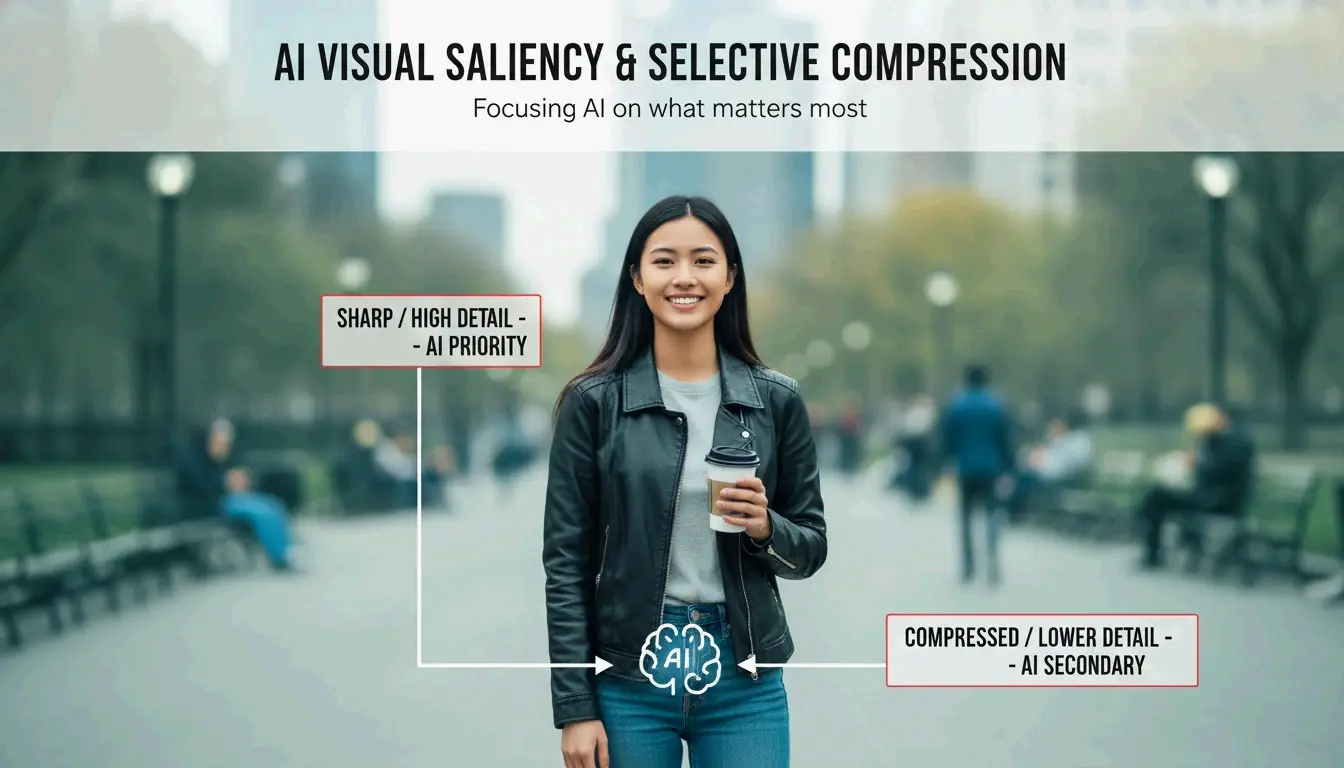
    The key shift in 2026 is Visual Saliency AI. Unlike traditional algorithms that compress the entire image uniformly, AI tools identify the most important parts — faces, foreground subjects — and keep those areas sharp while aggressively compressing backgrounds where artifacts are less noticeable.

    AI "Visual Saliency" concept: focus on subject vs background compression.

    AI compression tool landscape (2026):

    Tool Type Key Feature
    Adobe Photoshop Professional Neural filters for precision web optimization
    Ashampoo Image Compressor Consumer/batch Processes huge DSLR photos (50-75MB each) into compact files

    AI compression can shrink 50-75MB DSLR photos to a fraction of their original size while preserving “hero” elements — the subject, key details, and visual impact of the shot.

    Compressing for Specific Needs: Web, Email, and Forms

    Different platforms require different compression strategies:

    Web SEO

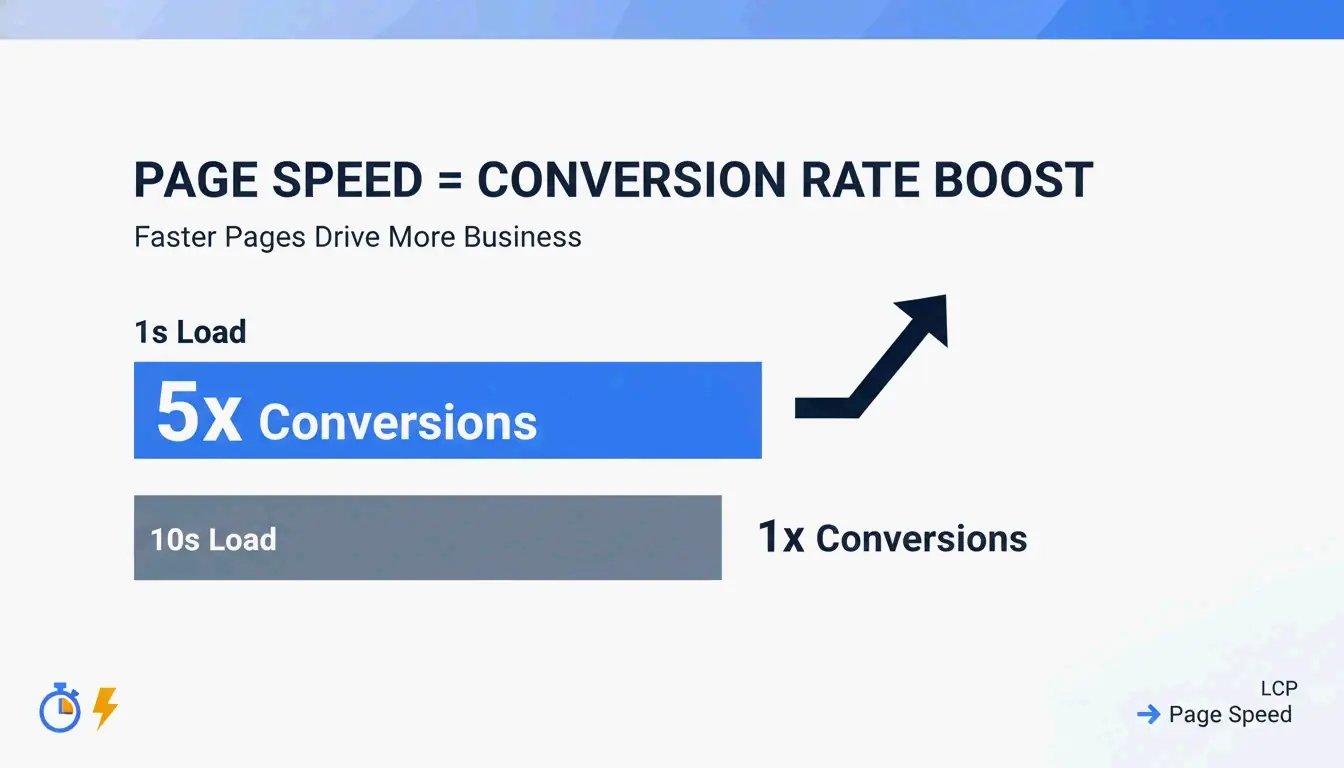
    To meet Google’s Core Web Vitals (LCP) standards, images must load fast. Illustrate Digital reports that a one-second load time on B2B sites leads to conversion rates five times higher than sites taking 10 seconds.

    Target Recommended Setting
    Hero images Under 200KB, WebP or AVIF
    Thumbnails Under 30KB
    Quality 75-85%

    Government Forms

    Official sites impose strict limits. IRCC Canada guidelines require files under 2MB, recommending scan resolution at 96 DPI.

    Email Attachments

    Keep quality at 70-80% to maintain individual images under 1MB, staying well within the common 25MB attachment limit.

    Use Case Quality DPI Max File Size
    Web SEO 75-85% 72 Under 200KB (hero)
    Government forms 80% 96 Under 2MB
    Email 70-80% 72 Under 1MB per image

    Conclusion

    Compressing photos no longer requires choosing between quality and size. Modern formats like HEIC and AI-based tools deliver both. By switching to WebP and AVIF, you can cut storage needs by up to 80% without losing visual detail. Start by enabling “High Efficiency” in your phone’s camera settings, then use an AI batch compressor to audit your cloud storage. These small changes save money on monthly subscriptions and ensure room for new photos.

    FAQ

    Does compressing a photo reduce its print quality?

    Yes, when using aggressive lossy compression. For physical prints, maintain a high resolution — at least 300 DPI. Use lossless compression or high-quality JPEG settings (90%+) to ensure the printed image remains sharp and free of pixelation artifacts.

    How do I batch compress multiple photos on a Mac?

    Use the native Quick Actions feature in Finder:
    1. Select all photos to compress
    2. Right-click and navigate to Quick Actions > Convert Image
    3. Choose “Small” or “Medium” size
    4. Select your preferred format

    This saves significant space instantly without opening a separate application.

    What is the difference between HEIC and JPEG for storage?

    HEIC (High Efficiency Image Format) uses HEVC encoding to produce files roughly 50% smaller than JPEGs at the same visual quality. JPEG offers broader compatibility with older software, while HEIC is the preferred standard for modern Apple and Android ecosystems to maximize storage efficiency.

  • How to Compress and Resize Images for Web and Social Media (2026 Guide)

    How to Compress and Resize Images for Web and Social Media (2026 Guide)

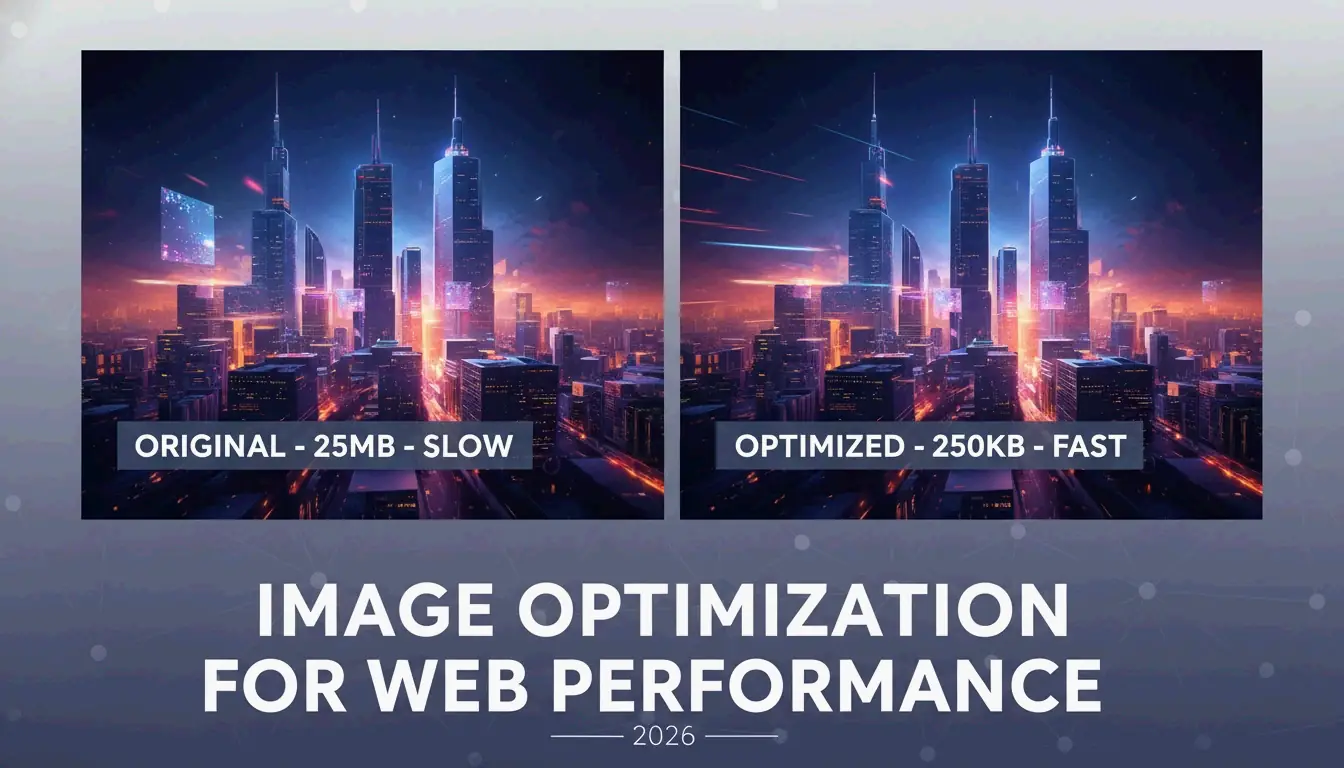
    Compressing and resizing images effectively in 2026 requires tools like Adobe Photoshop, Microsoft PowerToys, or browser-based platforms like Imgresizer.io. Adjust pixel dimensions for your target platform and set JPEG quality to 70-80%, or switch to AVIF format to reduce file weight without losing visual clarity.

    Mastering the Balance: How to Compress and Resize Images Without Quality Loss

    Optimizing visuals for the web is a two-step process: adjust physical dimensions (resizing), then reduce data density (compression). According to Business.com, standard JPEG compression typically cuts file size by 40-60%, striking a balance between professional quality and lightweight files.

    Step 1: Adjusting Pixel Dimensions (Resizing)

    Resizing changes the total pixel count to match where the image will be displayed. If your website hero banner is 1200px wide, uploading a 4000px original wastes bandwidth.

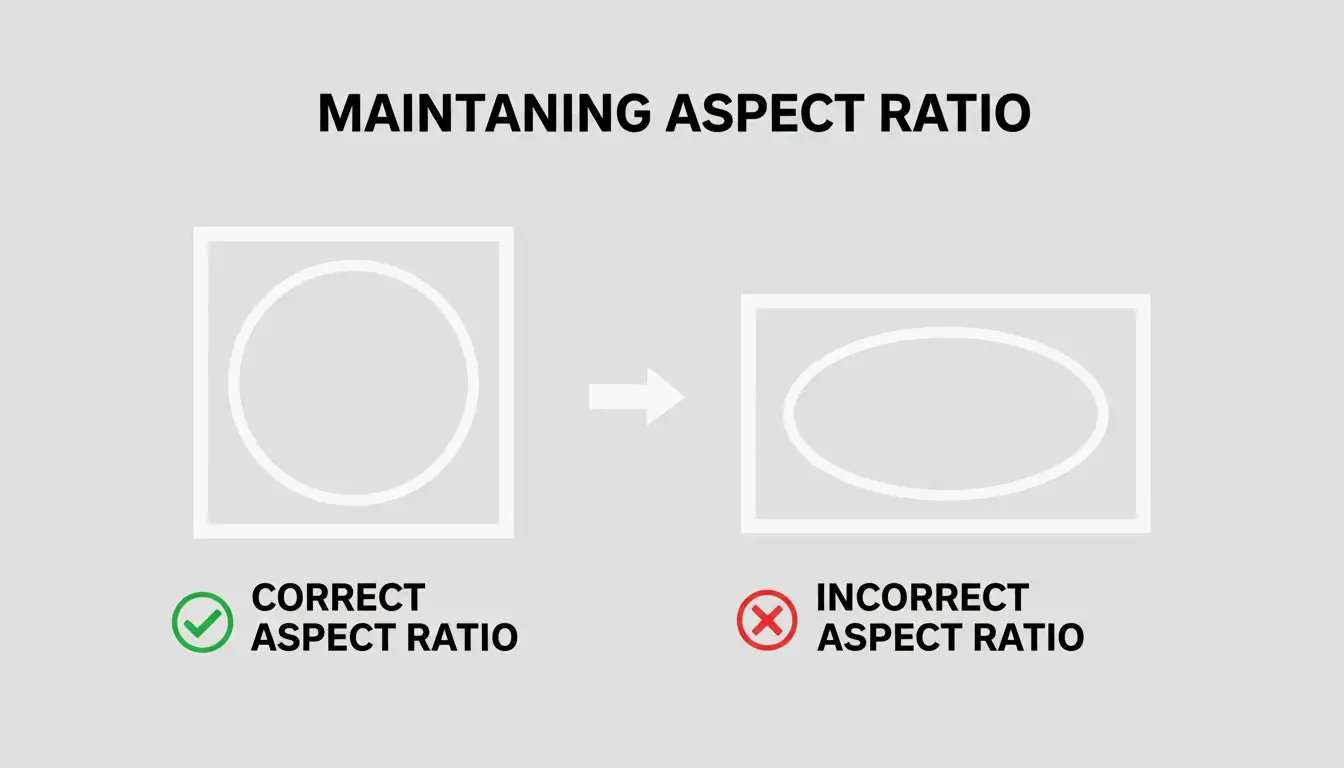
    Always lock the Aspect Ratio. Without it, images appear stretched or squashed. Tools like EverydayTools let you set the width while automatically calculating the height to maintain proper proportions.

    A simple visual metaphor for aspect ratio: a frame maintaining its proportions vs. one that is distorted.

    Step 2: Applying Compression Algorithms

    Once dimensions are set, compression reduces file size further.

    Compression Type How It Works File Size Impact Best For
    Lossy (JPEG 70-80%) Strips high-frequency data invisible to the eye 50-70% smaller Web, social media
    Lossless (PNG, WebP lossless) Removes redundancy without data loss 20-40% smaller Logos, text graphics, archival

    In 2026, the standard JPEG / JPG quality setting is 70-80%. This removes fine details the human eye cannot distinguish without creating visible artifacts.

    Why Image Optimization is Critical for Core Web Vitals (LCP)

    Image optimization is a basic SEO requirement in 2026. Google’s Core Web Vitals use Largest Contentful Paint (LCP) to measure how quickly the largest visual element (typically a hero image) loads. Large, unoptimized images are the primary cause of slow LCP scores, which directly hurt search rankings.

    The business impact is measurable:

    Load Time Conversion Impact Source
    1 second 5x higher conversion than 10s sites Illustrate Digital
    3+ seconds 53% of mobile users abandon Industry benchmark
    10 seconds Lowest conversion rates Illustrate Digital

    A 2026 report from the Baymard Institute found that 62% of e-commerce sites still struggle with slow visuals, leading to frustrated users and high bounce rates.

    A minimalist comparison showing the direct correlation between page load speed and conversion rates.

    AVIF vs. WebP: Which Format Should You Choose in 2026?

    Format Efficiency vs. JPEG Detail Preservation Browser Support (2026)
    WebP 25-30% smaller Good Broad
    AVIF 30-50% smaller Better (high-detail areas) Growing, modern browsers
    JPEG Baseline Standard Universal

    AVIF has become the preferred next-gen format for SEO in 2026. It is approximately 25-30% more efficient than WebP and preserves high-detail areas more effectively. The recommended approach is a “fallback” system: serve AVIF when supported, fall back to WebP or JPEG for older browsers.

    Best Tools to Compress and Resize Images: From Pro to Privacy-First

    Quality directly affects revenue. Salsify’s 2025 Consumer Research Report found that 42% of shoppers abandon a purchase if product images are missing or look low-quality.

    Offline and Bulk Processing for Windows/Mac

    Tool Platform Key Feature Best For
    Adobe Photoshop Win/Mac Color profiles, batch exports, full control Professional work
    Microsoft PowerToys Windows Right-click resize in File Explorer, bulk presets Fast batch processing

    Microsoft PowerToys adds a shortcut to File Explorer for right-click bulk resizing of hundreds of images using “Fit,” “Fill,” or “Stretch” presets.

    Zero-Upload Web Tools for Maximum Privacy

    For sensitive client assets, privacy is paramount. Tools like Imgresizer.io and EverydayTools use the HTML Canvas API, processing images entirely inside your browser’s memory. Since nothing is uploaded to a server, these “Zero-Upload” tools are the safest option for compression and format conversion.

    Automation and AI: Using MCP and Code for Image Processing

    Image optimization is moving toward automation. Developers can build custom resizers using HTML Canvas and JavaScript:

    Method API Call Use Case
    Draw to canvas drawImage() at specific sizes Resizing
    Export as data URL toDataURL() Quick format conversion
    Export as blob toBlob() Quality-controlled file export

    The AI Workflow: Resizing via Chat Prompts

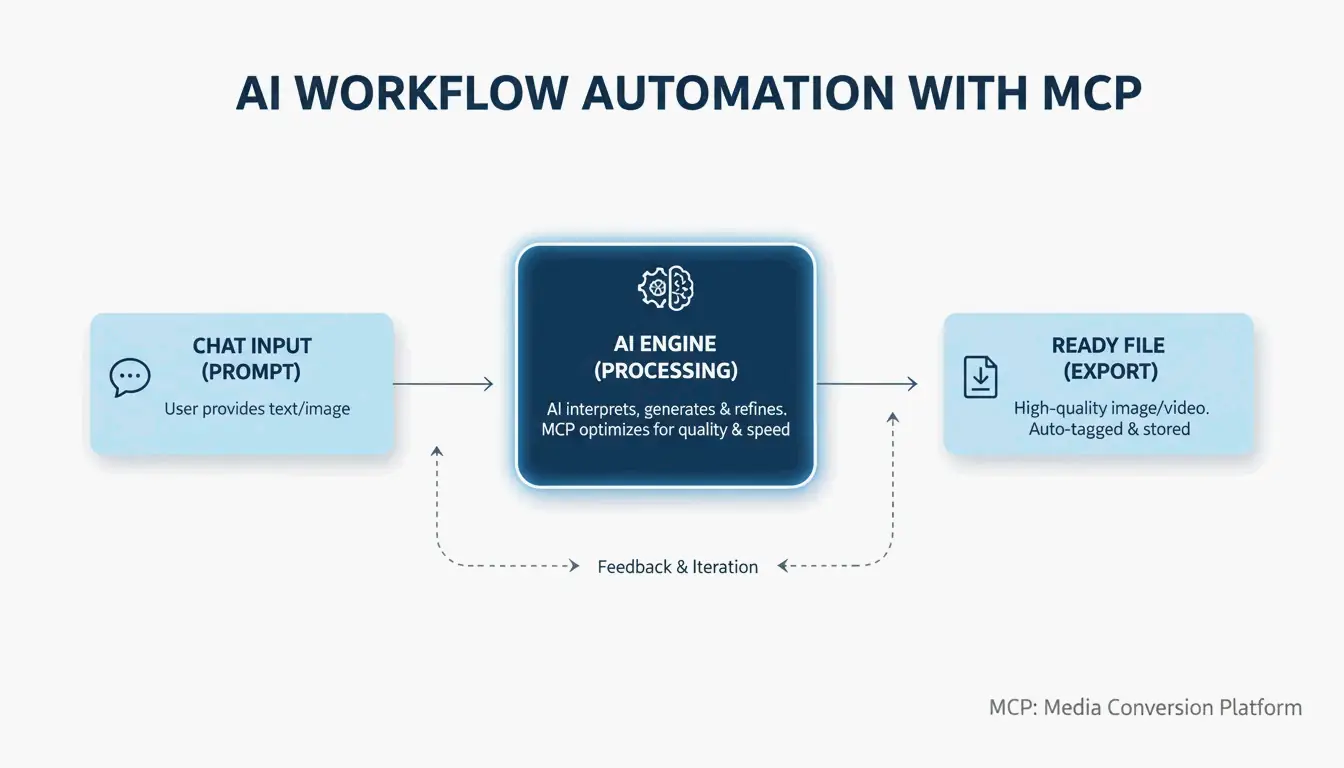
    A major 2026 trend is the Model Context Protocol (MCP). As noted by Iteration Layer, MCP lets AI assistants like Claude or Cursor connect directly to image tools. Instead of opening a separate app, you can instruct the AI: “Resize this PNG to 800×600, convert it to WebP, and keep it under 200KB.” The AI handles the math and conversion without leaving your code editor.

    A simple 3-step AI-driven workflow: User Prompt -> AI Processing -> Optimized Image.

    Conclusion

    Image optimization is a two-part job: resizing dimensions and compressing data. In 2026, using next-gen formats like AVIF and local-processing tools is the best approach for both privacy and SEO. Check your site’s LCP on PageSpeed Insights, then use a bulk tool like Microsoft PowerToys or an AI-driven MCP workflow to replace heavy JPEGs with lean, fast AVIF files.

    FAQ

    How can I resize an image without uploading it to a server for privacy?

    Use browser-based tools that utilize the HTML Canvas API, such as Imgresizer.io. These tools process images locally in your browser’s memory — the file never leaves your device. Alternatively, use offline software like Microsoft PowerToys or Adobe Photoshop to handle all processing on your local hard drive.

    What is the difference between Lossy and Lossless compression for JPEGs?

    Lossy compression permanently removes subtle data to reduce file size significantly. A 75% quality setting is the “sweet spot” for web performance. Lossless compression reduces size without removing any data, allowing full restoration to the original state. Lossless is better for professional archiving but results in larger files.

    What are the recommended dimensions for social media in 2026?

    Platform Content Type Dimensions Notes
    Instagram Square posts 1080x1080px Standard feed
    Instagram Portrait posts 1080x1350px Maximum engagement
    Facebook Cover photos 820x312px Desktop and mobile
    LinkedIn Company pages 1128x191px Banner format

    For high-DPI or Retina displays, export at 2x these dimensions (e.g., 2160x2160px for Instagram square) to ensure sharpness on modern mobile screens.

  • How to Change Photos Size Fast – 2026 Guide for Web, iOS, and Android

    How to Change Photos Size Fast – 2026 Guide for Web, iOS, and Android

    Changing photos size in 2026 is fastest with free web-based tools like BIRME or Img2Go for bulk processing, or native tools like the updated iOS “Preview” and Android “Google Photos.” Upload your image, set target pixels or percentage, lock the aspect ratio, and download the optimized file.

    Quick Ways to Change Photos Size Without Quality Loss

    When you need to change photos size, first decide between Pixels vs. Percentage:

    Method Best For Example
    Resize by pixels Exact dimensions for web forms, social headers Set width to 1080px
    Scale by percentage Quick proportional shrinking of large files Reduce to 50%

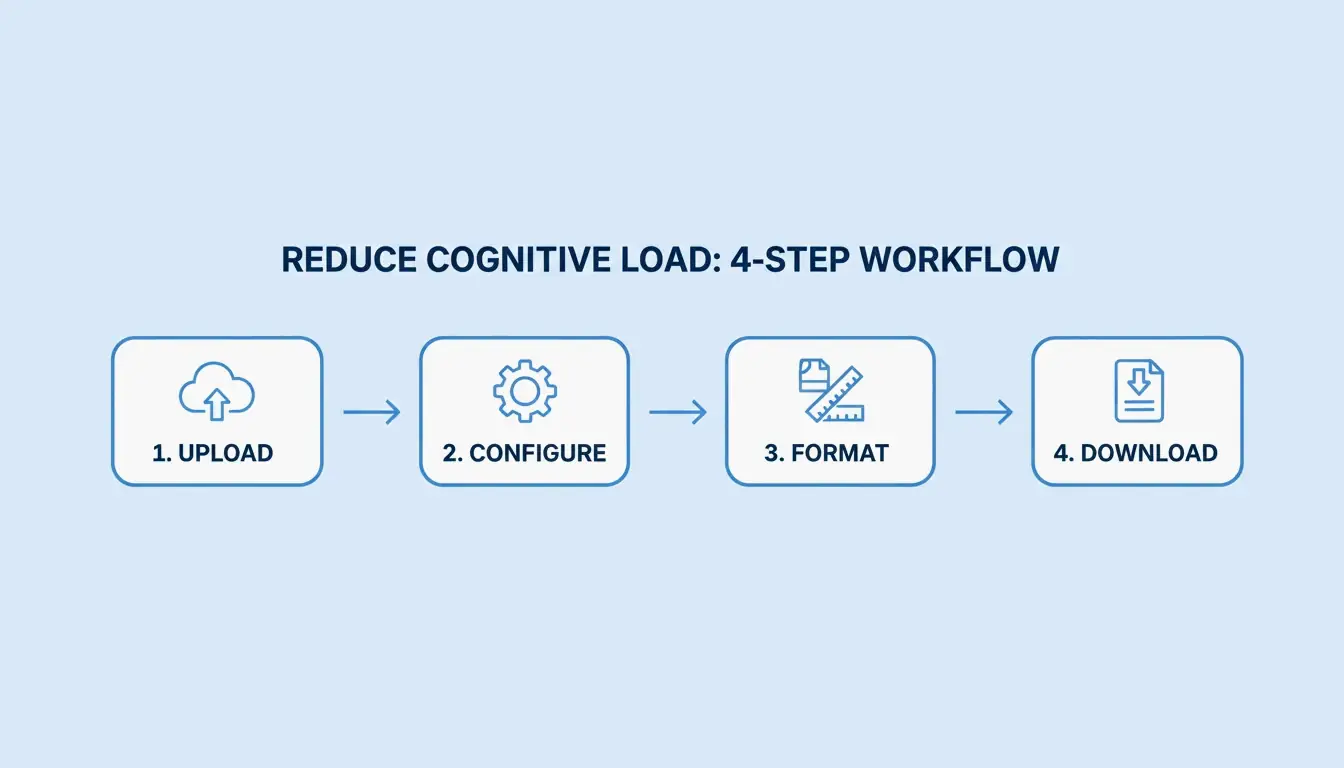
    Standard 4-step resizing process:

    Step Action Detail
    1. Upload Select source file JPG, PNG, WebP, or AVIF
    2. Define Constraints Enter width/height or scale Lock aspect ratio
    3. Format Selection Choose output format WebP for better compression
    4. Download Save optimized file Check file size meets target

    Simple 4-step resizing workflow

    BIRME recommends an 80% quality balance as the “golden rule” for web optimization. This setting cuts file size significantly while maintaining visual quality that helps pages load faster on mobile devices.

    Why Maintaining Aspect Ratio is Non-Negotiable

    Locking the Aspect Ratio ensures width and height adjust proportionally. Without this lock, images appear “squashed” or stretched. Modern tools like Toolnox include an aspect ratio lock by default.

    How to Batch Resize Multiple Images Efficiently

    Batch Resize / Bulk Resizing tools handle large volumes efficiently. BIRME serves over 50,000 monthly users (2026) and processes hundreds of images at once with a single rule set — essential for online stores and professional portfolios.

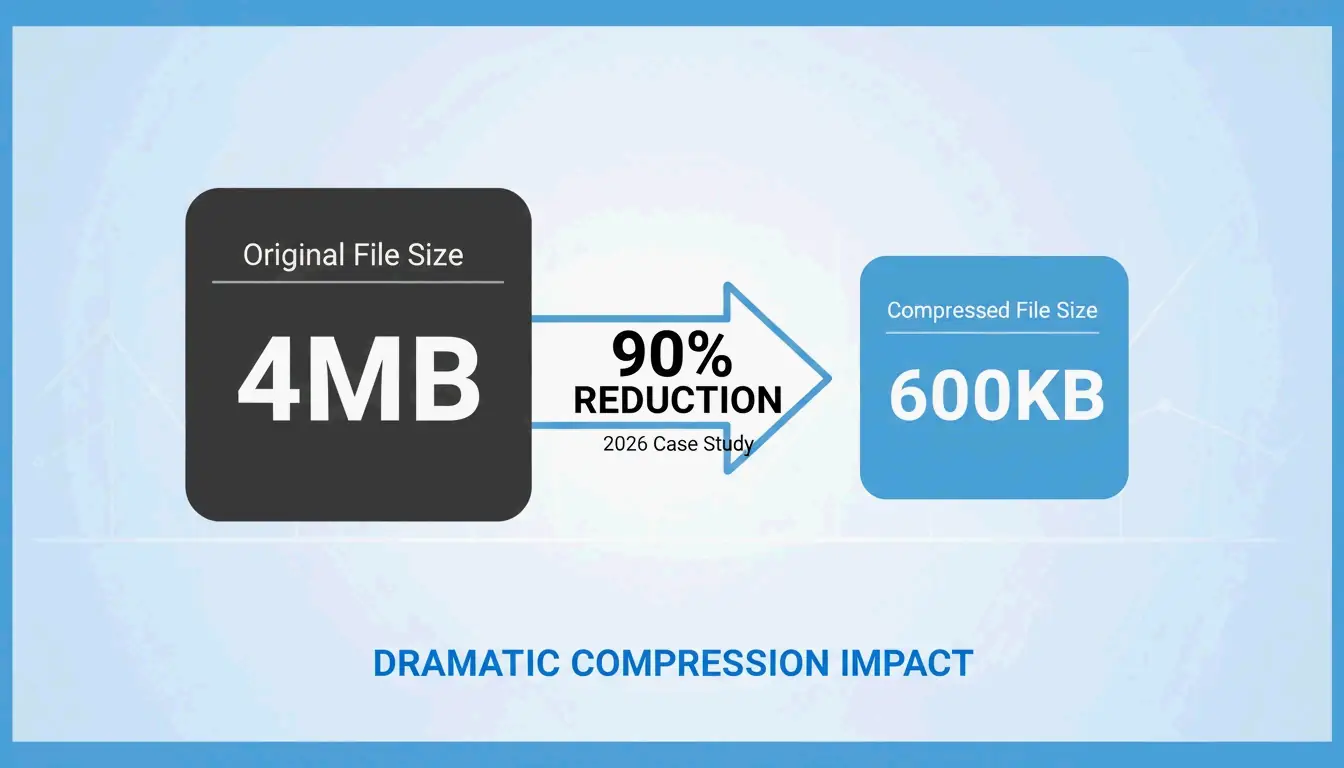
    Compression alongside resizing manages File Size (KB/MB) effectively. In a 2026 case study, users of Photo and Picture Resizer achieved a 90% file size reduction, shrinking 4MB high-res photos to approximately 400KB — well under the 5MB attachment limits of most email services.

    Metric Before After
    File size 4MB ~400KB
    Reduction 90%
    Email-compatible No (over 5MB combined) Yes

    File size reduction comparison: 4MB vs 400KB

    Native 2026 Methods: Resizing on iOS and Android

    Mobile devices now handle resizing without extra apps:

    iOS 2026 Updates:
    – The iOS Preview app (built into Files) supports direct resizing
    – Select an image in Files, tap “Quick Actions,” and pick dimensions
    – No need to email photos to yourself to trigger size prompts

    Android 2026 Updates:
    Google Photos uses AI for image size management
    – “AI Enhance” and “Auto Frame” help recompose shots
    – Always choose “Save as copy” to preserve originals

    Manage your EXIF Data carefully. Apps like Image Size — Photo Resizer let you keep or remove metadata like GPS location and camera settings to protect your privacy.

    Does Google Photos Preserve Quality?

    Google Photos uses smart compression to maintain visual quality. Key behavior:

    • Save overwrites the original file
    • Save as copy creates a new file alongside the original
    • The “AI Enhance” feature (US availability, 2026) suggests multiple resized versions so you can pick the clearest one

    2026 Image Dimension Cheat Sheet for Social and E-Commerce

    Platform Content Type Dimensions Aspect Ratio
    Amazon/eBay Product photos 2000x2000px 1:1 (square)
    Instagram Feed posts 1080x1080px 1:1 (square)
    Instagram Portrait posts 1080x1350px 4:5
    TikTok/Instagram Reels 1080x1920px 9:16 (vertical)
    Facebook Cover photo 820x312px 205:78
    LinkedIn Company page 1128x191px ~6:1
    YouTube Banner 2048x1152px 16:9

    Smart Cropping / Auto Focal Point technology uses “smartcrop” libraries to identify the most important parts of a photo — faces, textures, key subjects — and keeps them centered while trimming less important edges.

    AI Upscaling vs. Traditional Resizing: When to Use What

    Method Direction Quality Use Case
    Traditional resizing Downscale only High Web optimization, thumbnails
    Traditional resizing Upscale Low (pixelated) Avoid
    AI Super-resolution Upscale High (generative fill) Enlarging small images
    AI Uncrop/Generative Fill Expand borders High (invented data) Changing aspect ratio, extending scenes

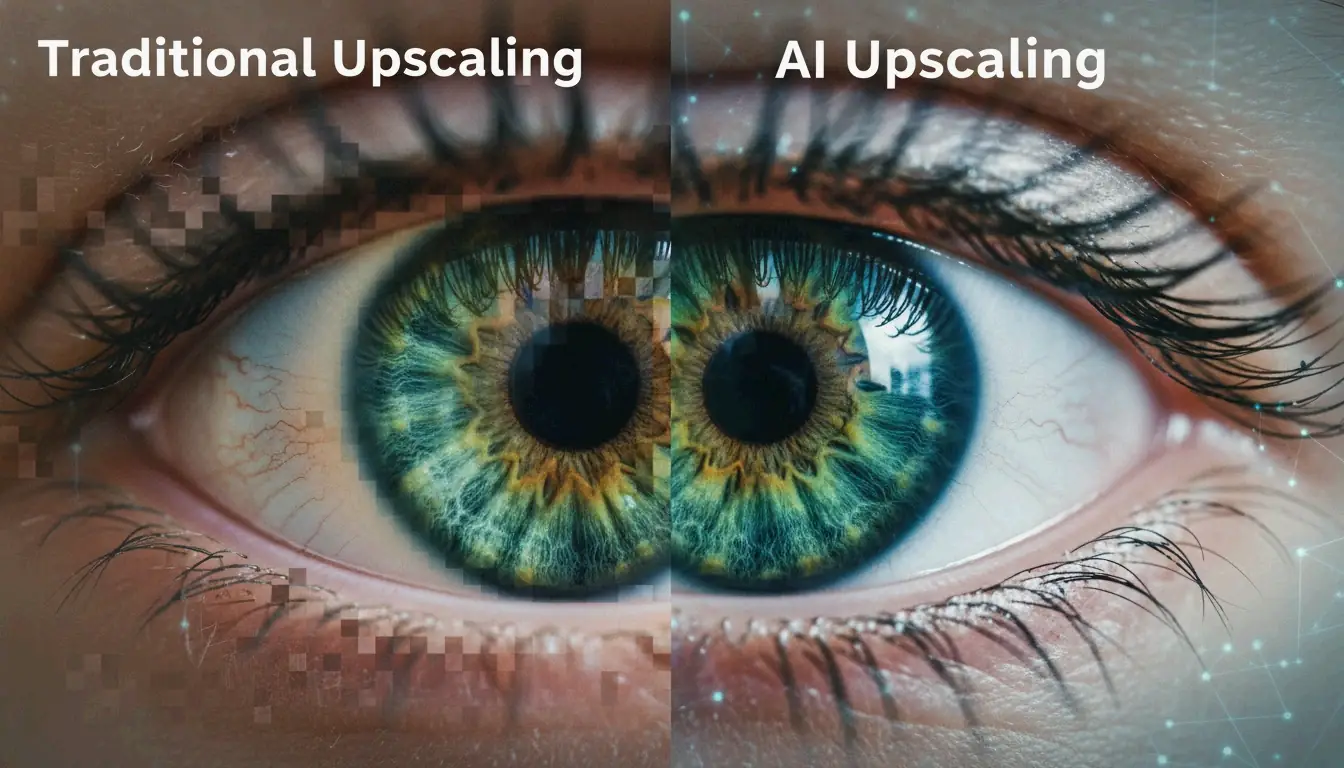
    Standard resizing cannot create new image data — it only stretches existing pixels, producing “interpolation artifacts.” The 2026 industry standard for enlarging images is Generative Fill and AI Uncrop, which fill in new data to expand borders or boost resolution.

    The BIRME Developer advises using an AI “superpixel” tool when photos look blurry after enlargement. Tools like Airbrush can transform a portrait into a wide landscape by generating a realistic matching background.

    Visualizing AI generative fill vs pixel stretching

    Conclusion

    Changing photo size in 2026 comes down to three principles: maintaining the correct aspect ratio, using modern formats like WebP or AVIF, and picking the right tool for your device. Whether using iOS Preview features, Google Photos AI tools, or bulk web processors like BIRME, the goal is lighter files without sacrificing visual quality.

    For web developers, the 80% quality rule keeps sites fast. For mobile users, 2026 native updates make space-saving possible without extra apps. By matching dimensions to current platform standards, content stays sharp and professional on every screen.

    FAQ

    How do I resize photos on iPhone without installing a third-party app?

    In 2026, use the built-in Files app. Open the app, find your image, long-press it, and select “Quick Actions,” then “Resize.” Choose from Small, Medium, or Large presets, or enter custom pixel dimensions. The Shortcuts app also supports creating an automated resizing tool for your entire Photos library.

    What is the recommended image quality (JPG/WebP) for fast website loading?

    For most websites, 80% quality offers the best balance between visual fidelity and file size. Use WebP or AVIF formats for better compression ratios. Target under 200KB for large hero images and under 30KB for small thumbnails to keep your site fast and mobile-friendly.

    Why do my photos look pixelated or blurry after I increase their size?

    Standard resizing cannot create new image data — it only stretches existing pixels, producing “interpolation artifacts.” This is most noticeable when enlarging beyond the original dimensions. To enlarge images without losing clarity, use AI Super-resolution or upscaling tools that employ generative AI to fill in missing details.

  • Best Change Image Size App Options for 2026: Resize Pixels and KB Instantly

    Best Change Image Size App Options for 2026: Resize Pixels and KB Instantly

    To change image size in 2026, the most reliable methods are using the “Image Size” app on iOS/Android for pixel-perfect adjustments or BIRME.net for bulk processing. Just upload your photo, set your new dimensions while keeping the aspect ratio locked, and save. For official document uploads, aim for 96-150 DPI to keep file sizes under 2MB.

    How to Use a Change Image Size App: The 3-Step Framework

    Choosing the right change image size app usually comes down to what device you are using and how many photos you have. If you are on your phone, dedicated apps like “Image Size — Photo Resizer” (iOS and Android) give you exact control over pixels, millimeters, or inches. If you are on a computer, browser-based tools like BIRME are often faster because they process images locally, which also keeps your data private.

    The process follows these three steps:

    1. Pick Your Tool: Use a mobile app for a quick single edit, or a web-based batch tool if you have dozens of photos to resize at once.
    2. Set Your Dimensions: Type in the width or height you need. Make sure the aspect ratio — often shown as a small chain link icon — is locked. This prevents your image from looking stretched or “squashed.”
    3. Choose the Format: Pick your output file type. JPEG, JPG, and PNG are still the standard go-tos, but WebP is becoming the favorite for websites because it makes files much smaller without losing quality.

    Simple 3-step process: Tool to Dimensions to Format

    The developer of BIRME points out that finding the right balance between clarity and file size is key. An 80% quality setting is usually the “sweet spot” for web use; you rarely need to go above 90% unless you need perfect high-fidelity prints.

    Maintaining Aspect Ratio to Prevent Distortion

    To keep your photos looking right, always lock the aspect ratio before you touch the dimensions. In the “Image Size” app, tapping the chain icon between the width and height boxes ensures that if you change one number, the other adjusts automatically. If you skip this, you might end up with distorted images — a frequent headache noted by the creator of BIRME when users upload “squeezed” photos to WordPress sites.

    The Decision Matrix: Resize Pixels vs. Compress KB/MB

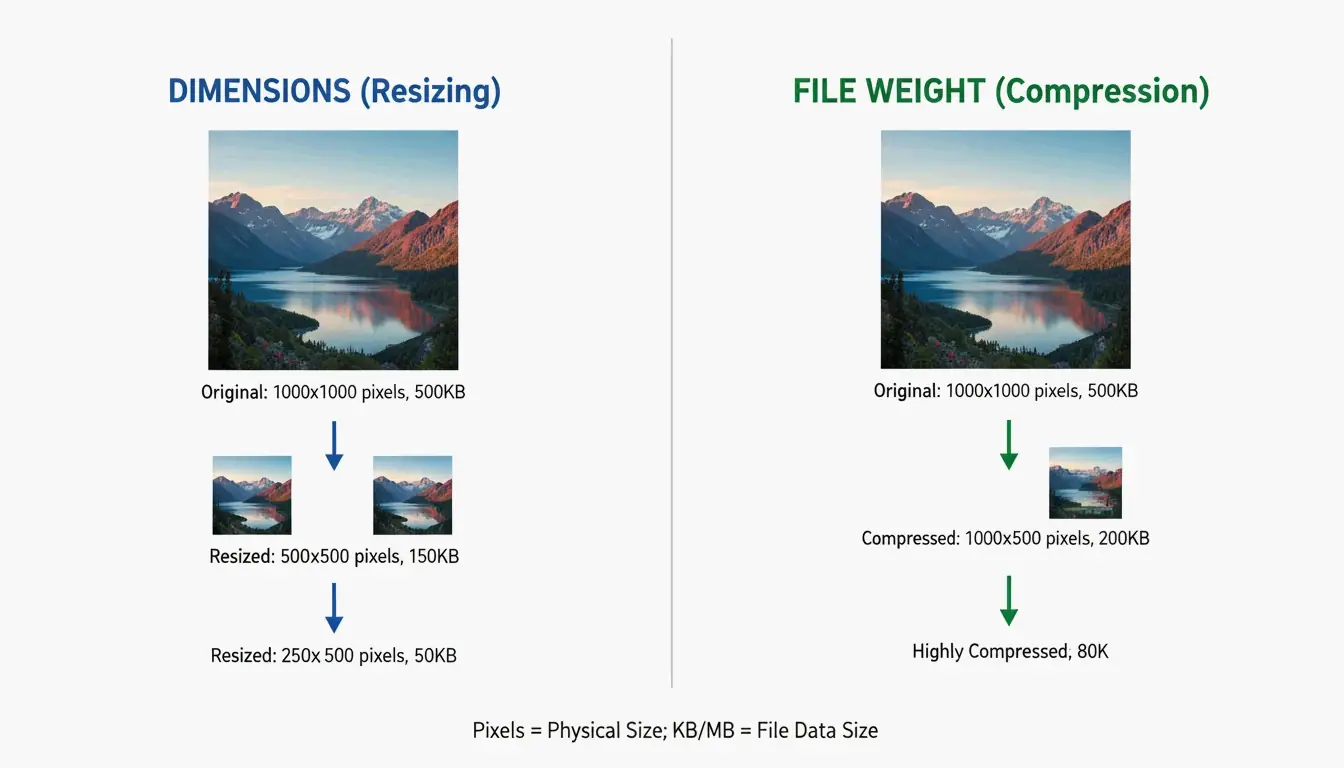
    Knowing whether to change the physical dimensions (pixels) or the file weight (KB/MB) is important for meeting specific upload rules.

    Your Goal Action Example
    Fit social media layout Resize pixels Set Instagram post to 1080x1080px
    Meet email attachment limit Compress KB/MB Shrink 5MB photo to under 1MB
    Government portal upload Both combined 96 DPI + target 50KB JPG
    Website hero banner Resize + compress 1200px wide at 80% quality

    Side-by-side comparison: Dimension Resizing vs. File Compression

    Your Resolution (DPI) also affects the final file size. According to Canada IRCC, official document uploads often have a 2MB limit. They suggest scanning documents at a lower resolution, like 96 DPI or 150 DPI. This keeps the file small enough to upload while ensuring the text stays clear and readable.

    Why Batch Processing is Essential for Efficiency

    When you have hundreds of images to deal with, Batch Processing is a lifesaver. Tools like BIRME (which handles over 50,000 users a month according to BIRME.net) let you drop an entire folder of photos into your browser and apply the same settings to all of them at once.

    Modern batch tools now use Smart Cropping (or Auto Focal detection). This technology uses libraries like “smartcrop” to scan an image for important details like faces, lines, or curves. It identifies the “focal point” so that when the image is resized or cropped to a new shape, the most important part of the photo stays centered and does not get cut off.

    No-App Methods: Resizing on iOS 26 and Android Native Tools

    By 2026, you can often resize images without downloading a separate change image size app by using the tools already on your phone.

    Platform Native Method Steps
    iOS 26 Shortcuts app Create “Resize Image” shortcut in Share menu
    iOS (classic) Mail app trick Email photo to yourself, choose Small/Medium/Large
    Android Gallery + Google Photos Use built-in resize in share settings
    Windows Paint / Photos app Resize > Set percentage or pixels

    Android’s native Gallery and the iOS “Preview” tool also offer basic resizing. However, many people still prefer dedicated apps because native tools sometimes lack the ability to set a specific KB target or handle 50 photos at once.

    Next-Gen Formats: Support for WebP and AVIF

    The way we save images is changing. While JPEG, JPG, and PNG work everywhere, WebP and AVIF are the new standards for high performance.

    Format Compression Browser Support Best For
    JPEG Lossy, 80% quality standard Universal General photos
    PNG Lossless Universal Logos, transparency
    WebP Lossy/Lossless 97%+ browsers Web optimization
    AVIF Lossy, 50% smaller than JPEG 93%+ browsers Next-gen web delivery

    AVIF is particularly impressive, offering much smaller file sizes than JPEG while looking just as sharp. Most top-rated resizing apps in 2026 now let you convert old files into these next-gen formats to help websites load faster and save space on your phone.

    Conclusion

    The best change image size app for you depends on what you are trying to do: do you need exact pixel dimensions, bulk processing, or a tiny file for a document upload? For a quick edit on your phone, a dedicated tool like the “Image Size” app offers the best precision for pixels and aspect ratio. For professional web work or large batches, a tool like BIRME.net is the most efficient choice — it is fast, keeps your files private, and does not require uploading anything to a server. Just remember to start with your highest-quality original and keep your quality settings around 80% for the best results.

    FAQ

    Why do my photos look pixelated after resizing?

    Pixelation usually happens when you try to “upscale” a small image (making it bigger than it originally was). The software has to “guess” where to put new pixels, which creates a blurry or blocky look. According to BIRME, setting the quality too low — well below 80% — can also ruin the fine details. To avoid this, always try to start with the highest-resolution original file you have.

    Is it safe to use online image resizers for private photos?

    It is safe as long as you use “client-side” or “local” tools like BIRME. On these sites, your images never actually leave your computer; the resizing happens right inside your browser using JavaScript. You should avoid sites that force you to upload your files to a remote server, especially if you are handling IDs or sensitive documents.

    How can I resize an image on iPhone without downloading a third-party app?

    The easiest way is to use the “Mail” app: email the photo to yourself and choose a smaller size (Small, Medium, or Large) when the prompt appears. You can also use the “Shortcuts” app to build a custom “Resize Image” tool. Another quick trick is to use the “Print” preview — if you pinch out on the print preview screen, you can save that version as a new, often smaller, PDF or image.

  • How to Bulk Resize Photos and Videos in 2026: A Privacy-First Guide

    How to Bulk Resize Photos and Videos in 2026: A Privacy-First Guide

    To bulk resize photos and videos in 2026, the most efficient approach is to use browser-based tools like BIRME or FastTool for images, and local API platforms for video files. Upload your batch, set your dimensions while locking the Aspect Ratio, adjust Compression Quality to 80-90%, and download the optimized results as a ZIP file — all without your data ever leaving your device.

    The 2026 Standard for Bulk Resizing Photos and Videos

    By 2026, media processing has shifted toward a “local-first” approach. Instead of sending private files to a distant server, your computer does the work right inside the browser. This is powered by the Canvas API and HTML5 Canvas, which allow modern browsers to handle heavy image editing at speeds comparable to native software.

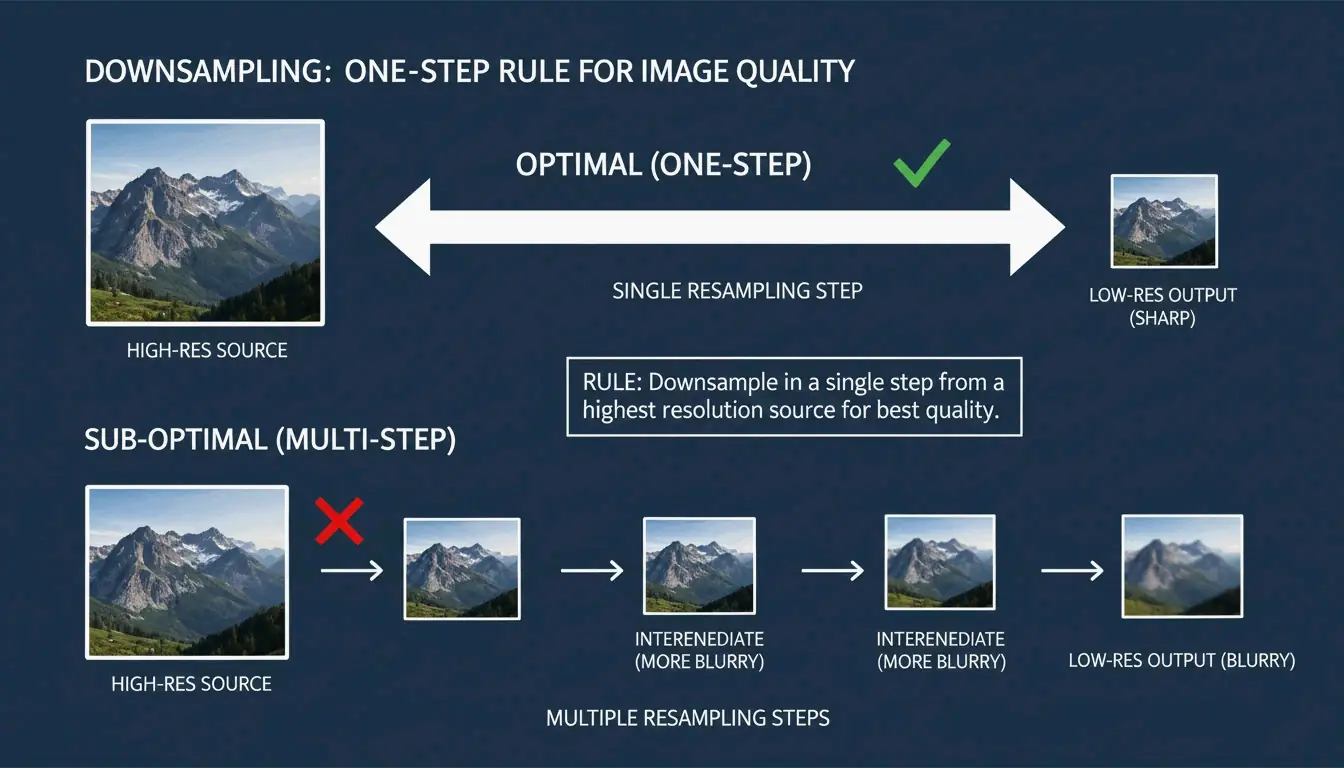
    The FastTool Engineering Team highlights a key rule for keeping images sharp: always downsample in one step. If you need to take a 2048px image down to 512px, doing it in a single step produces a cleaner result than resizing multiple times (e.g., 2048 to 1024 to 512), which often causes “ringing” or blurry artifacts.

    Comparison of single-step vs. multi-step resizing quality

    Step 1: Selecting Your Batch Processing Tool

    Your choice depends on how many files you have and how much you care about privacy.

    Scenario Recommended Tool Why
    Privacy-first, under 100 images BIRME or FastTool Browser-local, files never leave your device
    Large batches (hundreds of high-res files) ConvertFT Server-side C++ engines prevent browser freezes
    Mobile on-the-go editing Native iOS/Android tools No installation required

    Step 2: Defining Constraints to Maintain Aspect Ratio

    Nobody wants “squashed” or stretched photos. Always keep the Aspect Ratio locked. Most tools in 2026 let you set a fixed width (like 1200px) and automatically calculate the correct height. If you are prepping images for a specific shape like a square Instagram post, look for “Smart Cropping” — this feature finds the focal point of the photo so you do not accidentally cut off someone’s head.

    Common Aspect Ratio Settings:

    Platform Ratio Pixel Dimensions
    Instagram Feed (Square) 1:1 1080 x 1080px
    Instagram Reels / TikTok 9:16 1080 x 1920px
    YouTube Thumbnail 16:9 1280 x 720px
    Facebook Cover ~2.7:1 820 x 312px

    Step 3: Instant Local Export

    After you hit go, the browser uses canvas.toBlob to re-encode your media. The standard in 2026 is to export everything as a single ZIP file. This is a clever workaround for browser limits that usually block you from downloading dozens of individual files at once, letting you save your entire library with one click.

    Video vs. Photo: Bridging the Gap in Bulk Workflows

    Batch processing photos is mostly about pixels and dimensions, but video adds another layer: bitrate management. A video’s file size depends more on its bitrate (the amount of data processed per second) than its actual resolution. When resizing videos in bulk, your tool needs to adjust the encoding to match the new size. If it does not, you might end up with a tiny 480p video that still has a massive, unnecessary file size.

    Resolution vs. Bitrate: What Video Resizing Actually Means

    Shrinking a video from 4K to 1080p will not help your website load faster if the bitrate stays the same. Modern apps like Resize Now! let you choose specific Output Formats and aspect ratios (like 9:16 for TikTok) while managing these background settings. Whether you are working with MP4, MOV, or WebM, the goal is to get a consistent resolution that fits where you are posting it.

    Modern Standards: Adopting AVIF and HEVC for 2026

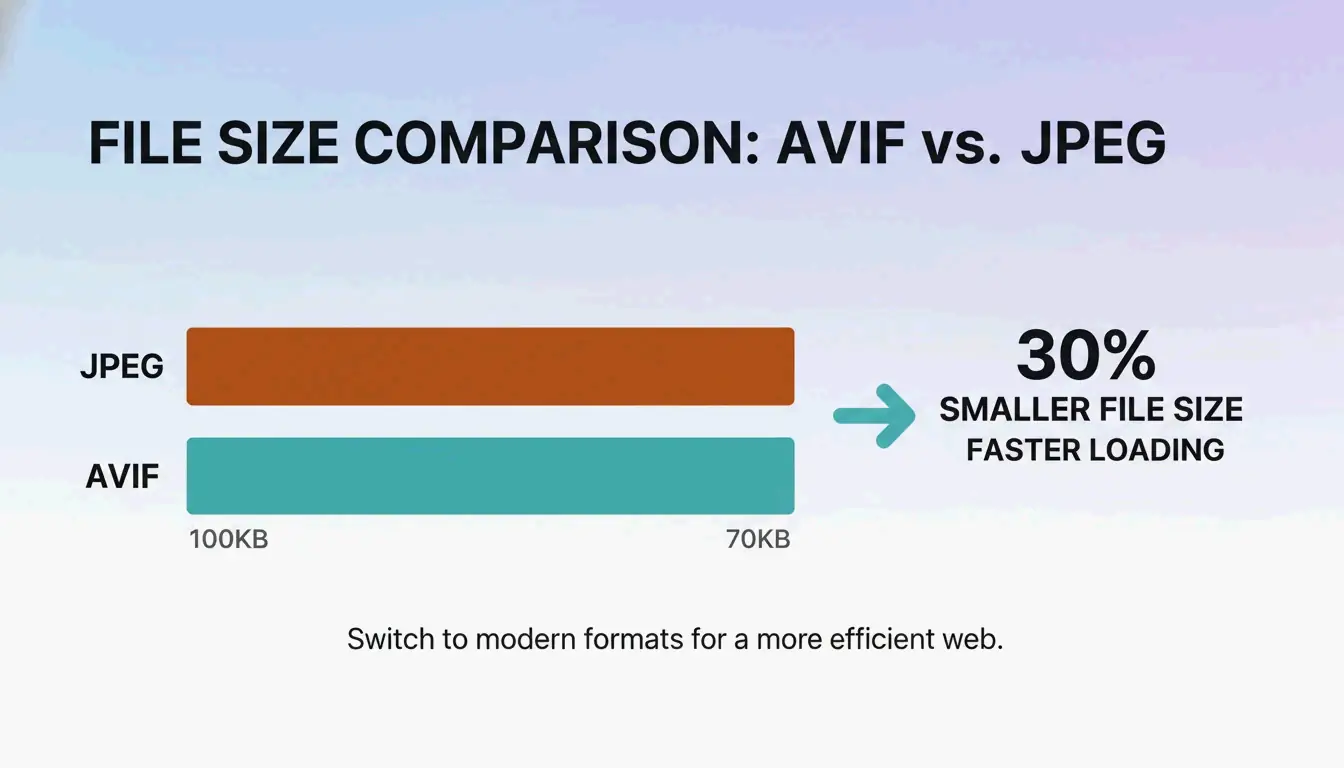
    In 2026, old-school JPEGs are taking a backseat to more efficient formats. FastTool notes that WebP and AVIF formats are usually 25-35% smaller than JPEGs or PNGs of the same quality. When resizing your library, converting to AVIF (for images) or HEVC (for videos) ensures your content loads instantly on the latest phones and high-speed networks.

    Format Type Savings vs JPEG Best Use
    AVIF Image 30-50% Web photos, hero images
    WebP Image 25-35% General web use
    HEVC (H.265) Video 40-50% vs H.264 4K/8K video delivery

    File size comparison between JPEG and AVIF/WebP

    Optimizing Compression Quality without Losing Sharpness

    Finding the “sweet spot” for Compression Quality is the secret to professional-looking files. For most websites, a setting between 80% and 90% is ideal. The BIRME guidelines mention that going above 90% rarely looks better to the human eye, but it makes the file size jump up significantly.

    To keep things crisp when shrinking images, 2026 tools use advanced algorithms like Lanczos and Bicubic Resampling. These algorithms calculate new pixel data in a way that prevents the “soft” or blurry edges you see in cheap editors.

    Compression Quality Reference:

    Quality Setting File Size Impact Visual Difference Best For
    90-100% Very large Imperceptible gain vs 85% Print, archival
    80-90% Moderate Barely noticeable loss Web, e-commerce
    70-80% Small Slight softening on close inspection Thumbnails, mobile
    Below 60% Very small Visible artifacts Avoid for professional use

    Case Study: Shopify Store Speed Optimization

    In one case from FastTool, a clothing store owner had 240 product photos shot at 24 megapixels. By bulk resizing them to 2048px wide at 85% JPEG quality, the store’s load time dropped from 4.8 seconds to just 1.9 seconds. That speed boost led to more sales in the very next quarter.

    Metric Before After Change
    Image dimensions 6000 x 4000px 2048px wide -66% width
    Quality 100% (original) 85% JPEG -15% quality
    Page load time 4.8 seconds 1.9 seconds -60%
    Total image weight ~1.4 GB ~45 MB -97%

    Advanced Features: Focal Point Detection and Metadata

    Handling a mix of portrait and landscape shots in one batch used to be a headache. Modern tools now use Focal Point Detection to fix this.

    Solving the Mixed Orientation Problem

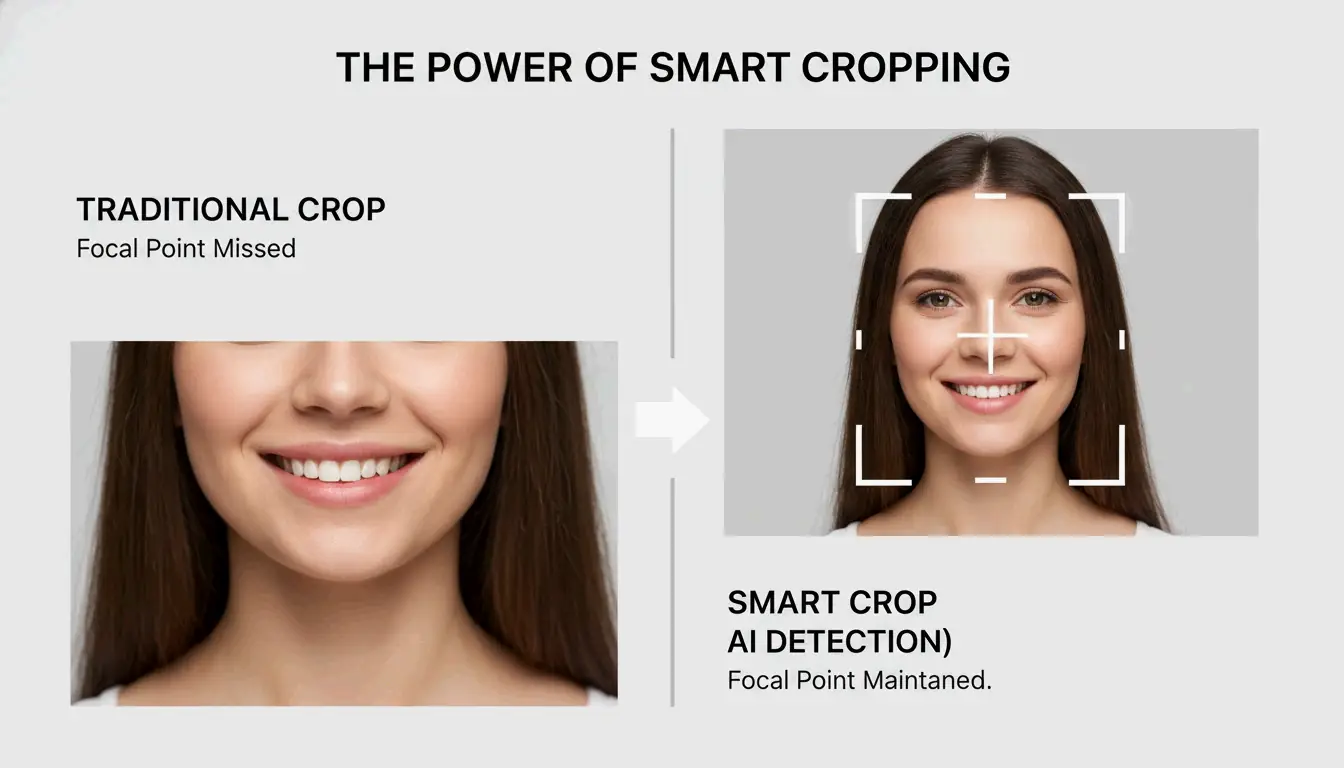
    Instead of just cropping the center of every image — which might cut out the product or a person’s face — 2026 tools use the Smartcrop library. This tech analyzes the image for interesting shapes and lines to figure out the most important part of the photo, then centers the crop there automatically.

    Visual demonstration of Smart Cropping vs. Center Cropping

    Privacy First: Handling EXIF Metadata in 2026

    Every smartphone photo contains EXIF Metadata — essentially a digital fingerprint including your GPS location, the time the photo was taken, and your phone model.

    • When to strip it: For social media or public galleries, removing this data is a smart privacy move.
    • When to keep it: Pro photographers often keep EXIF data to protect their copyright or keep track of their camera settings.

    Modern resizers usually give you a simple toggle to either “Strip Metadata” for privacy or “Preserve EXIF” for professional work.

    Conclusion

    By 2026, bulk resizing has evolved. It is no longer just about changing numbers; it is about balancing privacy, using modern formats like AVIF, and using smart detection to make sure your quality stays high on every screen. By sticking to browser-local processing, you can handle sensitive media without worrying about data leaks on a remote server.

    Action Plan: Start by checking your current files to see which ones are slowing you down. Use a browser-local tool to test a few samples and find your best compression-to-quality ratio (usually 80-85%) before you update your whole library. It is a small step that makes a huge difference for your SEO and your visitors.

    FAQ

    Why do my photos look pixelated after resizing?

    Pixelation usually occurs if you attempt to upscale an image beyond its original dimensions. It can also be caused by using incorrect resampling algorithms. For the best results, always downsize rather than enlarge, and ensure your tool uses Lanczos or Bicubic filtering rather than simple linear scaling.

    Is it safe to upload sensitive client photos to an online resizer?

    It depends on the tool’s architecture. To ensure maximum safety, look for “Serverless” or “Local-only” tools (like BIRME or FastTool) that use the Canvas API. These tools process images entirely within your browser, meaning your files never leave your device and are never stored on a remote server.

  • Best Photo Resize Tools and Methods for 2026: Maintain Quality with AI and Bulk Processing

    Best Photo Resize Tools and Methods for 2026: Maintain Quality with AI and Bulk Processing

    To achieve the best photo resize results in 2026, you need tools that balance speed and image integrity. Use Birme for fast, privacy-focused bulk resizing in your browser, Overchat AI to expand aspect ratios without cropping, and iLoveIMG for cloud-connected batch processing. For mobile users, the Image Size app provides precise pixel-level control.

    How to Choose the Best Photo Resize Method for Your Needs

    The right resizing method comes down to three factors: speed, final image quality, and data privacy. In 2026, professional workflows demand precise Pixel Dimensions (Width/Height) optimized for high-density displays, making accuracy more important than ever.

    Traditional resizing remains the standard for making images smaller — converting a 4000px photo into an 800px version for a blog post, for example. This approach is fast and preserves sharpness as the image shrinks. However, for enlarging or changing shape, standard tools often fall short. Data from Birme, which serves over 50,000 users monthly, shows that Privacy/Browser-based Processing is a priority for modern creators. Client-side JavaScript ensures sensitive photos never leave your device.

    The Decision Matrix: Traditional Pixel Control vs. AI Expansion

    Approach Best For Method Trade-off
    Traditional Resizing Specific resolution targets Pixel interpolation Cannot add new content
    AI Expansion Aspect ratio changes Generative fill for new pixels Requires AI model processing

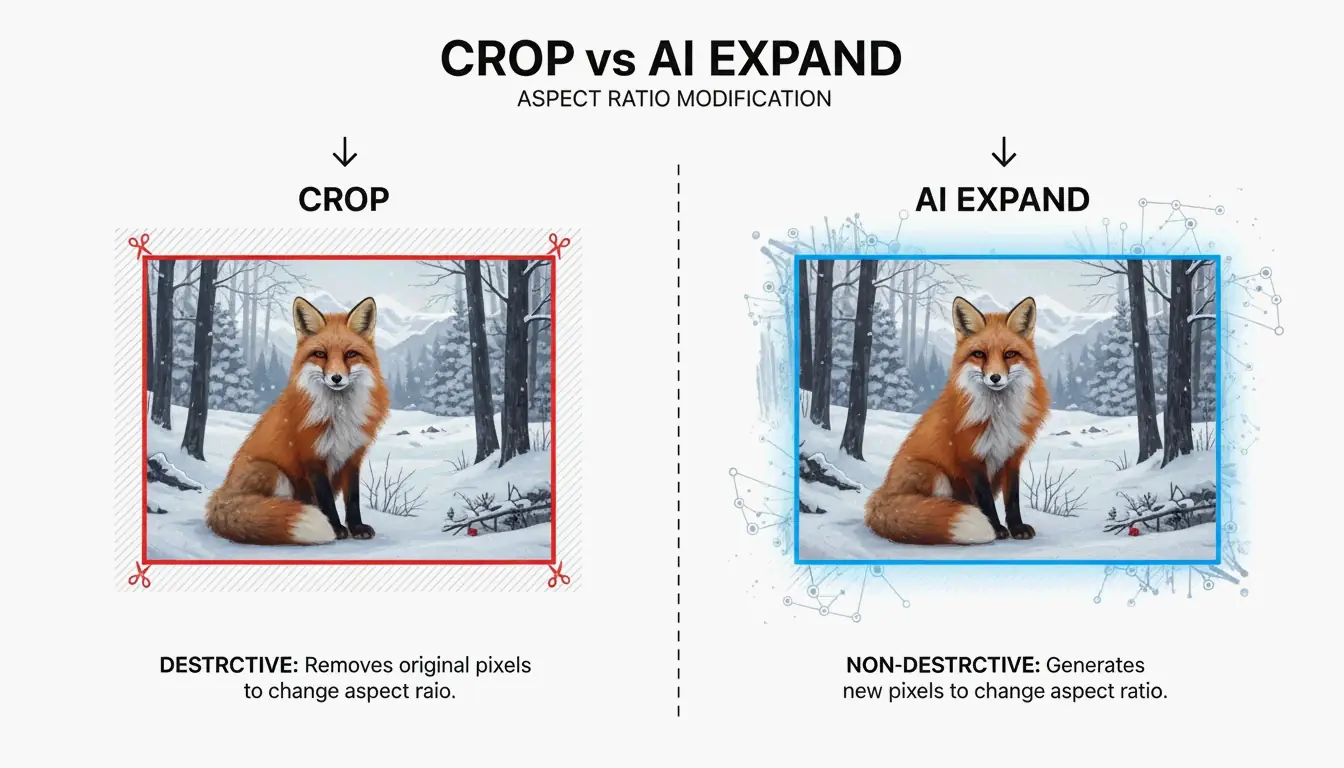
    Comparison between traditional cropping vs. AI generative expansion

    Traditional tools like ImageResizer.com work well when you have a specific resolution in mind and do not need to alter the image content. AI expansion is superior when the target aspect ratio differs from the original. While traditional cropping simply removes edges, AI generative fill creates new pixels to extend the scene, preserving the main subject.

    Best Photo Resize Tools for Bulk Processing and Privacy

    For content-heavy workflows, Bulk/Batch Resizing is essential. Processing hundreds of photos individually wastes time and introduces inconsistency. Tools like Birme let you set a single aspect ratio and apply it to an entire gallery at once.

    For batch work, format selection directly impacts website speed:

    Format Compression Quality Browser Support (2026)
    JPEG Lossy Good 100%
    PNG Lossless Excellent 100%
    WebP Both Excellent ~97%
    AVIF Both Excellent ~93%

    Birme recommends an 80%-90% quality balance for WebP or JPEG exports. This range represents the sweet spot where photos look professional but file sizes remain small enough for fast page loads.

    How to Batch Resize Without Losing Quality

    To maintain image sharpness, always resize downward from a high-resolution original. If upscaling is unavoidable, use a tool with a “High Quality Resize Method” or AI engine to prevent blurriness and pixelation. For cloud-connected workflows, iLoveIMG integrates directly with Google Drive and Dropbox, enabling pull-resize-save operations in a single flow.

    AI Aspect Ratio Expansion: Resizing Beyond the Frame

    The most significant advancement in 2026 is the AI Image Resizer/Extender, which enables “uncropping.” Rather than cutting off edges, AI models reconstruct the scene to fit new dimensions. This is ideal for converting a vertical 9:16 smartphone photo into a wide 16:9 cinematic header.

    Andrew Dyuzhov, a technology writer at AI Hub, explains: “AI image resizers differ from traditional ones by generating new content to extend images, rather than cropping or stretching — allowing aspect ratio changes without losing any original content.” Modern tools like Overchat AI, powered by the Seedream 5.0 model, reconstruct backgrounds with accuracy that makes the boundary between original and AI-generated content virtually indistinguishable.

    The “Uncrop” Revolution: How AI Fills the Gaps

    The “Uncrop” process combines Smart Cropping with generative fill to identify the focal point of a photo. When converting a horizontal image to vertical, traditional cropping might discard 80% of the scene. AI avoids this loss by “imagining” what should exist outside the frame based on existing textures and lighting. The Seedream 5.0 engine supports over 10 different aspect ratios, enabling one photo to be resized for Instagram, LinkedIn, and ultrawide monitors without compromising composition.

    2026 Social Media Cheat Sheet: Correct Image Sizes

    Social media platforms enforce strict dimension requirements. Non-compliant images are auto-compressed, often resulting in visible quality degradation.

    Platform Format Dimensions Ratio
    Instagram Feed (Portrait) Post 1080 x 1350 px 4:5
    Instagram Feed (Square) Post 1080 x 1080 px 1:1
    Instagram Stories & Reels Story/Reel 1080 x 1920 px 9:16
    LinkedIn Banners Banner 1128 x 191 px Custom

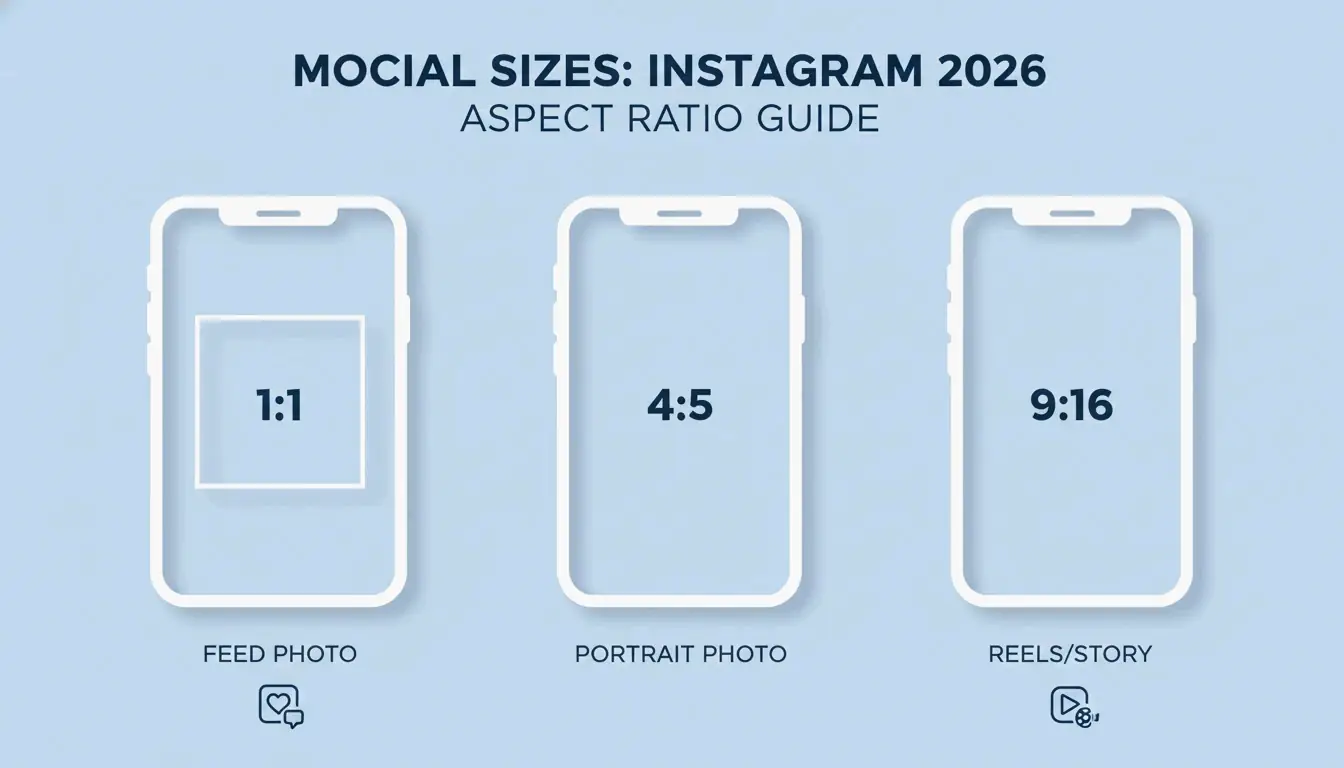
    Visual guide to 2026 social media aspect ratios

    With AVIF support becoming standard for web optimization in 2026, many professionals use it for social media content to achieve better color fidelity at smaller file sizes. For print, DPI (Dots Per Inch) is the critical metric: 300 DPI for high-quality prints, 72-96 DPI for screen display.

    Conclusion

    The best resizing strategy in 2026 combines two approaches: traditional local tools for fast bulk work, and AI tools for creative layout changes. For daily social media posts or private photos, a browser-based tool like Birme processes images on your device with full privacy. For professional work requiring aspect ratio changes without edge loss, AI extenders like Overchat AI deliver superior results. Selecting the right tool for each task — whether you need precise pixel control or AI expansion — ensures your visuals look professional across every platform.

    FAQ

    What is the difference between resizing and cropping?

    Resizing changes the total pixel count or physical scale of the image, making the file smaller or larger while preserving the entire scene. Cropping removes outer portions of the image to change the focus or aspect ratio. Resizing maintains all original content; cropping intentionally discards pixels to achieve a specific shape.

    How can I resize a photo for Instagram without losing quality?

    Use a 4:5 aspect ratio (1080×1350 pixels) for feed posts, as this occupies the most screen space. Export at 80-90% JPEG quality. This range prevents Instagram’s aggressive server-side compression algorithms from over-compressing your image, which is the primary cause of post-upload blurriness.

    Is it safe to use online image resizers for private photos?

    It is safe only if the tool uses “client-side” or “browser-based” processing. Tools like Birme use JavaScript to process images directly on your computer — photos are never uploaded to a server. Avoid uploading sensitive data to platforms that require cloud uploads unless they provide a clear, verifiable data deletion policy.

    Why do my photos look pixelated or blurry after resizing?

    Pixelation typically occurs when upscaling a small image beyond its original resolution, forcing the software to interpolate missing data. To prevent this, keep new dimensions within 150% of the original size. If you must go larger, use an AI Upscaler, which employs machine learning to reconstruct details rather than simply stretching existing pixels.

  • Auto Resize Free: The Best Browser-Based Tools for Instant Image and Video Optimization

    Auto Resize Free: The Best Browser-Based Tools for Instant Image and Video Optimization

    As of April 2026, you can auto resize for free using browser-based tools like Birme or FastTool. These platforms leverage Client-side Processing (WASM) to ensure 100% privacy and zero quality loss. Images are processed locally without sign-ups, watermarks, or server uploads — delivering instant, secure results.

    How to Auto Resize for Free Using Client-Side Processing

    By 2026, image processing has fundamentally changed. There is no longer a need to upload private files to remote servers. Modern tools use Client-side Processing, meaning all work happens in your browser’s memory. According to BIRME, this privacy-first approach serves over 50,000 monthly users as of April 2026, keeping images safely on each user’s own device.

    The speed and security come from WebAssembly (WASM). As FastTool explains, WASM enables web tools to perform at desktop-software speeds. It uses optimized libraries to handle demanding operations — high-quality resampling, bulk editing — instantly on everything from powerful desktops to basic smartphones.

    The 3-Step Execution Framework

    1. Input: Drag your files (JPG, PNG, WebP, AVIF, or MP4) directly into the browser window.
    2. Configuration: Enter your desired pixel dimensions or choose a percentage. Ensure “Aspect Ratio Lock” is enabled to prevent stretching or squashing.
    3. Export: Click “Resize” to start the WASM engine. Files are ready for immediate download, typically as a ZIP archive for batch processing.

    Simple 3-step workflow: Input, Configure, Export

    Why Modern SEO in 2026 Requires AVIF and WebP Formats

    For anyone publishing online, resizing is about more than making an image fit a container — it directly impacts site speed and search rankings. In 2026, SEO standards focus heavily on Core Web Vitals, requiring a shift from legacy formats like JPG and PNG to AVIF and WebP. AVIF is particularly effective because it maintains visual sharpness while dramatically reducing file size.

    Format Compression Efficiency Browser Support (2026) Best For
    AVIF Highest (50-60% vs JPEG) ~93% Maximum compression
    WebP High (25-34% vs JPEG) ~97% Balance of size and compatibility
    JPEG Baseline 100% Universal compatibility
    PNG Low for photos 100% Transparency, sharp edges

    Dimensions have a greater impact on file size than many realize. According to Utilko, halving an image’s dimensions (e.g., 4000×3000 to 2000×1500) can reduce file size by approximately 75%. Since both width and height shrink simultaneously, total data decreases rapidly, significantly improving mobile page load times.

    Visual comparison of file size reduction when dimensions are halved

    Social Media Presets: One-Click Optimization for Every Platform

    Maintaining brand consistency across platforms requires following specific Social Media Presets. Instagram, TikTok, and YouTube enforce strict dimension requirements. Non-compliant images are auto-compressed by the platform, often resulting in blurriness or incorrect cropping.

    Platform Format Dimensions
    Instagram Square Feed post 1080 x 1080 px
    Instagram Reels Short video 1080 x 1920 px
    YouTube Thumbnails Video thumbnail 1280 x 720 px
    Shopify Product Grid E-commerce 800 x 800 px

    Professional tools apply an Aspect Ratio Lock so that changing the width automatically adjusts the height proportionally. Advanced tools like BIRME also use Auto Focal Point Detection (smartcrop) to identify the most important part of the photo — typically a face — and ensure it is not cut during resizing. This is particularly valuable for Shopify merchants who use 800×800 square fits for consistent product grids.

    Efficiency at Scale: Mastering Batch Resizing for Professional Workflows

    For high-volume projects, Batch Resizing is the only practical approach. Modern browser tools can process long queues of images without freezing, using “dirty-row tracking” and offscreen rendering to maintain smooth performance.

    The quality of resized images depends on the resampling algorithm. FastTool notes that Lanczos resampling generally produces superior results for photos compared to standard Bilinear methods, because it evaluates a wider pixel area to preserve sharpness.

    Resampling Method Quality Speed Best For
    Lanczos High Medium Photos, detailed images
    Bilinear Medium Fast Quick previews
    Nearest Neighbor Low Fastest Pixel art

    Additionally, many professionals in 2026 use EXIF Metadata Scrubbing to remove hidden data — such as GPS coordinates — before images go live. This adds a security layer for both creators and clients.

    Conclusion

    Auto-resizing in 2026 is about privacy, speed, and choosing the right formats like AVIF. Client-side WASM technology enables safe handling of sensitive files and high-resolution media without data exposure. For optimal results, use a local tool like Birme or FastTool, keep your Aspect Ratio locked, and export in AVIF to boost SEO performance. This workflow keeps visuals sharp, secure, and ready for the modern web.

    FAQ

    Is it safe to resize private documents or photos using online tools?

    Yes, but only if the tool specifically uses client-side processing (WASM or JavaScript). In this mode, your photos are processed entirely within your browser and never uploaded to a remote server. Before using any tool, check for “No-Upload,” “100% Client-side,” or “Local Processing” labels to verify data privacy.

    Why does my image look pixelated after resizing it to a larger size?

    Pixelation occurs because standard resizers use interpolation, which can only approximate new pixels rather than creating genuine detail. Downscaling (making an image smaller) is safe and maintains clarity. Upscaling inevitably leads to blurriness. For professional results, always start with the highest resolution source available or use specialized AI-based upscaling tools.

    How can I resize an image to a specific file size (KB) for email?

    To hit a target KB limit: first resize pixel dimensions to a web-appropriate width (800px or 1200px). Next, adjust the quality slider — usually 70-80% is the optimal range. Finally, export in AVIF or WebP format, as these modern formats deliver significantly better compression-to-quality ratios than traditional JPEGs.

  • How to Adjust Your Images and Resize for Any Platform (2026 Guide)

    How to Adjust Your Images and Resize for Any Platform (2026 Guide)

    To adjust your images and resize effectively in 2026, use free browser-based tools like CapCut or BIRME for instant results. For quick offline adjustments, built-in apps like Mac Preview (Tools > Adjust Size) or Windows Photos work well. Always lock the Aspect Ratio to prevent stretching, and export as WebP or JPG to maintain fast website performance.

    How to Adjust Your Images and Resize: A Step-by-Step Framework

    Understanding what happens when you modify a file is essential before starting. “Resizing” changes the actual pixel dimensions — width and height. This is distinct from “compression,” which reduces file size (MB/KB) by removing redundant data without changing the image’s physical dimensions.

    As noted by Private Convert, resizing a high-resolution 4000x3000px photo (approximately 6MB) to 1200px wide can reduce the file size to 300-700KB — ideal for web use without compromising page load performance.

    Comparison between Pixel Resizing vs. File Compression

    Locking the Aspect Ratio: The Golden Rule

    The most common mistake when resizing is ignoring the Aspect Ratio — the relationship between width and height. Forcing a wide 16:9 photo into a 1:1 square without cropping will squash or unnaturally elongate your subject. Most tools display a small “lock” or “chain” icon. Keep this active so the software automatically calculates the height when you change the width (or vice versa).

    Quick Resize on Windows and macOS (No App Required)

    Platform Method Steps
    Windows Photos App Open image > three-dot menu > “Resize image”
    macOS Preview Open file > Tools > Adjust Size > check “Scale proportionally”

    Private Convert recommends selecting multiple photos in Finder and opening them simultaneously in Preview to apply batch resizing to an entire group.

    Beyond Stretching: Using AI Image Expansion to Fit New Dimensions

    By 2026, AI Image Expansion (also called Generative Expand or Outpainting) has solved the long-standing problem of fitting images into mismatched dimensions. Instead of choosing between distortion and cropping, tools like Adobe Express or CapCut use AI to generate new pixels at the edges.

    For example, if you have a vertical portrait but need a horizontal website banner, the AI analyzes the background and extends the scene naturally. Smart Cropping identifies the focal point to keep the main subject centered and intact.

    Visual metaphor of AI Expansion showing a photo frame growing naturally

    Which Online Image Resizer Should You Choose for Batch Processing?

    For handling multiple files, a dedicated Online Image Resizer is significantly faster than processing images individually.

    Tool Key Strength Privacy Pricing
    BIRME Speed, privacy-focused Client-side processing Free
    CapCut Filters, AI layouts Cloud-based Free tier available

    The BIRME Founder explains: “Buying Photoshop just to resize images in bulk didn’t seem like the smartest option.” BIRME processes everything in your browser, keeping files on your device.

    How to Batch Resize for Free in Seconds

    According to BIRME, which handles over 50,000 users monthly, the optimal workflow is:

    1. Drag and drop your folder of images into the site.
    2. Set your target width and height.
    3. The 80% Rule: Set image quality to 80% — the sweet spot where images look sharp but file sizes remain small.
    4. Download everything as a single ZIP file.

    Choosing the Right Format: JPEG vs. PNG vs. WebP

    The format you select after resizing directly affects web performance.

    Format Best For Key Characteristic
    WebP SEO and web performance Superior compression vs. JPEG
    JPEG/JPG Detailed photography Small file size, universal support
    PNG Transparent backgrounds, sharp text Lossless quality, larger files

    Also consider DPI/PPI settings. For screens, 72 DPI is sufficient — higher values do not improve display quality on monitors. For print, Spin Numbers recommends a minimum of 300 DPI to maintain print clarity.

    Developer Corner: Object-fit and Command-Line Resizing

    For developers, resizing happens in code as well as in the file. The Object-fit CSS property controls how an image fills its container. MDN Web Docs notes that cover is the most popular setting for responsive sites — it maintains aspect ratio by clipping edges to fit. Use contain when the entire image must be visible without any cropping.

    For command-line workflows on macOS, the built-in Sips tool handles batch operations. For cross-platform automation, ImageMagick is the standard:

    magick mogrify -resize 1200x *.jpg
    

    This command resizes every JPEG in the current folder to 1200px wide.

    Conclusion

    Adjusting and resizing images requires balancing correct proportions, modern formats like WebP, and the right tool for your workload. In 2026, AI has made it practical to expand images rather than stretch them, preserving quality across different aspect ratios.

    Quick start: Identify your platform’s required dimensions, use BIRME for bulk uploads, or Adobe Express when AI-powered aspect ratio changes are needed.

    FAQ

    What is the difference between resizing and compressing an image?

    Resizing changes the pixel dimensions (width and height). Compressing reduces the file size (MB or KB) by removing redundant data or lowering the quality setting. Most web optimization requires both: resize to correct dimensions, then compress for fast loading.

    How can I resize multiple images at once (batch resize) for free?

    Use online tools like BIRME.net or BulkResizePhotos. Upload your folder of images, set target dimensions, and download the resized set as a ZIP file. On macOS, Finder’s “Quick Actions” feature provides basic batch resizing without opening additional software.

    Will resizing an image reduce its quality or resolution?

    Downscaling (making an image smaller) typically maintains sharpness but reduces the total pixel count. Upscaling (making an image larger) usually produces blurriness or pixelation because the software must create new pixels. For best results, always start with a high-resolution original and resize downward.

  • Understanding Aspect Ratio: The Complete 2026 Guide for Social Media, Video, and Displays

    Understanding Aspect Ratio: The Complete 2026 Guide for Social Media, Video, and Displays

    Aspect ratio is the proportional relationship between an image’s width and height, expressed as a ratio like 16:9. In 2026, 16:9 remains the standard for TV and YouTube, 9:16 is essential for vertical social media, and 21:9 has become the industry benchmark for immersive gaming and professional multi-window workstations. Understanding which ratio to use — and why — is fundamental to producing content that displays correctly across every platform.

    What Is Aspect Ratio? Definition and Core Principles

    Aspect ratio describes the shape of a frame, not its size or pixel count. The Aspect Ratio Calculator expresses this as two numbers separated by a colon (width:height): for every X units of width, there are Y units of height. This proportion remains constant whether viewing on a smartphone or a cinema screen.

    A common point of confusion: aspect ratio and resolution are different measurements.

    • Aspect ratio describes the frame shape (square, landscape, portrait).
    • Resolution (e.g., 1920 x 1080) describes total pixel count and image sharpness.

    Multiple resolutions can share the same aspect ratio. Both 1080p Full HD and 4K UHD are 16:9 (Widescreen), even though 4K has four times the pixel density.

    Comparison of Aspect Ratio vs. Resolution using 16:9 as a constant shape with different pixel densities

    The 16:9 ratio became the universal widescreen standard as a mathematical compromise between older 4:3 TVs and wider 2.35:1 cinema screens. According to the Steam Hardware Survey, 16:9 remains the most popular display orientation in 2026, with 1080p resolution alone accounting for 67% of the gaming market.

    The Math: How to Calculate Aspect Ratio from Pixels

    To derive the aspect ratio from pixel dimensions, find the Greatest Common Divisor (GCD) of the width and height. The Aspect Ratio Calculator demonstrates:

    • 1920 x 1080: GCD is 120. Divide: 1920/120 = 16, 1080/120 = 9. Result: 16:9.
    • 4000 x 3000: GCD is 1000. Divide: 4000/1000 = 4, 3000/1000 = 3. Result: 4:3.

    2026 Platform Standards: Social Media and Video Requirements

    The shift toward 9:16 (Vertical) video continues to accelerate. This format, popularized by TikTok, Instagram Stories, and YouTube Shorts, fills a smartphone screen held upright. Buffer recommends using a resolution of 1080 x 1920 pixels to avoid unwanted borders or cropping.

    Instagram Post Sizes (2026 Update)

    Format Dimensions Ratio Best Use
    Square 1080 x 1080 px 1:1 Classic grid posts
    Portrait 1080 x 1350 px 4:5 Maximum screen space
    Landscape 1080 x 566 px 1.91:1 Wide compositions

    A significant change in the 2026 Instagram update: the profile grid now uses 3:4 previews. Data from Buffer shows that creators must center important elements within this 3:4 “safe zone” to prevent cropping on profile pages.

    Visual guide of the 2026 Instagram Safe Zone and 3:4 profile grid preview

    The Unified Creator Standard: Mapping Ratios Across Platforms

    To maximize reach, creators typically adapt one video into multiple ratios. The standard workflow: shoot in high-resolution 16:9 or 9:16, maintaining “safe zones” for app buttons and text overlays. On TikTok and Reels, the app places profile names and buttons over the video. Buffer recommends leaving approximately 250 pixels of empty space at the top and bottom of a 9:16 frame to keep text and logos readable.

    Beyond the Screen: 21:9 Ultrawide and 3:2 Photography

    While 16:9 is the most common format, several specialized ratios serve distinct professional needs.

    Ratio Primary Use Key Advantage
    21:9 (Ultrawide) Gaming, professional editing 33% more horizontal space than 16:9
    3:2 Photography (DSLR/mirrorless) Extra height vs. 16:9 for document editing
    2.00:1 (Univisium) Streaming originals (Netflix, Amazon) Cinematic feel that fills modern TVs efficiently

    A Dexon Systems Analyst points out that 21:9 fits the human field of view more naturally than standard widescreen. For streaming, Univisium (2.00:1) — championed by cinematographer Vittorio Storaro — has become a required format for many streaming originals, per Wikipedia.

    Technical Deep Dive: DAR, SAR, and PAR Explained

    Three technical ratios govern how digital video displays correctly:

    Ratio Full Name Definition
    DAR Display Aspect Ratio The actual shape of the screen (e.g., 16:9)
    SAR Storage Aspect Ratio Ratio of pixel width to pixel height
    PAR Pixel Aspect Ratio Shape of a single pixel (1:1 for modern screens)

    The relationship: SAR x PAR = DAR. As Wikipedia explains, mixing up these values when saving a video produces a “stretched” or distorted image. Most modern screens use square pixels (1:1 PAR), but older broadcast formats like NTSC used rectangular pixels.

    Letterboxing and Pillarboxing: Fixing the Black Bars

    When a video’s shape does not match the display, the system adds black bars to maintain correct proportions.

    • Letterboxing: Bars at top and bottom (wide content on a narrower screen).
    • Pillarboxing: Bars on left and right (narrow content on a wider screen).

    Visual demonstration of Letterboxing vs. Pillarboxing on a standard screen

    Professional Implementation: Custom LED Walls and High-End Displays

    By 2026, custom LED walls present new challenges. These installations often have non-standard shapes that do not match conventional monitors. A Dexon Systems case study explains that professional video controllers are now required to scale 16:9 or 21:9 footage to fit custom shapes without stretching or losing important details.

    In command centers and high-stakes environments, Super Ultrawide (32:9) displays have become standard. These are effectively two 16:9 monitors joined seamlessly, allowing operators to track multiple data feeds — maps, cameras, dashboards — in a single uninterrupted view.

    Conclusion

    Aspect ratio is the invisible framework of digital content. It determines how audiences experience everything from a five-second ad to a three-hour film. Selecting the correct ratio — 9:16 for social media, 16:9 for standard video, or 21:9 for productivity — is essential for professional results in 2026.

    Actionable steps: Audit your content workflow to ensure 3:4 “safe zone” compliance for social media. For improved productivity, consider migrating to a 21:9 or 32:9 display to reduce multi-monitor clutter.

    FAQ

    What is the best aspect ratio for a custom-shaped LED wall in 2026?

    The optimal ratio depends on the physical dimensions of the wall, but most professional hardware is designed to scale from a standard 16:9 or 21:9 source. As Dexon Systems advises, ensure your video controller supports non-standard scaling to preserve the intended proportions and avoid visual distortion.

    How do I fix “black bars” (letterboxing) on my video?

    Match your export settings to the intended display’s aspect ratio. If the source and display ratios differ, use “Crop to Fill” or “Center Crop” methods. These remove the bars by expanding the image to fill the screen, though some image area at the edges will be lost.

    What is the difference between 16:9 and 21:9 for professional monitoring?

    16:9 is the standard format for single-task focus and general media consumption. 21:9 provides 33% more horizontal screen real estate. According to Dexon Systems, 21:9 is ideal for professional monitoring because it matches the human field of view and enables side-by-side windows without monitor bezel interruption.