Category: beconverter

  • Image Optimization for SEO and Performance: Complete Technical Guide (2026)

    Image Optimization for SEO and Performance: Complete Technical Guide (2026)

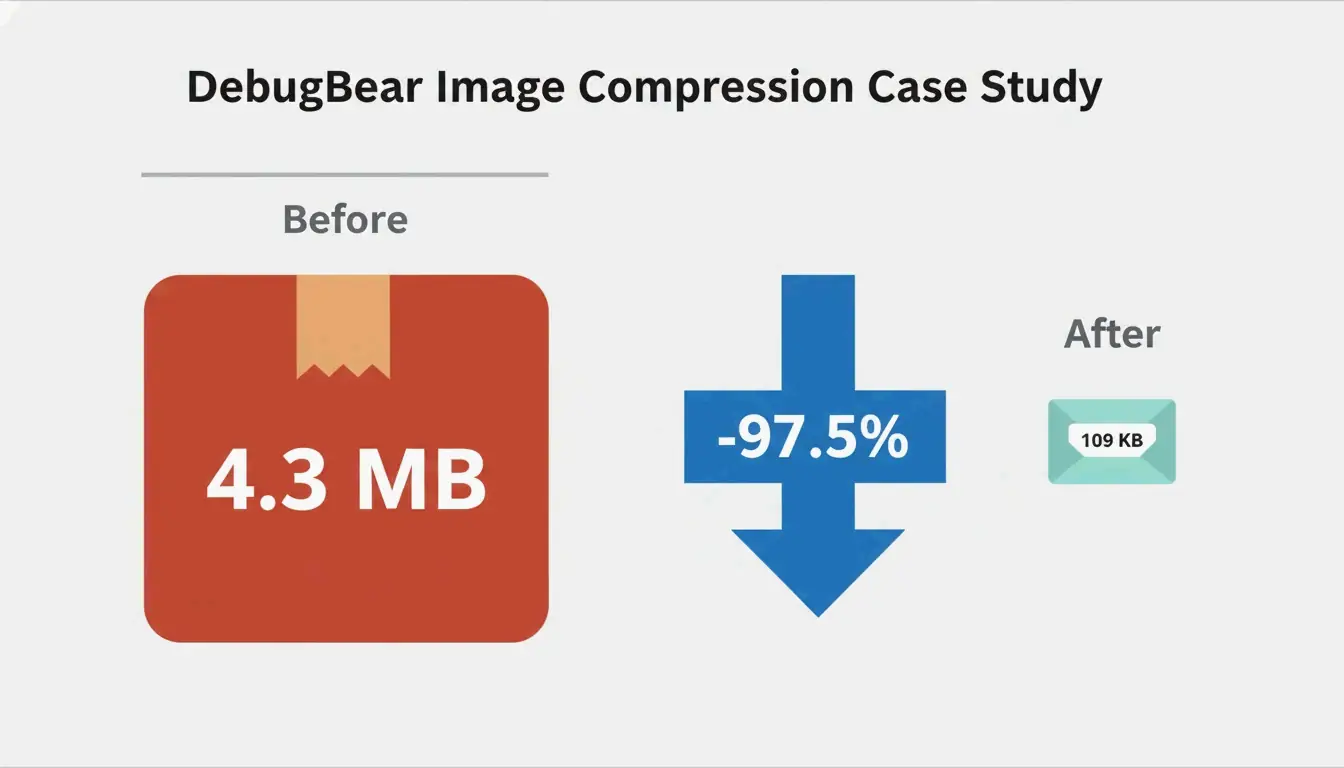
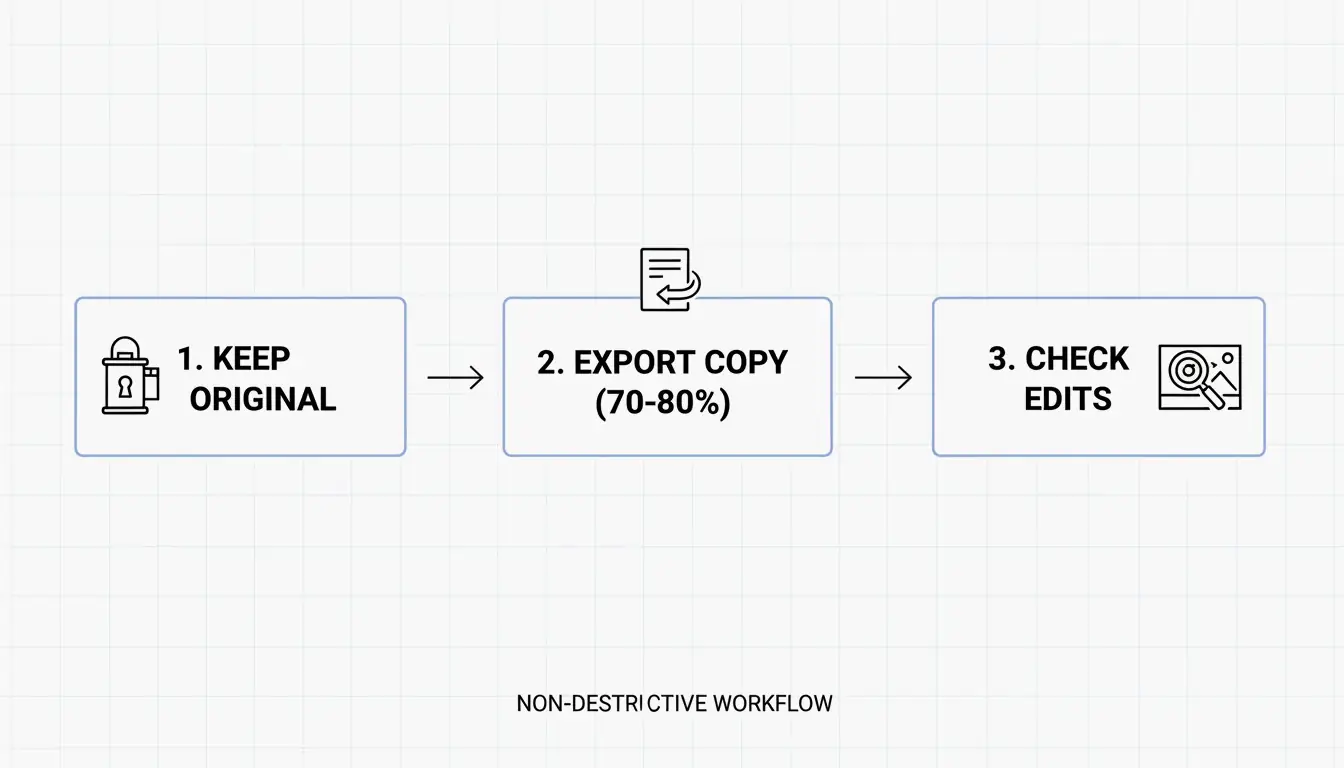
    Image optimization reduces file sizes while preserving visual quality. The core workflow: resize to display dimensions, compress at 75-85% quality, convert to WebP or AVIF, add lazy loading, and set explicit width/height attributes. A DebugBear case study achieved a 97.5% reduction (4.3 MB → 109 KB) using this exact sequence.

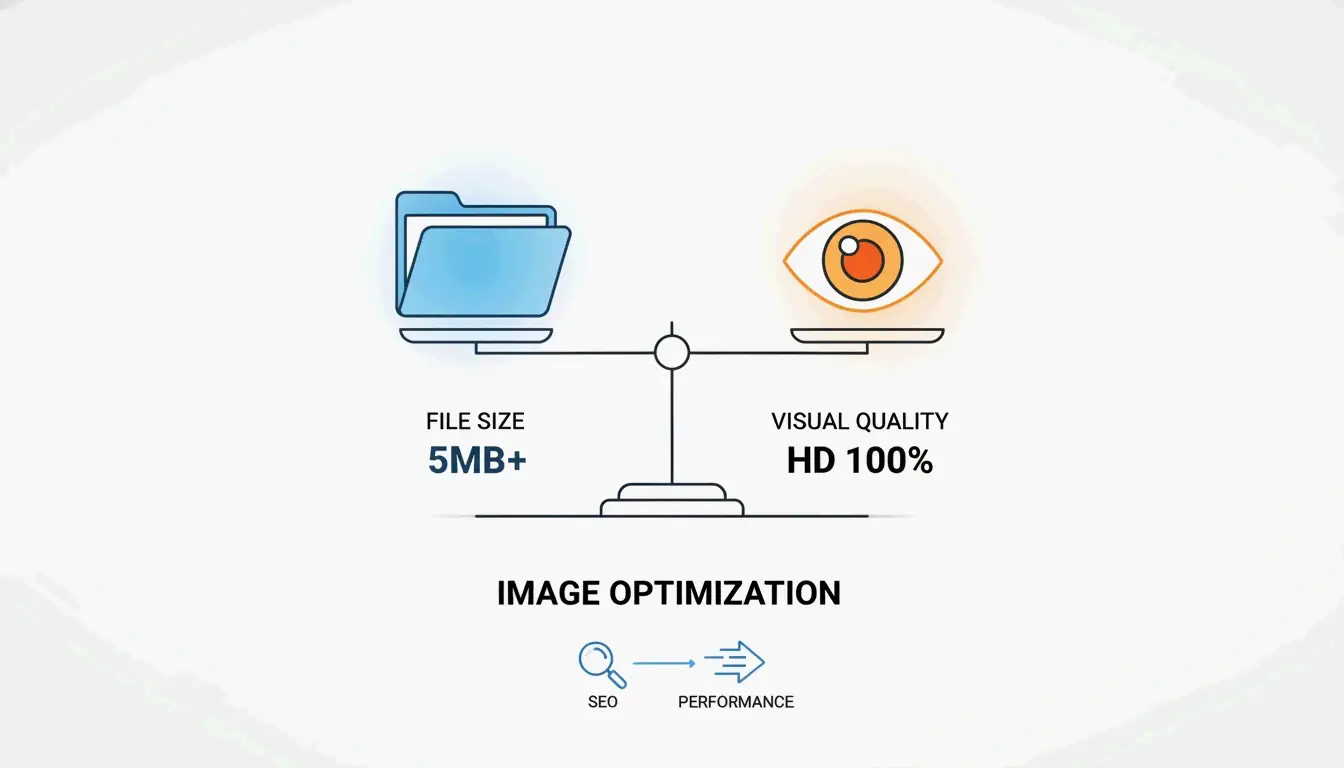
    A balanced scale with a large folder on the left (file size) and a high-definition icon on the right (visual quality), with the word 'Image Optimization' on the scale.

    Why Image Optimization Matters

    Images account for approximately 64% of total page weight (Sanity). Unoptimized images directly hurt:

    Metric Impact Cause
    LCP (Largest Contentful Paint) Pushed past 2.5s threshold Bloated hero images
    CLS (Cumulative Layout Shift) Content jumps on load Missing width/height attributes
    Bounce rate Visitors leave before content loads Slow initial paint
    Mobile rankings Lower search position Excessive bandwidth on variable networks

    Before and after comparison: a large 4.3 MB package reduced to a small 109 KB envelope with a -97.5% arrow.

    The Three Pillars: Resize, Compress, Format

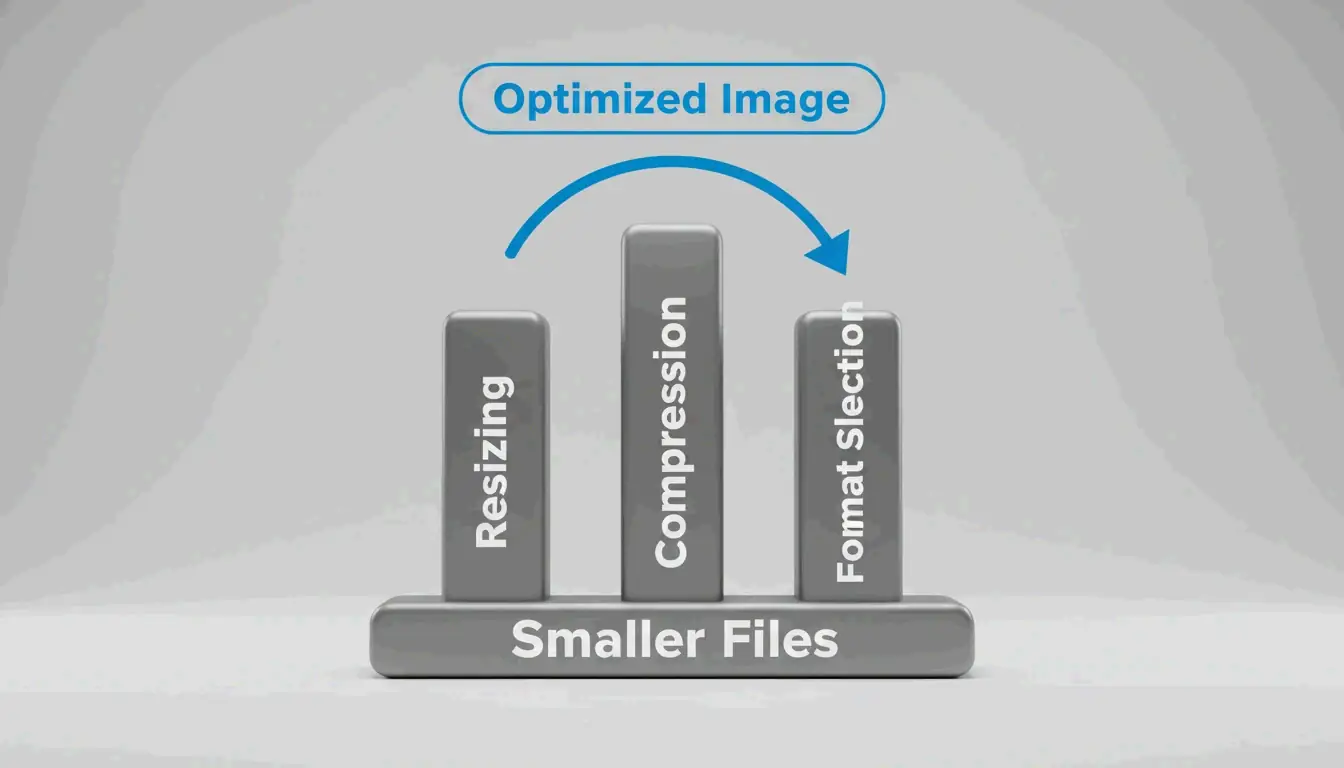
    Three pillars labeled Resizing, Compression, and Format Selection connected to a base 'Smaller Files' with an arrow pointing to 'Optimized Image.'

    Pillar 1: Resizing — The Largest Single Win

    Serving images at their actual display size is the biggest optimization. The DebugBear case study shows a 7108×4744 photo displayed at 1266×845: resizing alone reduced the file from 4.3 MB to 495 KB (89% reduction).

    Steps:

    1. Determine display dimensions — WordPress.com recommends uploading at 1.5-2× content area width for crisp results.
    2. Resize before uploading — use Preview (Mac), Paint (Windows), or GIMP.
    3. Add responsive images with srcset and sizes attributes to serve different widths (400w, 800w, 1600w) based on viewport size.

    This lets the browser pick the right file for each viewport — mobile users download smaller files, desktop users get sharp versions.

    Pillar 2: Compression — Lossy vs. Lossless

    Mode How It Works File Size Best For
    Lossy Permanently removes some data Smaller (40-60% reduction) Photos, complex images
    Lossless Preserves all data exactly Larger Logos, text, screenshots, transparency

    For most web images, lossy compression at quality 75-85 provides the optimal balance. Both WebP and AVIF support both modes.

    Pillar 3: Format Selection — WebP vs. AVIF vs. JPEG

    Format Compression vs. JPEG Encoding Speed Browser Support (2026) Best For
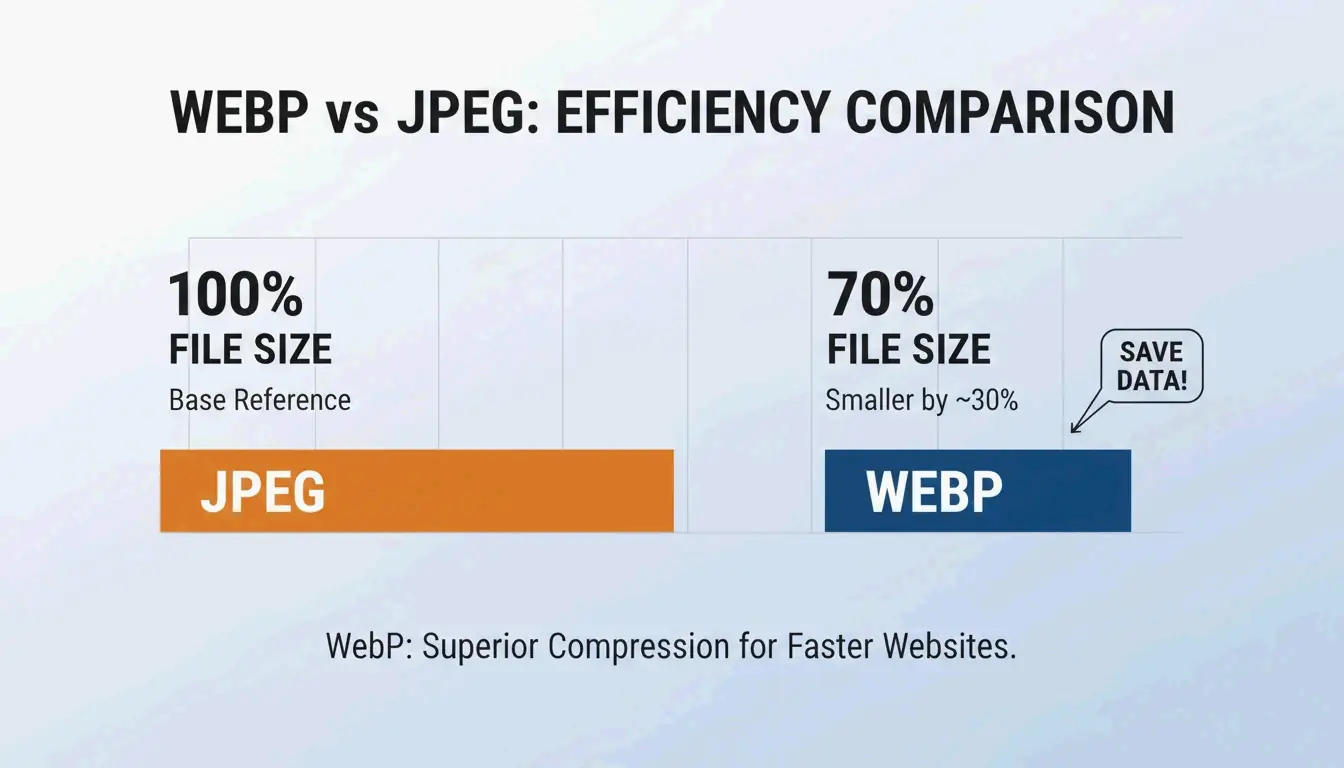
    WebP 25-35% smaller Fast 97%+ LCP images, general use
    AVIF ~50% smaller 50% slower than WebP 92%+ Maximum compression
    JPEG Baseline Fastest 100% Universal fallback

    Decision framework:

    Scenario Recommended Format
    LCP/above-the-fold hero image WebP (faster encoding, wider support)
    Total page weight reduction AVIF (better compression)
    Product photography (HDR) AVIF (wide color gamut)
    User-generated content WebP (faster processing)
    Animated graphics WebP (animation support)
    Graphics with text/sharp lines WebP lossless

    Hybrid approach (recommended): Per Framer, serve WebP on first request, convert to AVIF in the background, then serve AVIF on subsequent visits. You get fast initial delivery and smaller cached files.
    Lazy Loading and Responsive Images

    Lazy loading defers off-screen images until they’re needed, saving bandwidth and improving initial load. Add loading="lazy" to any below-the-fold image tag.

    Rules:

    • Never lazy-load above-the-fold images — this delays LCP.
    • Prioritize LCP images with fetchpriority="high".
    • Preload critical CSS background images in <head> using rel="preload" as="image" fetchpriority="high".

    • Always set explicit width and height attributes on image elements to prevent CLS.

    Tool Comparison

    Tool Best For Formats Batch Cost
    Squoosh Developer format comparison WebP, AVIF, JPEG, PNG Yes Free
    TinyPNG Designer single-image optimization WebP, JPEG, PNG 20 files Free
    ImageLean Privacy-focused browser compression WebP, AVIF, JPEG, PNG Yes Free
    Smush WordPress site owners WebP, AVIF, JPEG, PNG Bulk Free/Pro
    Cloudflare Images CDN-delivered global scaling Auto-conversion On-the-fly Pay-per-use
    Next.js Image React/Next.js projects Auto WebP/AVIF Automatic Free

    CDN vs. Plugin Optimization

    Approach How It Works Pros Cons
    CDN-based (Cloudflare, Fastly) Optimizes at network edge, caches result Zero manual work, device-adaptive Requires CDN subscription
    Plugin-based (Smush, TinyPNG) Processes on upload or via API More control over output Must run bulk on existing images

    Best practice: Hybrid — CDN for on-the-fly delivery + plugin for upload compression. CDNs cut image load times by 50%+ for international visitors (DebugBear).

    Automation Workflows

    CI/CD Pipeline

    GitHub Actions can auto-compress and convert formats on every push using Squoosh CLI or sharp. All images in the codebase are optimized before deployment.

    Headless CMS

    Platforms like Sanity serve optimized images with on-the-fly transformations — store one high-quality source, get thumbnails, responsive sizes, and modern formats automatically.

    E-commerce

    • WooCommerce: Smush integrates directly — auto-compress on upload, bulk optimize galleries, CDN for global delivery.
    • Shopify: Built-in pipeline handles optimization. Ensure source images are correctly sized before upload and themes generate proper srcset attributes.

    Fixing PageSpeed Insights Warnings

    Warning Cause Fix
    “Properly size images” Image larger than display size Resize to match container + use srcset
    “Serve images in next-gen formats” Using JPEG/PNG instead of WebP/AVIF Convert with Squoosh or Smush auto-conversion
    “Defer offscreen images” All images load immediately Add loading="lazy" to below-fold images only
    “Eliminate render-blocking resources” Large Base64-encoded images in CSS/HTML Serve as separate files; avoid Base64 for >few hundred bytes

    Conclusion

    Optimize images in sequence: resize → compress → convert to modern format → add lazy loading → set explicit dimensions. Automate with a CDN/plugin hybrid. Start by auditing your site with DebugBear — the 97.5% size reduction from the case study is achievable for most sites with these techniques.

    FAQ

    What is the difference between lossy and lossless compression?

    Lossy permanently removes data for smaller files — suited for photos. Lossless preserves all data exactly — suited for logos, text, and screenshots. WebP and AVIF support both modes. For web images, lossy at 75-85% quality is the standard.

    Should I use WebP or AVIF in 2026?

    WebP for LCP/above-the-fold images (faster encoding, wider support). AVIF for maximum compression (smaller files, slower encoding). Use the hybrid approach: WebP on first load, AVIF for cached subsequent visits.

    How do I fix “Properly size images” and “Next-gen format” PageSpeed warnings?

    Resize images to match their display dimensions. Convert JPEG/PNG to WebP or AVIF. Use srcset with the <picture> element to serve appropriate versions per screen size and format support. WordPress users can automate this with the Smush plugin.

  • How to Compress a Picture: File Size Targets, Formats, and Quality Settings (2026)

    How to Compress a Picture: File Size Targets, Formats, and Quality Settings (2026)

    Set JPEG quality to 70-80%, convert to WebP for up to 95% size reduction, and resize to target dimensions before compressing. For government portals, cap at 96 DPI and 2MB. These three steps handle the vast majority of image compression needs in 2026.

    A high-quality visual metaphor for image compression: balancing speed and clarity

    Compression Workflow: Resize → Format → Quality

    The order matters. Always resize first, then choose format, then apply quality compression.

    Step Action Why First
    1. Resize Scale to target width (e.g., 1200px for web) Reduces pixel count — largest size savings
    2. Format Convert to WebP (or AVIF) 25-35% smaller than JPEG at same quality
    3. Quality Set to 70-80% Removes data invisible to the human eye

    Resolution and Dimensions

    For web use, set DPI to 72-96. 300 DPI is for print — it adds no visual benefit on screens but inflates file size. Resize before compressing: a 4000px smartphone photo should be scaled to 1200px (blog) or 1080px (social media). This gives the compression algorithm a manageable base.

    The 70-80% Quality Rule

    Data from Business.com confirms that 70-80% quality (on a 100-point scale) is the sweet spot — significant size reduction with virtually no visible quality loss.

    Visual comparison of the "Sweet Spot" (70-80% quality) vs. Original

    Quality Setting File Size Reduction Visual Impact
    90-100% Minimal (10-20%) Visually identical to original
    70-80% 40-60% (JPEG) Indistinguishable to human eye
    50-60% 60-75% Slight artifacts visible on close inspection
    Below 50% 75%+ Visible pixelation — not recommended

    This directly impacts SEO. Google’s Core Web Vitals (specifically LCP — Largest Contentful Paint) often flags unoptimized images as the primary cause of slow sites. Illustrate Digital (2023) found that a 1-second load time yields 5× higher conversion rates than a 10-second load time for B2B sites.

    WebP vs. JPEG vs. AVIF: Format Comparison

    Format Compression vs. JPEG Browser Support (2026) Best For
    WebP 25-35% smaller 97%+ General web use
    AVIF 50% smaller 92%+ Maximum compression
    JPEG Baseline 100% Universal compatibility
    PNG 2-5× larger than JPEG 100% Transparency, sharp edges

    A SkyToolz Benchmark converted an 8.2MB smartphone JPEG to a 420KB WebP at 80% quality — a 95% size reduction with no visible quality loss.

    Tool Comparison: Free vs. Professional

    Tool Cost Best For Key Feature
    ImageLean Free Quick browser-based compression “Compress to Target Size” for exact file size limits
    Adobe Photoshop Paid Precise manual control Quality slider with live preview in “Export As”
    TinyPNG Free (20 images) Batch processing 60-80% reduction, auto-optimized per image

    Salsify’s 2025 Consumer Research Report found that 42% of shoppers abandon purchases when product images are missing or low-quality — making compression accuracy a revenue concern.

    Photoshop “Export As” Workflow

    1. FileExportExport As
    2. Select format: JPG or WebP
    3. Set quality slider to 70-80
    4. Check estimated file size in the preview window
    5. Export

    3-step Photoshop export workflow

    TinyPNG Batch Processing

    Drag and drop up to 20 images. TinyPNG analyzes each file and applies optimal compression automatically — no manual configuration required.

    Platform-Specific Target Specifications

    Platform Format Max File Size Max Width DPI
    Web blog post WebP < 200 KB 1200px 72-96
    Government portal (e.g., IRCC) JPG / PDF < 2 MB Variable 96
    Email attachment JPG < 1 MB 1000px 72
    Social media (Instagram) JPG / PNG < 500 KB 1080px 72

    For government portals like IRCC, resize to 1200-1500px width and set DPI to 96 before compressing. Tools like ImageLean’s “Compress to Target Size” function hit these limits directly.

    For social media, pre-compress to 1080px width to control quality yourself rather than letting the platform’s algorithm recompress.

    Conclusion

    Compress pictures in three steps: resize to target dimensions, convert to WebP, and set quality to 70-80%. For government uploads, add the 96 DPI constraint. Check your site’s LCP score — if images are the bottleneck, switching to WebP alone can reduce total image weight by 60-80% without visible quality loss.

    FAQ

    How do I compress an image without losing any quality?

    Use lossless compression (PNG-24, OptiPNG) which removes metadata without altering pixels. WebP also maintains near-lossless visual fidelity at file sizes 25-35% smaller than JPEG — appearing “lossless” to the human eye even at lossy settings.

    What is the best JPEG quality setting for website performance?

    70-80 out of 100. This range delivers 40-60% file size reduction with no perceptible quality loss. Below 50, visible pixelation and compression artifacts appear, damaging user trust and brand perception.

    How do I batch compress photos on Windows 10/11?

    For small batches, use the built-in Photos app “Resize” feature. For professional volumes, use Adobe Photoshop’s “Batch Action,” PowerToys Image Resizer, or TinyPNG (up to 20 images per batch, free).

    Why is my compressed image still too large for government portal uploads?

    The pixel dimensions are too high. A 4000px-wide image cannot compress below 500KB with quality settings alone. Per IRCC guidelines, resize to 1200-1500px width and set resolution to 96 DPI before applying compression.

  • Why Your Content Needs a Handwritten Feel: Trust Signals in the AI Era

    Why Your Content Needs a Handwritten Feel: Trust Signals in the AI Era

    Generic AI content is a zero-cost commodity in 2026. To build trust, you need human-exclusive signals: lived experience, specific contextual judgment, and a unique personal voice. Data shows 52% of readers stop reading once they detect purely AI-generated content — making authenticity a measurable business advantage.

    Trust Scarcity: The Data Behind the Problem

    Ahrefs 2025 data shows 74.2% of new web pages contain AI-generated text. The result: readers have developed “blindness” to standard marketing copy.

    Metric Value Source
    Web pages with AI text 74.2% Ahrefs 2025
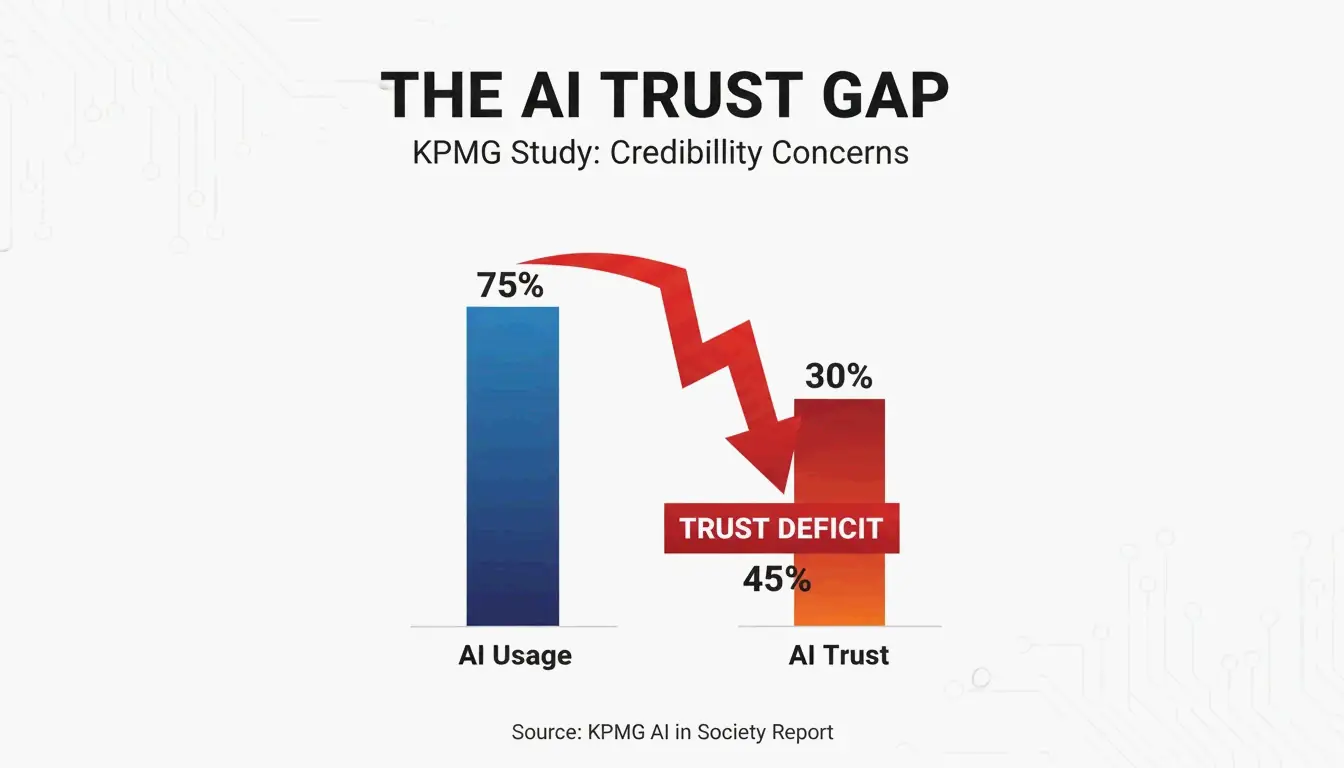
    People who use AI regularly 66% KPMG 2025
    People who trust AI output 46% KPMG 2025
    Readers who abandon pure AI content 52% White Beard Strategies 2026

    The gap between usage (66%) and trust (46%) is the core problem. When readers detect a “bot” behind the screen, they discount the author’s credibility immediately.

    A simple contrast showing the gap between AI usage and human trust.

    Competent Mediocrity: The Statistical Average Trap

    AI models converge toward the statistical middle. As Lilian Makena notes, AI polishes away the quirks and rhythms that make a voice recognizable. The output is grammatically perfect but indistinguishable from thousands of other articles on the same topic.

    What Creates the ‘Handwritten’ Signal?

    A “handwritten feel” is not about fonts. It is about showing the friction of real human thought — the kind of evidence that only comes from doing the work.

    Proof of Work: The Trust Mechanism

    Jonathan Mast shares a case study: a founder posted polished AI content daily for three months. Result: 1,200 followers, $0 in revenue. The volume was there, but the human proof wasn’t.

    AI-Only Content Human-Proof Content
    General best practices Specific failures and lessons learned
    Statistical average advice Counterintuitive opinions from experience
    Generic examples First-person anecdotes with real outcomes
    “Safe” recommendations Recommendations that carry personal risk

    The Skin in the Game Audit

    Before publishing, ask: Could a competitor using the same AI tools produce this exact piece? If yes, the content lacks the human risk signal that builds trust. Content that builds credibility costs the creator something — a controversial stance, a vulnerable mistake, or a counterintuitive opinion.

    Tiered Protocol: Human vs. AI Balance by Content Type

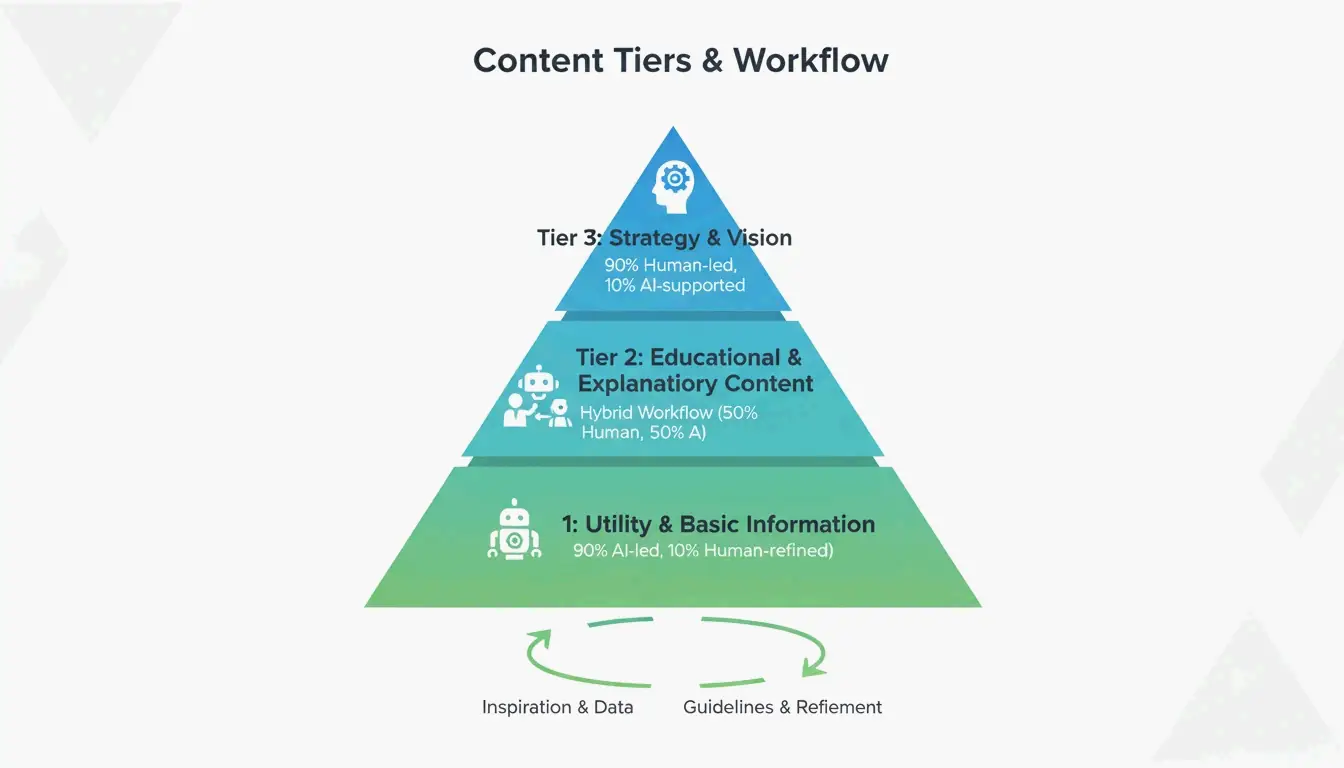
    A minimalist 3-tier pyramid showing the human vs. AI balance.

    Tier Content Type Human/AI Split Requirement
    Tier 1 Strategy, opinion, thought leadership 90% human-led Voice anchor before AI touches the draft
    Tier 2 Educational how-to guides Human-anchored, AI-supported Expert adds authenticity signals + real data
    Tier 3 Product descriptions, summaries AI-led, human-verified Human checks accuracy and brand tone

    This hybrid workflow lets you scale production without compromising the high-stakes content that closes sales.

    Cost Per Quality Unit: The Metric That Matters

    “Cost Per Word” is obsolete when words are infinite and free. The new metric is Cost Per Quality Unit — how much it costs to produce content that actually converts.

    The “Trust Tax” from AI-only content: 52% of consumers stop reading once they detect pure AI output (White Beard Strategies). This leads to fewer leads and longer sales cycles.

    Measurement: Track “Attribution by Anecdote” — how often a lead mentions a specific story or unique take from your content during a sales call. This directly correlates trust-building content to revenue.

    Voice Anchoring: Scaling Without Losing Authenticity

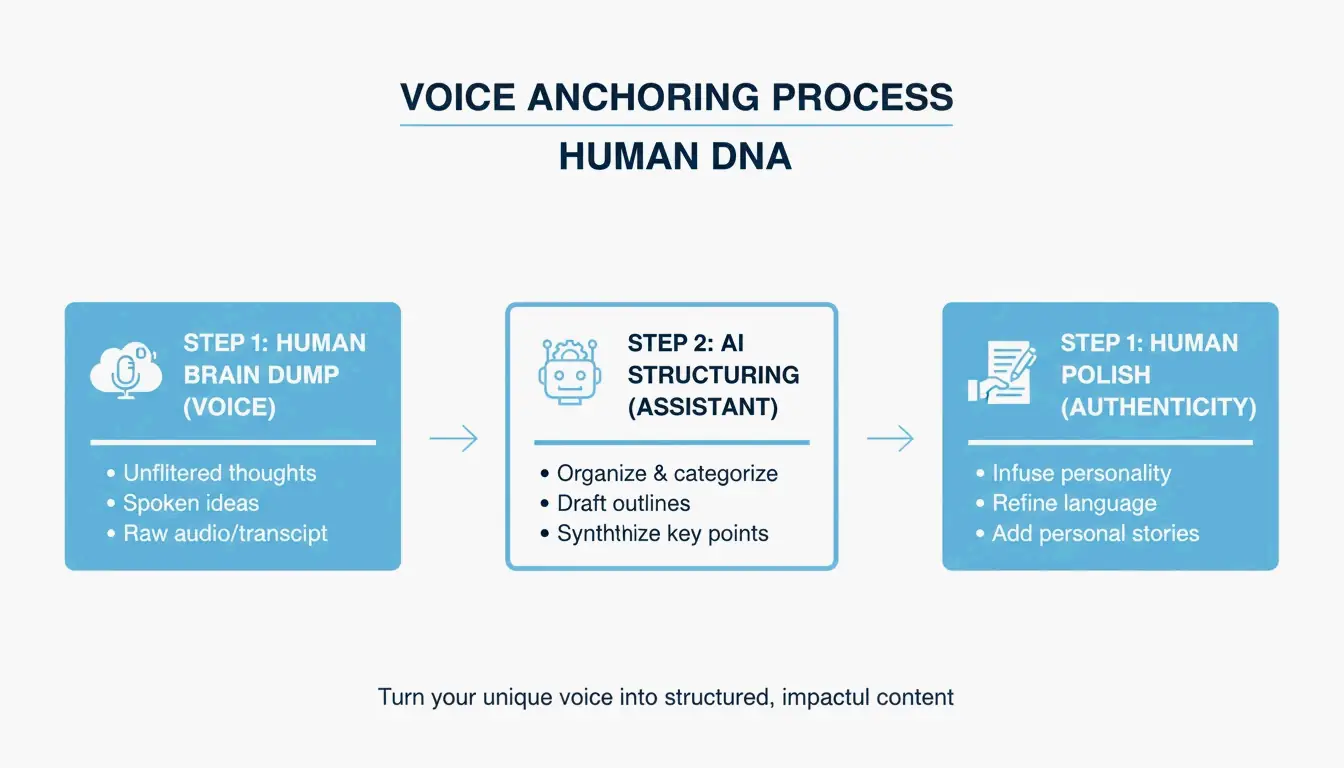
    The 3-step Voice Anchoring process.

    1. Record a 2-minute “brain dump” of your unique thoughts on the topic (voice-to-text or interview).
    2. Use AI as a research librarian to find supporting data, or as a formatting assistant to organize your thoughts.
    3. Preserve the human perspective as the DNA of the final piece — the viewpoint must come from you.

    As Invoke Media notes, authentic content proves you understand a client’s specific reality rather than repeating publicly available information.

    Conclusion

    In 2026, your only competitive edge in content is the “handwritten feel” — the specific, lived reality of human expertise. Apply the tiered protocol: keep Tier 1 content 90% human-led, use voice anchoring to scale, and measure results with Cost Per Quality Unit rather than Cost Per Word.

    Immediate action: Audit your top 10 pages. Find one generic, AI-sounding section in each and replace it with a specific case study, a personal lesson, or a unique opinion.

    FAQ

    Can I train an AI persona to sound like me and still maintain trust?

    AI can mimic your sentence structure and vocabulary, but it cannot replicate lived experience. Use AI to mirror your structure, then inject a “human anchor” — a story or specific observation only you know. Trust requires current judgment that AI’s training data doesn’t contain.

    How do I measure ROI of trust-building content vs. high-volume SEO posts?

    Shift from “Traffic” to “Conversion Intent” and “Sales Cycle Length.” High-trust content produces fewer visitors but higher-quality leads further along the buyer’s journey. Track “Attribution by Anecdote” — instances where a prospect references a specific take from your content during a sales call.

    What authenticity markers do search engines and readers look for in 2026?

    Search engines prioritize “Information Gain” — new, non-training-data insights added to the web. Readers look for “First-person specificity” (I, We, Our) backed by unique data or real-world photos. A consistent perspective that occasionally disagrees with the AI statistical average is the strongest human-expert signal.

  • Temperature Converter Guide: Formulas, Calibration, and Scale Reference

    Temperature Converter Guide: Formulas, Calibration, and Scale Reference

    Convert between Celsius, Fahrenheit, and Kelvin using these core formulas: °F = (°C × 1.8) + 32, °C = (°F − 32) / 1.8, K = °C + 273.15. For hardware accuracy, calibrate digital thermometers with the Ice Point Method (0°C / 32°F) at least weekly.

    Core Conversion Formulas

    From To Formula Example
    Celsius Fahrenheit °F = (°C × 1.8) + 32 40°C = (40 × 1.8) + 32 = 104°F
    Fahrenheit Celsius °C = (°F − 32) / 1.8 68°F = (68 − 32) / 1.8 = 20°C
    Celsius Kelvin K = °C + 273.15 25°C = 298.15 K
    Fahrenheit Kelvin K = (°F − 32) / 1.8 + 273.15 32°F = 273.15 K
    Celsius Rankine °R = (°C × 1.8) + 491.67 0°C = 491.67 °R

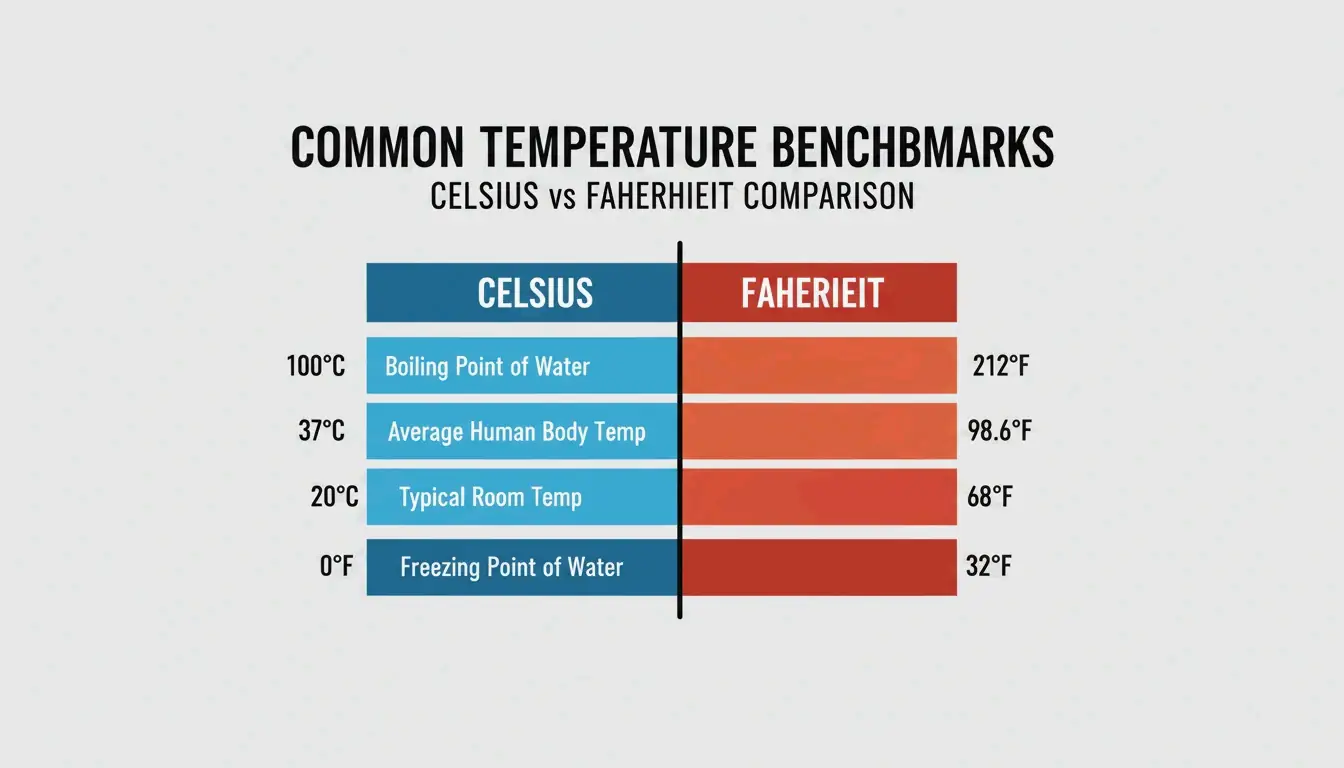
    Key Temperature Benchmarks

    Point Celsius Fahrenheit Kelvin
    Water freezes 0°C 32°F 273.15 K
    Room temperature 20°C 68°F 293.15 K
    Body temperature 37°C 98.6°F 310.15 K
    Water boils (sea level) 100°C 212°F 373.15 K

    A clean comparison bar showing key temperature benchmarks in both Celsius and Fahrenheit.

    Mental Shortcuts for Quick Estimates

    When you need a fast estimate without a calculator:

    Quick & Dirty: Double the Celsius and add 30.

    Actual Shortcut Error
    20°C = 68°F (20 × 2) + 30 = 70°F +2°F
    30°C = 86°F (30 × 2) + 30 = 90°F +4°F
    10°C = 50°F (10 × 2) + 30 = 50°F 0°F

    Adequate for weather and travel decisions. Use the exact formula (C × 1.8) + 32 for cooking, science, or medical contexts.

    For digital conversion, browser-based tools like FastTool Temperature Converter handle all four scales (Celsius, Fahrenheit, Kelvin, Rankine) instantly. The Tootoolz Temperature Converter works offline — useful for remote sites and flights.

    Thermometer Calibration: The Ice Point Method

    Digital thermometers drift over time due to battery drain or physical impact. The Ice Point Method is the standard calibration procedure.

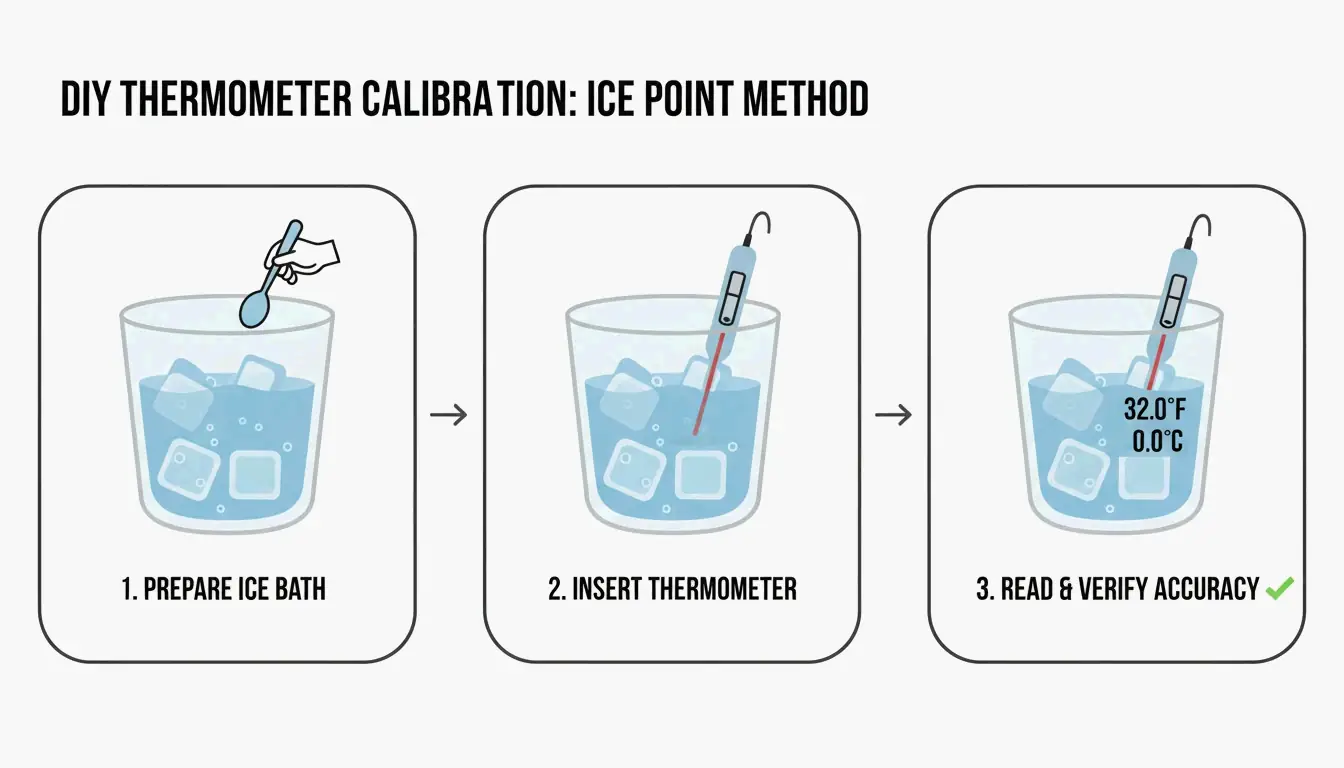
    A simple 3-step visual guide to the Ice Point Method: Ice Slurry, Stir, and Probe.

    Steps (per Paddl):

    1. Fill a tall glass with crushed ice, add cold water to fill gaps.
    2. Stir for 30 seconds to reach thermal equilibrium.
    3. Insert the probe into the center — do not touch sides or bottom.
    4. Expected reading: 32°F (0°C). If off by more than ±1.8°F (±1°C), adjust the calibration offset.

    Calibration frequency: Weekly for daily-use kitchen thermometers. Immediately after dropping the device or exposing it to extreme temperature swings (e.g., blast freezer → hot oven). Professional kitchens must maintain a calibration log for health inspections.

    For professional-grade accuracy, use NIST-Traceable devices — accuracy certified against the National Institute of Standards and Technology. As Helen Rosner reported in The New Yorker, an oven just 25°F off from its display can ruin an entire baking session.

    Tool Selection by Use Case

    Use Case Recommended Tool Accuracy Key Feature
    Weather/travel FastTool (browser) Exact All 4 scales, instant
    Professional kitchen Thermapen ONE ±0.5°F 1-second reading
    Remote/offline Tootoolz (mobile app) Exact Works without internet
    Lab/scientific NIST-Traceable probe ±0.1°F Certified calibration
    PC hardware tuning AMD Ryzen Master Real-time CPU throttling alerts

    As Dr. Elena Marquez from EastWest Studios notes: “Temperature accuracy is not just a detail — it’s a safety imperative.” This applies equally to HACCP food safety standards and PC thermal management. Club386 reports that AMD Ryzen Master’s Curve Optimizer reduced power consumption by 18.8% while boosting performance by over 5%.

    Programmable Thermostats and Energy Savings

    The U.S. Department of Energy reports that setting a programmable thermostat back 7°–10°F for 8 hours per day saves up to 10% annually on heating and cooling.

    Season Setting When
    Winter (awake) 68°F–70°F (20°C–21°C) While home
    Winter (asleep/away) 58°F–60°F (14°C–16°C) 8+ hours
    Summer (home) 78°F (26°C) While home
    Summer (away) 85°F+ (29°C+) While out

    Note: Heat pump systems require specialized “setback” thermostats to maintain efficiency during temperature recovery.

    Conclusion

    Use the exact formulas for precision work, the “double and add 30” shortcut for weather estimates, and calibrate hardware thermometers weekly with the Ice Point Method. For digital conversion, bookmark a reliable tool like FastTool. For energy savings, a programmable thermostat with a 7°–10°F setback during unoccupied hours delivers measurable annual savings.

    FAQ

    How do I calibrate a digital food thermometer?

    Fill a tall glass with crushed ice and cold water. Stir for 30 seconds. Insert the probe into the center without touching sides or bottom. Adjust the calibration until the display reads 32°F (0°C). Recalibrate weekly or immediately after dropping the device.

    What is the fastest mental estimate for Celsius to Fahrenheit?

    Double the Celsius and add 30. Example: 20°C → (20 × 2) + 30 = 70°F (actual: 68°F). Accurate within ±4°F for temperatures between 0°C and 40°C. Not suitable for cooking or scientific use.

    Is 13°C considered cold?

    13°C (55.4°F) is “cool” or “fresh” — typical spring or autumn weather. Comfortable for walking with light layers: T-shirt plus a cardigan, light jacket, or overshirt, with full-length trousers.

  • How to Convert PDF to Word: 2026 Methods Ranked by Accuracy

    How to Convert PDF to Word: 2026 Methods Ranked by Accuracy

    Use Microsoft Word for simple digital PDFs, Adobe Acrobat Pro for complex layouts with tables, or AI-powered tools (Copilot, PDNob) for scanned documents. The right method depends on whether your PDF is Native (selectable text), Scanned (image of text), or requires AI rebuilding.

    Decision Framework: Match PDF Type to Tool

    A simple 3-node diagram showing the three types of PDFs: Native, Scanned, and AI-Rebuilt.

    PDF Type Characteristics Best Tool Expected Accuracy
    Native Selectable text, digital origin Microsoft Word (free) ~95%
    Scanned Image-based, no selectable text PDNob / Adobe Acrobat (OCR) Up to 99%
    Complex layout Nested tables, multi-column, graphics Adobe Acrobat Pro ~98%
    AI-rebuild needed Mixed content, broken formatting Microsoft Copilot ~97%

    Method 1: Microsoft Word — Best for Native PDFs

    For digitally-created PDFs with simple layouts, Microsoft Word is the fastest free option.

    Desktop: Right-click the PDF → “Open with” → Microsoft Word.

    Web: Open Word for the Web, go to “Open,” select your PDF. Word converts columns, spacing, and line breaks into editable text.

    Important: Word often opens converted files in “Compatibility Mode,” which blocks advanced editing features. Microsoft’s editorial team recommends saving immediately as .docx to unlock all formatting tools.

    Method 2: Microsoft Copilot — AI Document Rebuilding

    The 2026 shift is from reflowing text to rebuilding it. Copilot uses AI to understand document context — recognizing headers, footers, nested tables, and style hierarchies that traditional converters flatten.

    Workflow:

    1. Attach the PDF to a Copilot chat in Word.
    2. Copilot analyzes structure and rebuilds the document with organized headings and lists.
    3. Use natural language prompts to clean up conversion artifacts.

    A simple 3-step process: Upload PDF -> AI Context Analysis -> Rebuilt Word Doc.

    Cleanup prompts that work:

    • “Identify and fix broken line breaks and duplicated text, while adding bullet points and headings.”
    • “Review this document and suggest improvements to heading structure and table formatting for accessibility.”
    • “Identify and suggest corrections for spacing, uneven fonts, or incorrect list numbering.”

    Microsoft offers “Zero-Knowledge” cloud processing for enterprise users — confidential documents stay within your organization’s secure environment.

    Method 3: Adobe Acrobat Pro — Complex Tables and Layouts

    Adobe Acrobat Pro remains the industry standard for PDFs with complicated structures. Its layout-aware engine preserves borders, cell alignments, and multi-column formatting. Export to .docx through Acrobat handles graphics and nested tables better than free alternatives.

    Method 4: OCR for Scanned Documents

    Standard conversion cannot extract text from image-based PDFs. OCR (Optical Character Recognition) is required, and quality depends on scan resolution.

    Scan Quality DPI OCR Accuracy Use Case
    Low 150 DPI ~90% Quick text extraction
    Professional 300 DPI ~99% Legal, medical documents
    High 600 DPI 99%+ Archival, fine print

    According to PDNob, AI-driven OCR engines in 2026 achieve 99% precision at 300 DPI. PDNob PDF Editor offers batch processing — apply the same OCR settings to dozens of invoices or contracts at once.

    Method 5: Google Docs — Free Basic OCR

    Upload the PDF to Google Drive, right-click → “Open with” → Google Docs. A built-in OCR process converts image text to editable content.

    Limitations: Google Docs frequently fails to match original fonts and displaces images into text lines. Adequate for extracting plain text from simple pages; insufficient for branded documents or complex data tables.

    A simple comparison visual showing 'Basic Tools' (Word/Google) vs 'Pro Tools' (Acrobat/AI) for layout complexity.

    Tool Comparison Summary

    Tool Cost Best For OCR Batch Privacy
    Microsoft Word Free Simple native PDFs No No Local
    Microsoft Copilot Subscription AI rebuilding No No Zero-Knowledge
    Adobe Acrobat Pro Paid Complex tables, layouts Yes (Pro) Yes Local/Cloud
    PDNob PDF Editor Freemium Scanned batch OCR Yes (AI) Yes Local
    Google Docs Free Quick text extraction Basic No Cloud

    Conclusion

    Match the tool to the PDF type: Word for native documents, Adobe Acrobat Pro for complex layouts, and AI-powered OCR (PDNob, Copilot) for scanned files. For professional results on scanned documents, ensure the source is at least 300 DPI. Always save the converted file as .docx immediately to exit Compatibility Mode and unlock full editing capabilities.
    FAQ

    Can I convert PDF to Word for free without losing formatting?

    Text-heavy native PDFs convert well with Word for the Web or Google Docs. Complex layouts with nested tables require Adobe Acrobat or AI-rebuilding tools to preserve structure. Free tools lack the advanced OCR engines needed to interpret spatial relationships in complex documents.

    Is it safe to use online PDF converters for sensitive documents?

    Security depends on the provider. Look for “Zero-Knowledge” cloud processing (Microsoft Copilot enterprise) or use local desktop software (Adobe Acrobat Pro, PDNob) for legal and medical files. Verify SOC2 compliance and AI data privacy labels before uploading sensitive content.

    How does AI improve PDF to Word conversion?

    AI tools like Copilot understand document structure beyond character recognition — they identify headers, footers, styles, and table hierarchies that traditional converters flatten. Natural language prompts let you fix specific formatting errors (broken line breaks, inconsistent fonts) without manual editing.

  • Timezone Converter: Accurate Global Time Scheduling with UTC and DST Handling

    Timezone Converter: Accurate Global Time Scheduling with UTC and DST Handling

    A professional timezone converter must sync with the IANA Time Zone Database (400+ zones), apply Daylight Saving Time (DST) automatically, and calculate UTC offsets down to the minute—including non-standard offsets like UTC+5:30 (India) and UTC+5:45 (Nepal). Tools like Time.now pair this data with visual meeting planners for reliable cross-timezone scheduling.

    3-Step Workflow: Select, Sync, Schedule

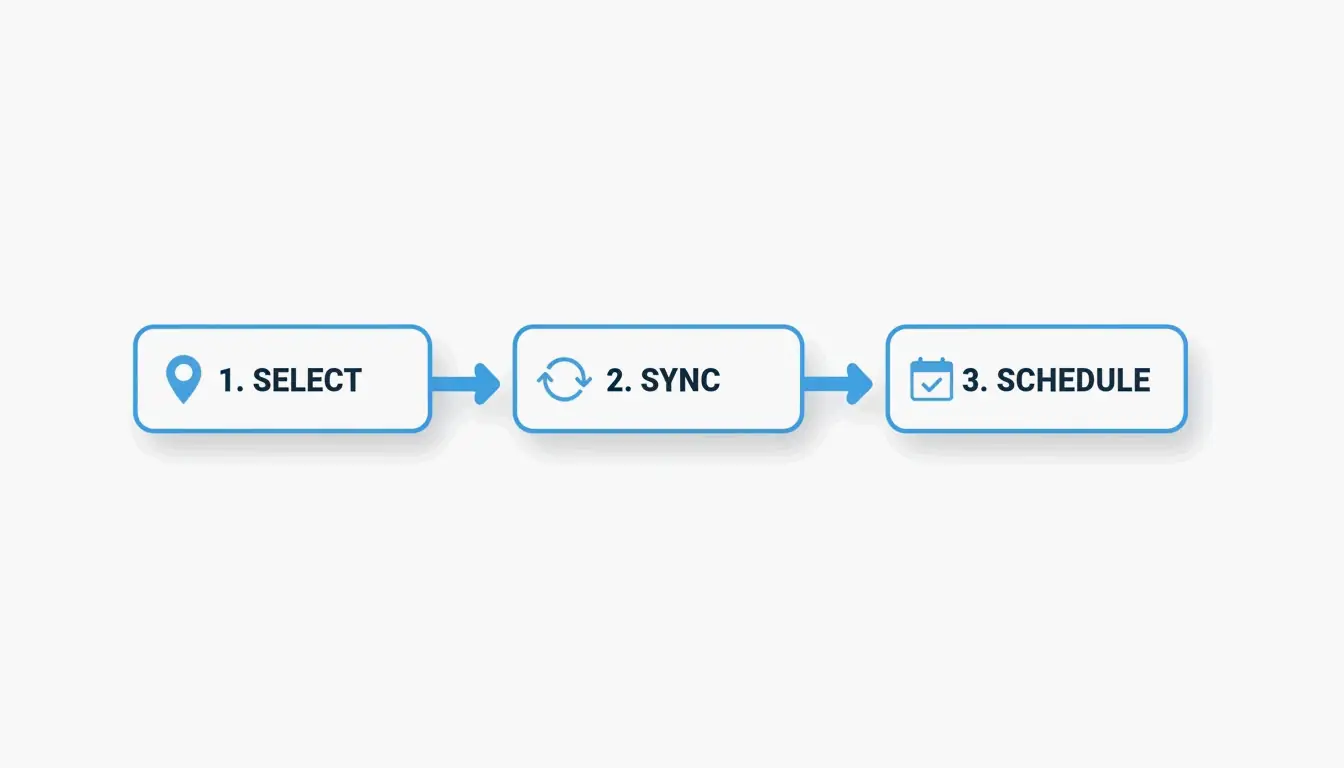
    The 3-step workflow: Select, Sync, Schedule.

    Step Action Why It Matters
    Select Choose source and target timezones IANA database tracks 400+ zones worldwide
    Sync Apply UTC offset + current DST status 62 locations observe DST as of May 2026
    Schedule Find overlapping “Golden Hours” Avoids midnight meetings and zoom fatigue

    Step 1: Establish the UTC Baseline

    UTC (Coordinated Universal Time) never shifts for DST. Use it as your anchor: Local Time = UTC + Offset + DST Adjustment. This formula stays correct even when local laws change clock rules.

    Step 2: Automate DST Adjustments

    As of May 7, 2026, Time and Date confirms 62 locations are observing DST. A reliable converter handles these shifts automatically—London switches between GMT (UTC+0) and BST (UTC+1) without manual intervention.

    Step 3: Find Golden Hours

    “Golden Hours” are overlapping windows where all participants are within working hours. For teams spanning EST (New York), PST (California), IST (India), and JST (Japan), visual grid planners highlight these slots instantly.

    UTC vs. GMT: Technical Distinction

    Property UTC GMT
    Definition Atomic time standard Time zone for UK/Europe/Africa
    Precision Millisecond-level Second-level
    DST affected Never Yes (UK switches to BST in summer)
    Required for Aviation, finance, servers General scheduling in UK/Africa

    As 24TimeZones notes, UTC and GMT are functionally identical for casual use. For technical logs, financial trades, and Unix systems, UTC is the required standard. Unix Time counts seconds since January 1, 1970 (Epoch), giving servers a timezone-independent reference.

    DST Status in 2026: What Still Changes

    Despite legislative efforts like the U.S. Sunshine Protection Act and EU proposals to end biannual clock changes, DST remains active in many regions.

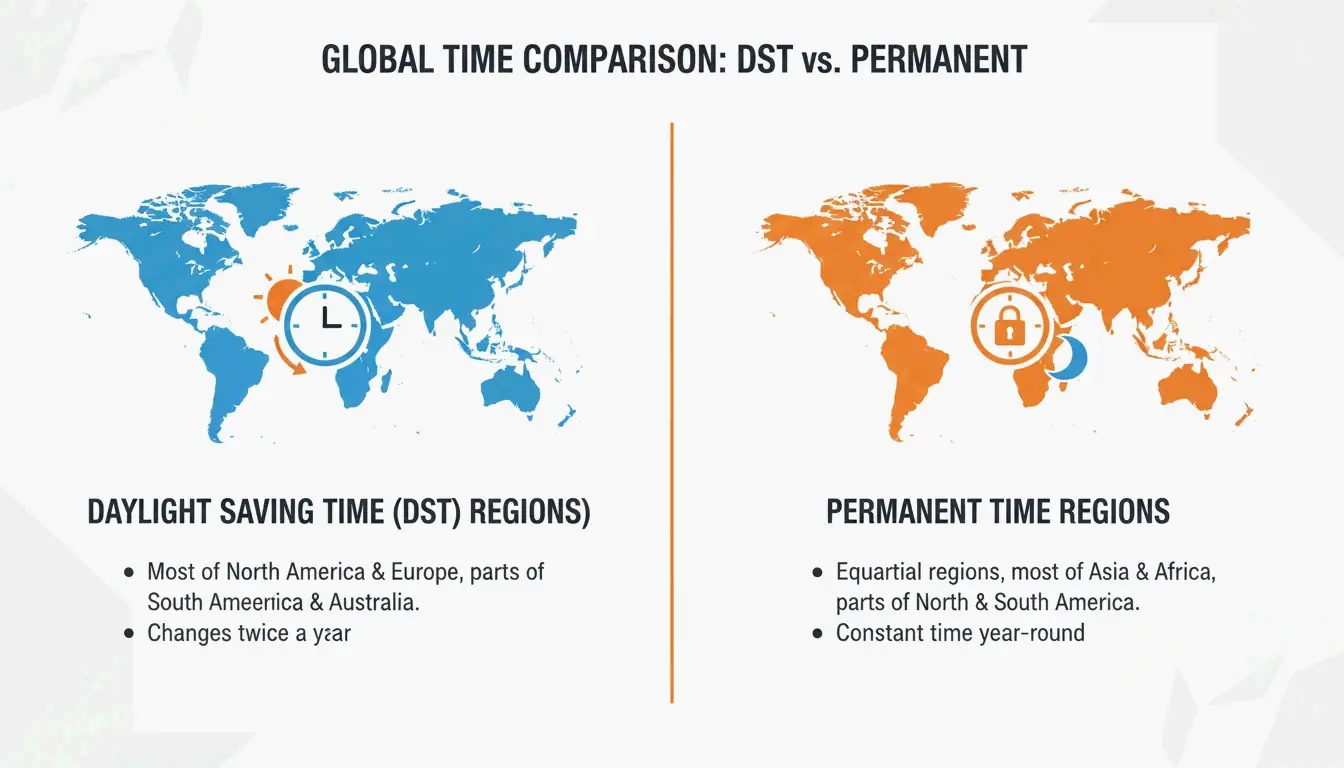
    Visual contrast between DST-observing regions and Permanent Time regions.

    Category Regions DST Status (May 2026)
    DST active US, Canada, EU, parts of Australia +1 hour offset applied
    Permanent Time Arizona (US), China, India, Japan, most of Africa/Africa No seasonal shift

    When using a converter, look for a “Permanent Time” label to confirm a location does not shift clocks.

    Non-Standard Timezone Offsets

    Not all timezones shift by whole hours. Common non-standard offsets:

    Offset Region Note
    UTC+5:30 India (IST) 30-minute offset
    UTC+5:45 Nepal (NPT) 45-minute offset
    UTC+9:30 Australia (ACST) Northern Territory, South Australia
    UTC+3:30 Iran (IRST) 30-minute offset

    Always verify these zones when scheduling “on the hour” — a meeting set for 9:00 AM in New York is 6:30 PM in Mumbai, not 7:00 PM.

    AI-Powered Timezone Workflows

    Modern teams use AI Time Assistants to eliminate manual conversion:

    • Natural language scheduling: “Schedule a 30-minute sync with Tokyo and London for next Tuesday morning” — the AI checks IANA data and finds the best overlap automatically.
    • Slack/Teams integration: Auto-update your status based on local time and working hours.
    • Offline sync: Apps like World Clock: Timezone Converter cache timezone data for use without Wi-Fi.

    For high-stakes coordination — like the Hubble 36th Anniversary scientific event — synchronized time standards are non-negotiable across global observatories.

    Conclusion

    Use an IANA-backed timezone converter that applies UTC offsets and DST adjustments automatically. For team scheduling, a visual “Golden Hours” planner outperforms a basic converter by showing overlapping working windows. For the highest throughput, integrate an AI Time Assistant into your existing Slack or Teams workflow. Always double-check non-standard offsets (UTC+5:30, UTC+5:45) before confirming meeting times.

    FAQ

    What is the difference between GMT and UTC?

    UTC is an atomic time standard with millisecond precision, used globally by technology and science. GMT is a specific timezone used by the UK (in winter) and parts of Africa. For scheduling, they are functionally identical. For aviation, finance, and server logs, UTC is the required standard.

    Which countries do not observe DST?

    Most of Asia (China, India, Japan), Africa, and South America do not observe DST. In the US, Arizona (except the Navajo Nation) stays on standard time year-round. Look for a “Permanent Time” label in your converter to confirm.

    How do 30-minute and 45-minute timezone offsets work?

    Regions like India (UTC+5:30) and Nepal (UTC+5:45) use fractional offsets. Modern converters using the IANA database handle these automatically. When scheduling across these zones, double-check the exact local time — a one-hour scheduling assumption can put you 30 minutes late.

  • TOML to YAML: Quick Conversion Guide with Syntax Map and Pitfalls

    TOML to YAML: Quick Conversion Guide with Syntax Map and Pitfalls

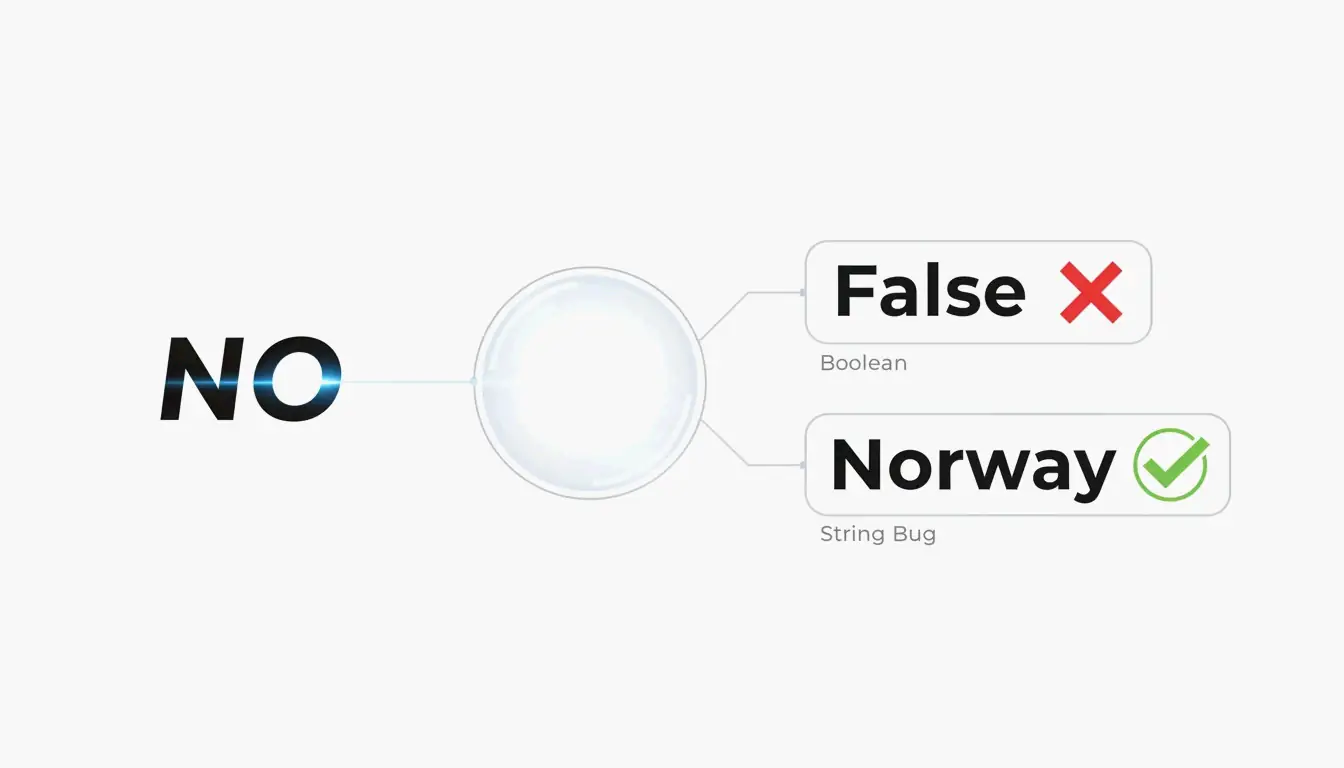
    The fastest way to convert TOML to YAML is yq -oy '.' file.toml. For manual conversion, map TOML [table] headers to YAML indented blocks, TOML arrays to dash-prefixed lists, and always quote ambiguous strings to avoid the “Norway Problem.”

    Quick Conversion: Using yq CLI

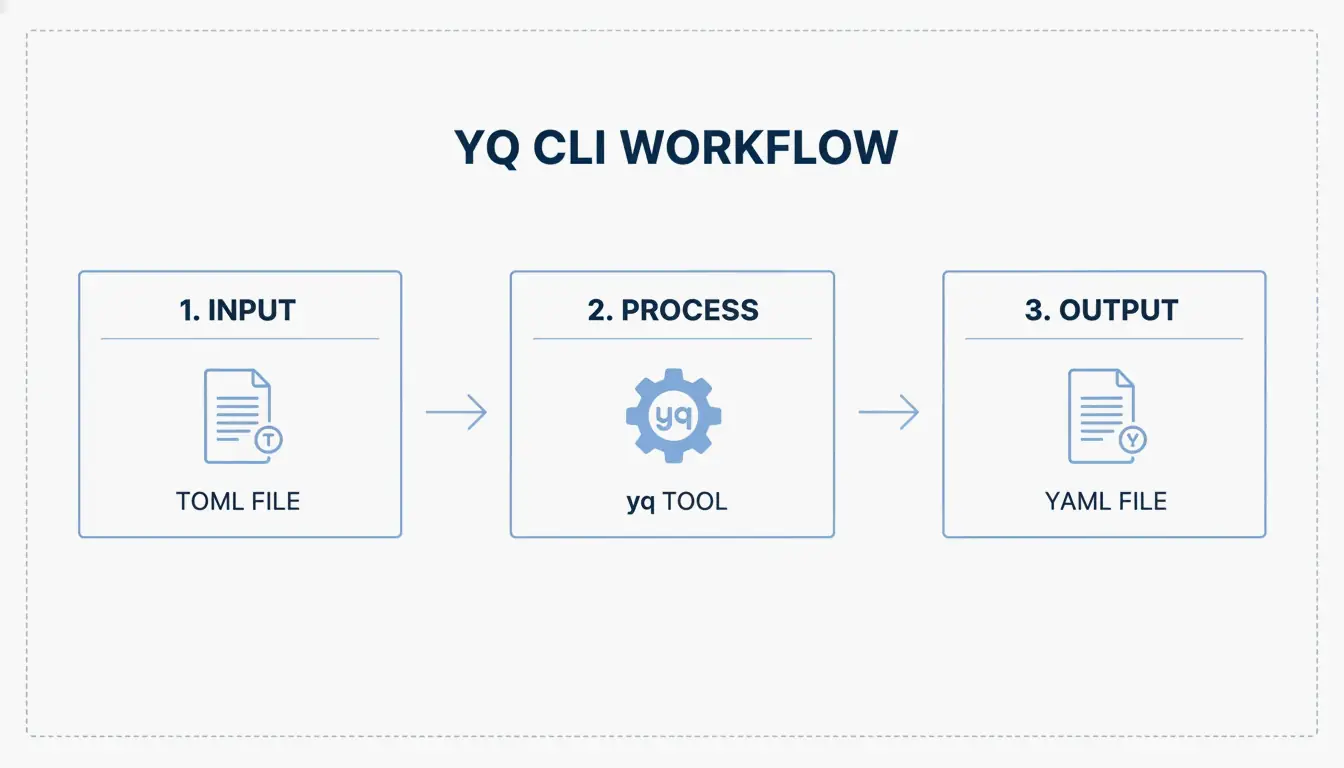
    TOML (Tom’s Obvious, Minimal Language) reached its v1.1.0 release in December 2025, but YAML remains the standard for CI/CD pipelines and Kubernetes manifests. The yq tool handles the conversion in a single command.

    Install yq

    Platform Command
    macOS/Linux brew install yq
    Windows choco install yq
    Python (pip) pip install yq

    The Go-based version by Mike Farah is preferred for speed. As noted in Mike Farah’s yq documentation, the tool decodes TOML structure and re-encodes it as clean YAML.

    Run the Conversion

    Display in terminal:

    yq -oy '.' your-config.toml
    

    Save to file:

    yq -oy '.' your-config.toml > your-config.yaml
    

    The -oy flag sets output format to YAML. This handles key-value pairs, nested tables, and arrays.

    Simple 3-step terminal conversion process

    Syntax Translation Map: TOML Structure to YAML

    Developer Drew DeVault has noted that while TOML is popular, YAML handles deep nesting more cleanly. Here is the exact mapping:

    Tables to Indented Keys

    TOML uses bracket headers; YAML uses indentation.

    TOML YAML
    [server] server:
    host = "127.0.0.1" host: 127.0.0.1
    port = 8080 port: 8080

    Critical difference: In TOML, indentation is cosmetic. In YAML, indentation is structural — one wrong space breaks the entire config.

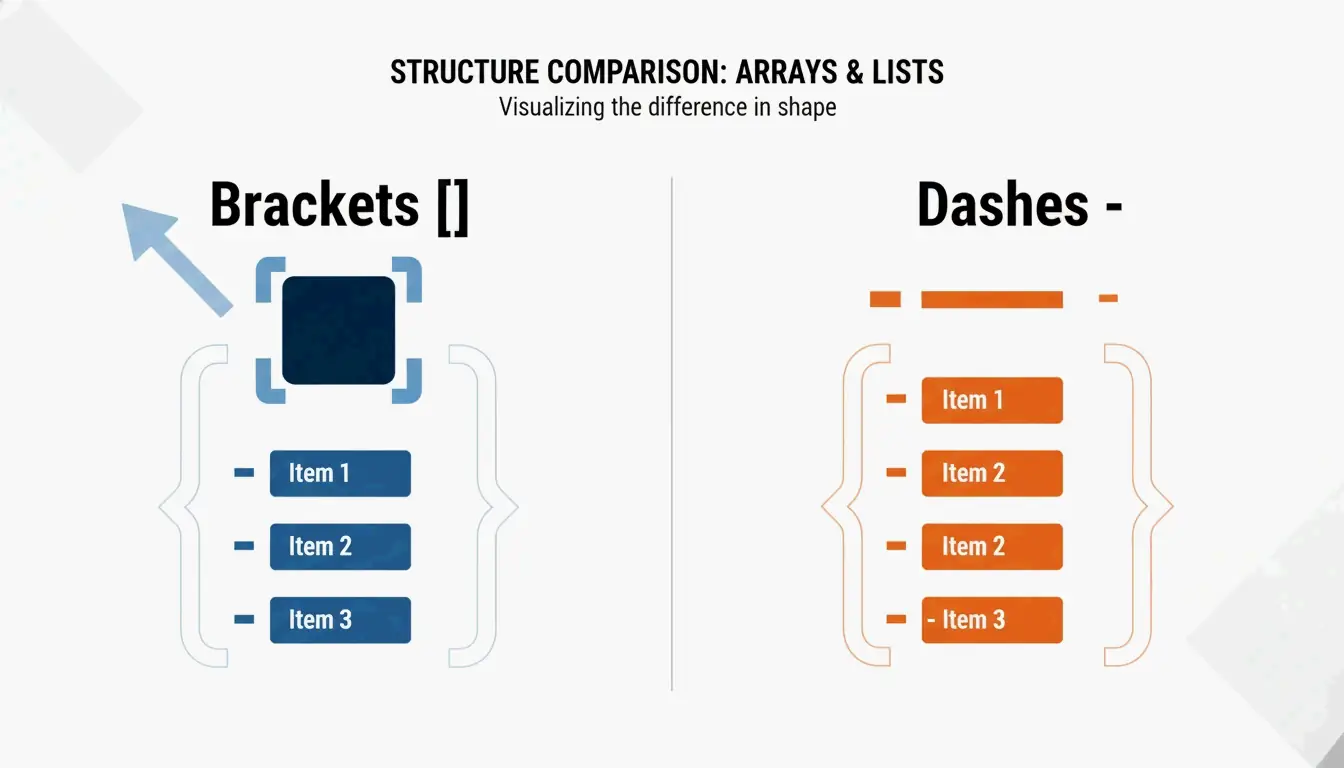
    Arrays to Dash-Prefixed Lists

    TOML: ports = [ 8000, 8001 ]

    YAML:

    ports:
      - 8000
      - 8001
    

    Side-by-side structural comparison of TOML vs YAML

    As Knightli.com explains, YAML’s “block style” makes lists readable, provided vertical alignment is consistent.

    Inline Tables and Dotted Keys

    TOML Construct YAML Equivalent
    [a.b.c] (dotted header) a:b:c: (nested indentation)
    point = { x = 1, y = 2 } (inline table) point:x: 1y: 2

    Real-World Use Cases

    Hugo Static Site Configuration

    Hugo accepts hugo.toml, hugo.yaml, or hugo.json. Most projects start with TOML (the default), then migrate to YAML when config needs to align with deployment platforms like Netlify or GitHub Actions. Hammer Europe notes that the hugo command reads these files to determine how Markdown converts to a live site.

    Python Packaging: pyproject.toml to CI/CD YAML

    The Python community standardized pyproject.toml via PEP 518. These settings frequently need translation to YAML for GitHub Actions CI/CD workflows. For AI agent workflows, CocoIndex reports that optimized YAML configs can reduce token usage by up to 70%.

    The Norway Problem and Other Conversion Pitfalls

    The NO Country Code Bug

    In YAML 1.1, bare strings like NO, OFF, and YES are auto-coerced to boolean false or true. TOML avoids this by requiring quotes on all strings. When converting, always quote ambiguous values in YAML:

    Value YAML 1.1 Interpretation Fix
    NO false "NO"
    OFF false "OFF"
    YES true "YES"
    On true "On"

    YAML 1.2 (the current spec) fixes most of these coercions, but many parsers still default to 1.1 behavior.

    Visual metaphor for the 'Norway Problem' (Boolean vs String)

    Indentation Errors

    YAML parsers reject files with inconsistent indentation. Common mistakes:

    • Mixing tabs and spaces (YAML forbids tabs)
    • Using 3 spaces in one block and 2 in another
    • Misaligned list items

    AI-Assisted Generation

    Tools like AgentBuilder let you describe configuration in plain English and output validated YAML. This “describe → generate → validate” cycle helps avoid both indentation errors and the Norway Problem.

    Conclusion

    Use yq -oy '.' file.toml for automated conversion. For manual work, map TOML tables to YAML indentation, arrays to dash-prefixed lists, and always quote strings that could be mistaken for booleans. After any conversion, validate the YAML output before deploying — a single misaligned space or unquoted NO can break your entire pipeline.

    FAQ

    Does YAML support comments like TOML?

    Yes. Both use # for single-line comments. YAML comments can interfere with multi-line string parsing, so place them on separate lines when in doubt.

    What is the ‘Norway Problem’ in YAML?

    In YAML 1.1, bare strings like NO (Norway’s country code) are auto-converted to boolean false. TOML avoids this by requiring quotes on all string values. When converting TOML to YAML, wrap any potentially ambiguous string in quotes.

    Which format handles deep nesting better?

    YAML. TOML requires repeating long headers like [table.subtable.subsubtable] for each level, which becomes verbose. YAML represents the same hierarchy with indentation — more compact and readable at depth.

  • Best HEIC to JPG Converter Online for Windows Users: 5 Free Tools Compared

    Best HEIC to JPG Converter Online for Windows Users: 5 Free Tools Compared

    The best free HEIC to JPG converter for Windows in 2026 depends on your priority: Picovert for private browser-based conversion, iMazing HEIC Converter for offline batch processing, or the built-in Windows Photos app for occasional one-off files. All five methods compared below.

    Selection Criteria: What Makes a Top HEIC Converter in 2026?

    A professional-grade converter must satisfy three requirements:

    Criterion What to Look For Why It Matters
    Batch speed Process 100+ images in under 30 seconds Modern photo libraries contain thousands of files
    EXIF preservation GPS, timestamps, camera settings retained Essential for photo organization and legal metadata
    Privacy Client-side (browser-local) processing Prevents personal photos from reaching third-party servers

    As Arpit Kuzo notes: “Stop uploading private photos to shady servers! Learn how to batch convert HEIC to JPG locally in your browser.” Modern tools use WebAssembly to run the conversion entirely in your browser tab—no upload required.

    Local Browser Processing vs Cloud Upload Comparison

    Method 1: Picovert — Secure Local Browser Conversion

    Picovert handles conversion entirely in your browser’s memory using WebAssembly. Files never leave your device.

    Steps (Windows 11, Chrome 105+ / Edge):

    1. Open the Picovert HEIC converter.
    2. Drag .heic files into the browser window.
    3. Set quality to 90% — the optimal balance between visual fidelity and file size.
    4. Click “Convert” — JPGs download instantly.

    Other tools using the same local-processing approach include Warpbin and SafeHEICtoJPEG.

    Method 2: iMazing HEIC Converter — Best Desktop Batch Tool

    For large offline archives, iMazing remains the benchmark. In a FileHulk Lab Test (April 2026), iMazing converted 30 iPhone photos in 11 seconds with a 100% success rate.

    Its key advantage is full EXIF metadata preservation — date taken, GPS coordinates, and camera settings survive the conversion. This is critical for photographers who rely on searchable, organized libraries.

    Method 3: Windows Photos App — Native HEIC Support

    Windows 11 can convert HEIC natively if you install two extensions:

    Extension Cost Purpose
    HEIF Image Extensions Free Thumbnail preview and basic HEIC rendering
    HEVC Video Extensions $0.99 Decode Apple’s specific compression codec

    Steps:

    1. Open the HEIC file in the Windows Photos app.
    2. Click the three-dot menu (…).
    3. Select “Save As” → “JPEG.”

    According to FileHulk, this works for approximately 93% of files. The main limitation: HDR color mapping can produce slightly washed-out results in some exports.

    Method 4: 4DDiG File Repair — Professional Batch with Repair

    4DDiG File Repair includes an AI-enhanced image format converter designed for high-throughput workflows. Its distinguishing feature is structural validation during conversion — it can often repair corrupted HEIC files that browser tools simply reject. Supports one-click bulk processing for thousands of images.

    Method 5: ImageMagick — Command-Line Power

    For developers and automation pipelines, ImageMagick offers the highest throughput. Install on Windows, then convert an entire folder:

    magick mogrify -format jpg *.heic
    

    No GUI, no click-through — just raw volume processing. Best suited for users comfortable with the command line.

    5 Methods at a Glance

    Method Privacy Batch Speed EXIF Preserved Best For
    Picovert Local (browser) Fast Yes Quick, private conversion
    iMazing Full offline 30 photos/11s Yes Large photo archives
    Windows Photos Offline Slow (one-by-one) Partial Occasional single files
    4DDiG Desktop Very fast Yes Corrupted files + bulk
    ImageMagick Full offline Fastest Configurable Developers, automation

    Should You Switch iPhone to ‘Most Compatible’?

    If you want to eliminate HEIC entirely, change your iPhone camera settings:

    1. SettingsCameraFormats
    2. Tap Most Compatible

    3-Step iPhone Camera Settings Change

    Trade-off: A 2MB HEIC file becomes approximately 5MB as JPG, according to Freetoolonline. You lose roughly 50% storage efficiency but gain universal compatibility across all Windows devices and websites.

    Conclusion

    For most Windows users in 2026, the optimal setup is: use Picovert for quick, private conversions without installing software; use iMazing for batch-processing large photo libraries offline. If HEIC incompatibility is a recurring headache, switching your iPhone to “Most Compatible” mode is the simplest long-term fix — at the cost of 50% more storage per photo.

    FAQ

    Does converting HEIC to JPG reduce image quality?

    Yes — JPG is a lossy format, so some data is discarded during re-encoding. However, at 90%+ quality settings, the visual difference is imperceptible to the human eye. The trade-off is file size: the resulting JPG will be approximately 2× larger than the original HEIC.

    HEIC vs JPG: Quality & File Size Balance

    How do I preserve EXIF metadata during bulk conversion?

    Use iMazing HEIC Converter or Picovert — both offer explicit “Keep Metadata” or “Include EXIF” options. The Windows Photos “Save As” method typically retains the date but may strip GPS tags and HDR color data depending on your system configuration.

    Can I convert HEIC to JPG on Windows 11 without third-party software?

    Yes, using the built-in Photos app with the HEIF Image Extensions installed from the Microsoft Store. Open the image, use “Save As” and select JPEG. This method is slower for batching since files must be saved individually.

  • How to AI Prompt with BeConverter: Reverse Engineer Any Visual in 4 Steps

    How to AI Prompt with BeConverter: Reverse Engineer Any Visual in 4 Steps

    Upload an image to BeConverter, let its Vision-Language Model (VLM) decompose the visual into style tokens, then paste the extracted prompt into Midjourney, Stable Diffusion, or FLUX. That is the complete workflow for turning any visual into a reproducible AI prompt—no guesswork required.

    What Is Reverse Prompting and How Does BeConverter Work?

    Reverse prompting converts pixels back into text a generative model can understand. Instead of writing a prompt from scratch and hoping the output matches a reference, you start with the finished image and extract the exact keywords, lighting conditions, and aesthetic tags that define its look.

    BeConverter uses a Vision-Language Model (VLM) to analyze an image’s artistic properties. The model compares your photo against its training data to classify attributes like rendering style (3D vs. oil painting), lighting setup (volumetric vs. ambient), and composition. The result is a structured text prompt you can feed into any image generator.

    VLM vs. OCR: Why Standard Scanning Cannot Read Art

    Optical Character Recognition (OCR) reads text—letters, numbers, receipts. A VLM reads art direction. As PromptsEra explains, where OCR sees the word “STOP” on a sign, a VLM detects the octagonal shape, the faded red paint, the depth of field, and the angle of the sun—details essential for visual reproduction.

    Simple comparison between OCR (text focus) and VLM (artistic focus)

    Capability OCR VLM
    Reads text Yes Limited
    Identifies lighting No Yes
    Detects composition style No Yes
    Extracts color grading No Yes
    Outputs prompt-ready text No Yes

    4-Step Workflow: How to AI Prompt with BeConverter

    Based on the Style Token Isolation Strategy from PromptsEra, follow this sequence:

    1. Upload your source image — Use a high-resolution file. The VLM needs clear pixels to detect subtle attributes like “volumetric lighting” or “35mm lens grain.”
    2. Choose your interrogator — Select CLIP Interrogator for descriptive, poetic prompts (ideal for Midjourney) or DeepDanbooru for comma-separated tags (ideal for Stable Diffusion).
    3. Isolate style tokens — Delete the subject tokens (e.g., “a cat”) and retain only the style markers (e.g., “cyberpunk, neon rim lighting, 8k, cinematic depth of field”).
    4. Paste into your generator — Copy the cleaned tokens into Midjourney v7, Stable Diffusion, or FLUX and generate.

    3-step core workflow: Upload -> Extract Tokens -> Generate New

    Adapting Prompts for 2026 Models: FLUX vs. Midjourney

    Each model interprets prompts differently. PromptsEra notes that abstract descriptions like “melancholy atmosphere” work well in Midjourney but fail in FLUX, which requires literal spatial descriptions like “dark room with rain hitting the window, overhead fluorescent light casting long shadows.”

    Prompt Style Midjourney v7 FLUX Stable Diffusion
    Abstract/poetic Strong Weak Moderate
    Literal/spatial Moderate Strong Moderate
    Comma-separated tags Moderate Moderate Strong
    Negative prompts Supported (--no) Supported Supported

    The Frankenstein Strategy: Merging Styles from Multiple Images

    The most effective reverse engineering technique combines style tokens from different sources. Use BeConverter to extract lighting from Image A and subject rendering from Image B, then merge them into a single prompt.

    Key controls for consistent merging:

    • Aspect Ratio — Set explicitly (e.g., --ar 16:9 for Midjourney) since reverse tools cannot infer your intended canvas.
    • Negative Prompts — Always add exclusions like “blurry, deformed, low quality.” Reverse tools only detect what is present; they cannot identify what should be absent.

    As Andrew Lo, Director of MIT’s Laboratory for Financial Engineering, advises: “Always ask the LLM, what are you uncertain about? What information are you missing?” Apply the same principle—identify the gaps in your reconstructed prompt before generating.

    BeConverter vs. Zemith vs. PromptShot: Tool Comparison (2026)

    Feature BeConverter Zemith PromptShot AI
    Interrogator modes CLIP + DeepDanbooru Multi-model (25+) Single-pass
    Daily free credits Yes 100 Unlimited
    Sign-up required No Yes No
    Best for Token isolation All-in-one workflow Quick extractions
    Output format Descriptive + tags Model-specific Prompt string

    Additional options worth noting:

    • Zemith — Over 30,000 users as of 2026. According to Zemith, it supports 25+ models including GPT-5.5 with 100 daily credits.
    • PromptShot AI — No account needed. PromptShot AI offers a 5-step process designed for creators who need to “recreate and improve” AI art quickly.
    • Dreamina (GPT Image 2) — Generate and edit in one window. According to Dailyhunt, the GPT Image 2 model supports inpainting and lighting adjustments directly after prompt generation.

    Key highlights/strengths of the three mentioned tools

    Conclusion

    Reverse prompting with BeConverter converts any reference image into a structured, reusable AI prompt in seconds. Upload your image, extract style tokens with CLIP or DeepDanbooru, isolate the artistic attributes, and paste into your generator of choice. For best results, adapt the prompt format to your target model—abstract for Midjourney, literal for FLUX, tag-based for Stable Diffusion—and always include negative prompts to maintain output quality.

    FAQ

    Can reverse prompting recover the exact original prompt used by another creator?

    No. It reconstructs a descriptive approximation based on visual analysis. Different VLM models prioritize different attributes, so the output is a high-quality reconstruction—not hidden metadata or keystroke recovery.

    Does image-to-prompt technology work on real smartphone photographs?

    Yes. PromptsEra notes that VLMs can identify real-world attributes like “golden hour lighting” or specific camera lenses and translate those textures into prompts for artistic reinterpretation.

    Is it legal to use prompts extracted from copyrighted artwork?

    Prompts are short text strings and are not typically covered by copyright. The ethical approach is to extract style tokens to inform your own original work. As PromptsEra points out, attempting to exactly replicate a protected character can create legal issues—use these tools to learn techniques, not to copy.

  • UTF-8 to Base64URL Converter Guide (2026)

    UTF-8 to Base64URL Converter Guide (2026)

    To convert UTF-8 to Base64URL, follow 4 steps: (1) encode text to UTF-8 bytes, (2) apply standard Base64, (3) swap +- and /_, (4) strip trailing = padding. This produces a URL-safe string per RFC 4648, used in JWTs and API headers.

    Standard Base64 vs. Base64URL

    Character Standard Base64 Base64URL Why
    62nd character + - + means space in URLs
    63rd character / _ / is a path separator in URLs
    Padding = required Omitted = becomes %3D in URLs
    URL-safe No Yes Direct use in query strings, filenames

    Per RFC 4648 §5, this “URL and Filename Safe Alphabet” ensures cross-system compatibility.

    A simple side-by-side comparison of Standard Base64 vs Base64URL unsafe characters.

    The 4-Step Conversion Process

    Step Operation Example (“Hello”)
    1 UTF-8 text → bytes H e l l o → byte array
    2 Bytes → standard Base64 SGVsbG8=
    3 Swap +-, /_ No change needed here
    4 Strip trailing = padding SGVsbG8

    Base64 encoding increases data size by ~33% per Wikipedia.

    The 4-step conversion pipe: Text -> Bytes -> Base64 -> Base64URL.

    Unicode and Emoji Handling

    Per NextUtils, Base64 is encoding, not encryption — it moves data through text-only channels. To handle Unicode/emoji without corruption (“Mojibake”), always use TextEncoder to convert to UTF-8 bytes first.

    Input Without TextEncoder With TextEncoder
    Hello 世界! 🌍 Mojibake / TypeError Correct Base64URL

    Code Examples

    JavaScript (Browser) — Unicode-Safe

    function toBase64Url(str) {
        const bytes = new TextEncoder().encode(str);
        const base64 = btoa(String.fromCharCode(...bytes));
        return base64.replace(/\+/g, '-').replace(/\//g, '_').replace(/=+$/, '');
    }
    

    Python 3 — Standard Library

    Per AskPython:

    import base64
    
    data = "Hello 世界! 🌍"
    encoded = base64.urlsafe_b64encode(data.encode('utf-8')).decode('utf-8').rstrip('=')
    print(encoded)
    

    Node.js — Buffer Conversion

    const str = "API_Payload_Data";
    const base64url = Buffer.from(str, 'utf8')
        .toString('base64')
        .replace(/\+/g, '-')
        .replace(/\//g, '_')
        .replace(/=/g, '');
    

    Troubleshooting: Padding Errors

    Error Cause Fix
    binascii.Error: Incorrect padding Missing = padding Add = until length is multiple of 4
    TypeError with atob() Non-ASCII characters Use TextEncoder first
    Garbled output Skipped UTF-8 encoding Always encode to bytes before Base64

    Per AskPython, calculate missing padding: padding_needed = (4 - len(data) % 4) % 4, then append that many = characters.

    Use Cases: JWT and Data URIs

    JWT (JSON Web Token) Structure

    Part Content Encoding
    Header Algorithm + token type Base64URL
    Payload Claims (user data, expiration) Base64URL
    Signature HMAC or RSA signature Base64URL

    JWTs often start with eyJ — the Base64URL encoding of { (opening JSON bracket).

    A simple visualization of a JWT structure showing its 3 Base64URL parts.

    Base64 vs. Base64URL by Use Case

    Use Case Encoding Padding
    JWT tokens Base64URL Omitted
    Data URIs (embedded images) Standard Base64 Required
    HTTP Basic Auth Standard Base64 Required
    URL query parameters Base64URL Omitted

    Conclusion

    4 steps: UTF-8 bytes → Base64 → swap +/ to -_ → strip padding. Use TextEncoder in JavaScript, base64.urlsafe_b64encode() in Python, Buffer in Node.js. Follow RFC 4648 for cross-system compatibility. Base64URL is encoding, not encryption — use AES-256 or TLS for security.

    FAQ

    Is Base64URL the same as encryption?

    No. Base64URL is reversible encoding — anyone can decode it without a key. Use AES-256 or TLS/SSL for securing sensitive data.

    Why does Base64URL fail in a standard Base64 decoder?

    Standard decoders expect +, /, and = padding. Base64URL uses -, _, and omits padding. Reverse the character swaps and restore padding before decoding.

    Why is padding omitted in JWTs?

    The = character becomes %3D in URLs, making strings longer and harder to read. RFC 4648 allows omission because decoders can reconstruct the original length without padding markers.