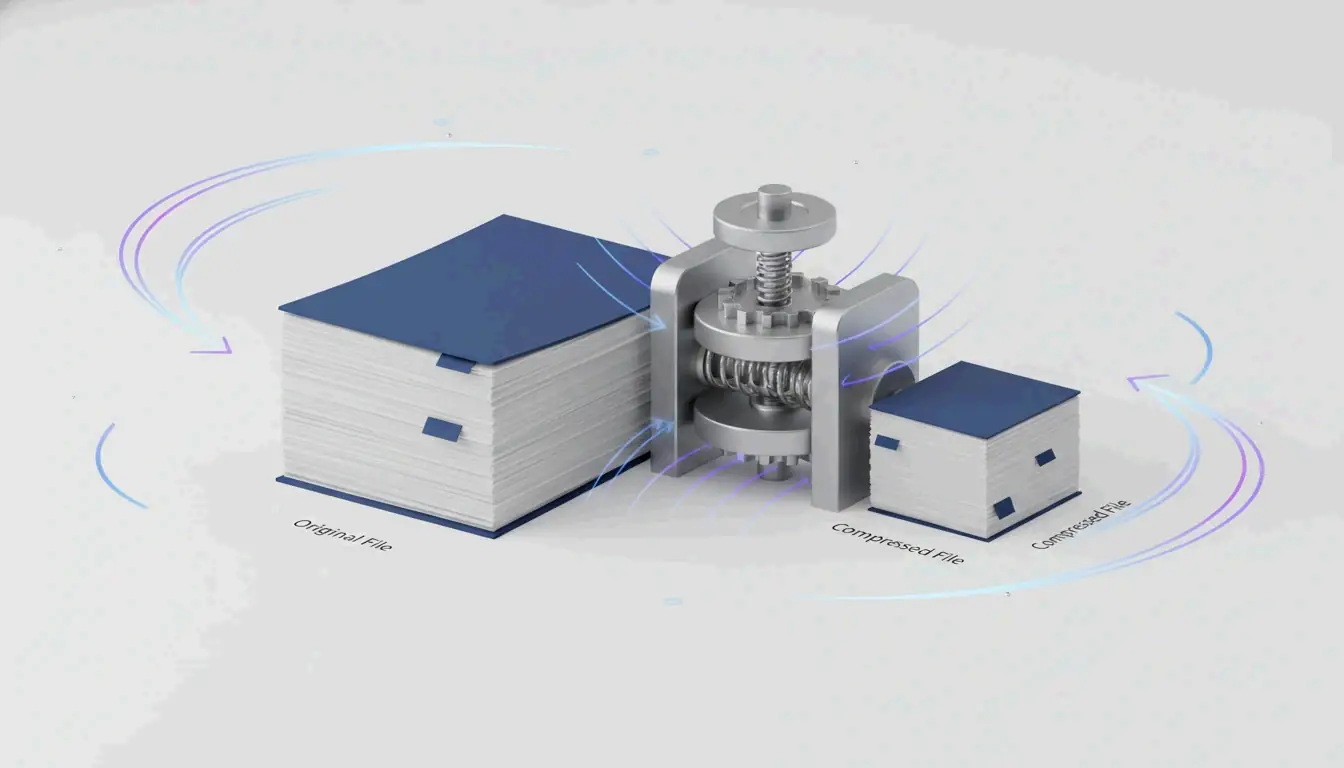
To compress a PDF, use an online tool like Adobe’s free compressor for instant results, Mac Preview for built-in offline compression (up to 86%), or Ghostscript for batch processing (up to 91%). The key is choosing the right method for your platform, privacy needs, and file type.
Why PDFs Are Large: Root Causes
| Cause | % of File Size | Fix |
|---|---|---|
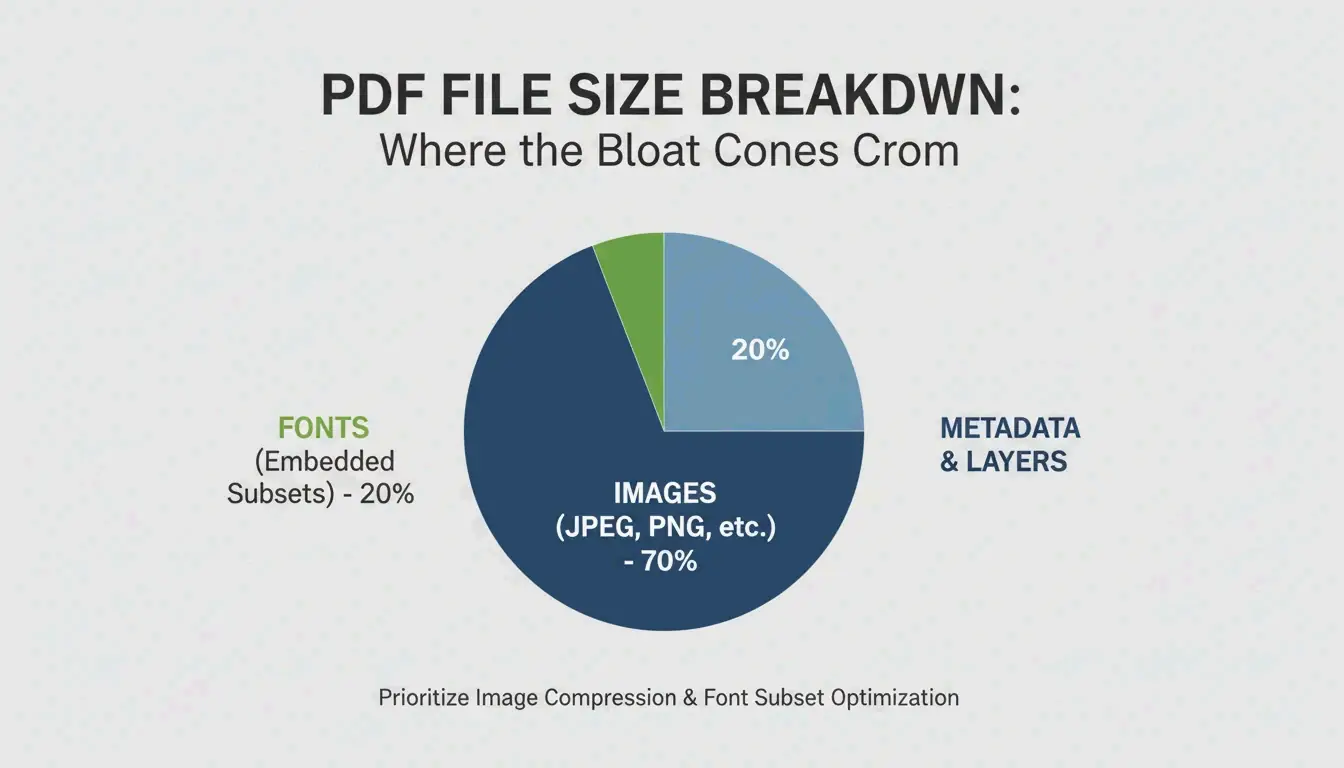
| High-res images (300+ DPI) | 80–90% | Downsample to 150 DPI |
| Uncompressed content streams | Variable | Use “Save as PDF” not “Print to PDF” |
| Fully embedded fonts | 5–15% | Enable font subsetting |
| Hidden metadata / annotations | 1–5% | Strip in PDF Optimizer |
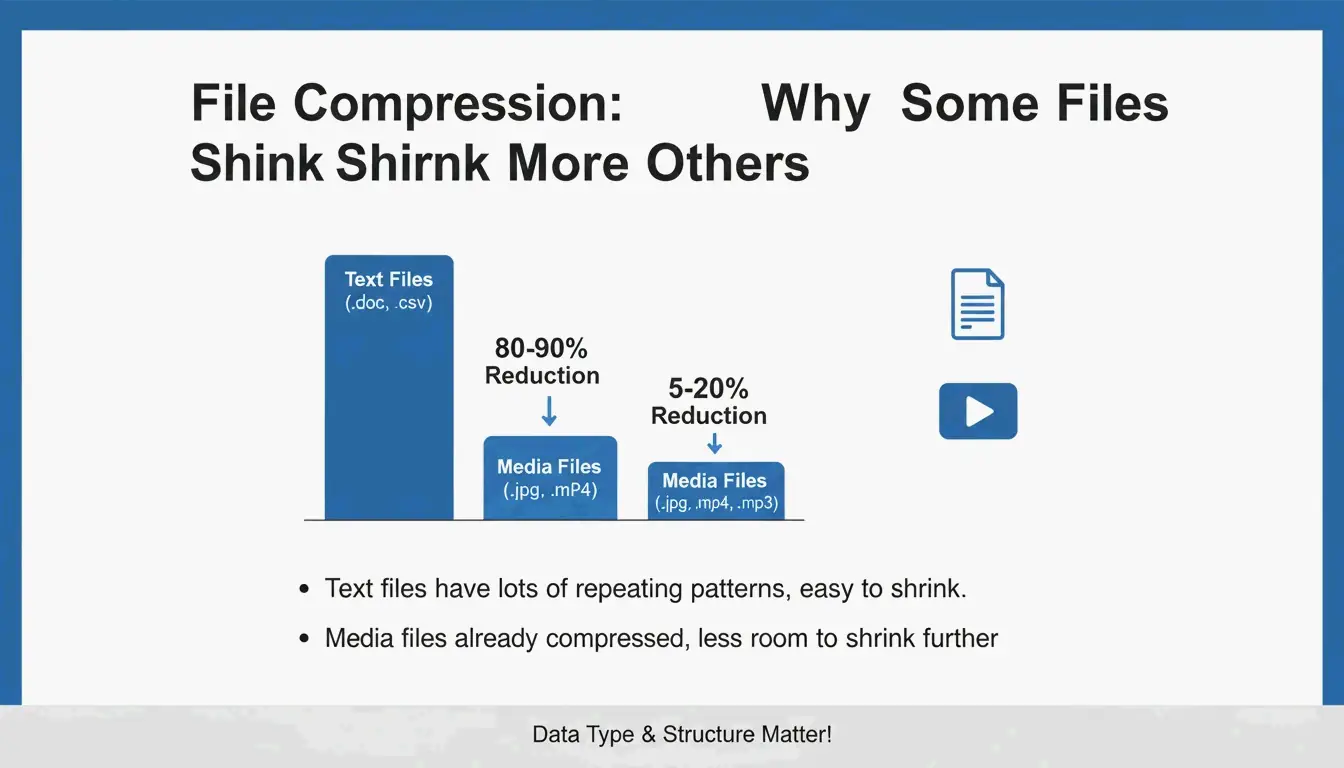
A single full-page photo at 300 DPI adds 5–10 MB. Image data dominates most PDF file sizes.
DPI Settings and File Size
| DPI Setting | Ghostscript Flag | Use Case | Typical Reduction |
|---|---|---|---|
| 72 DPI | /screen |
Strict portal limits, mobile | ~95% |
| 150 DPI | /ebook |
Email, web sharing (recommended) | 50–70% |
| 300 DPI | /printer |
High-quality print | ~50% |
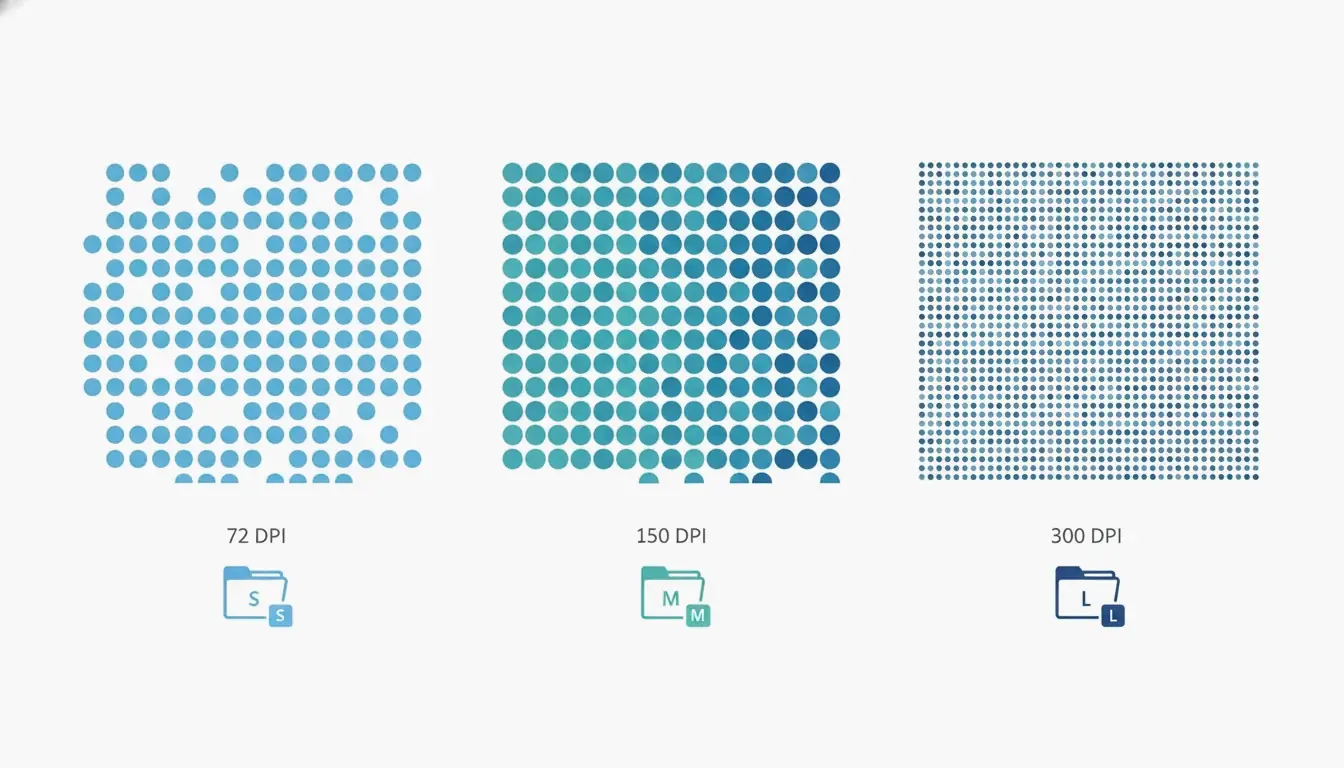
Technology Org confirms /ebook at 150 DPI is the sweet spot for screen viewing. Free PDF Compress notes text-only PDFs can achieve 70% reduction with zero visible loss.
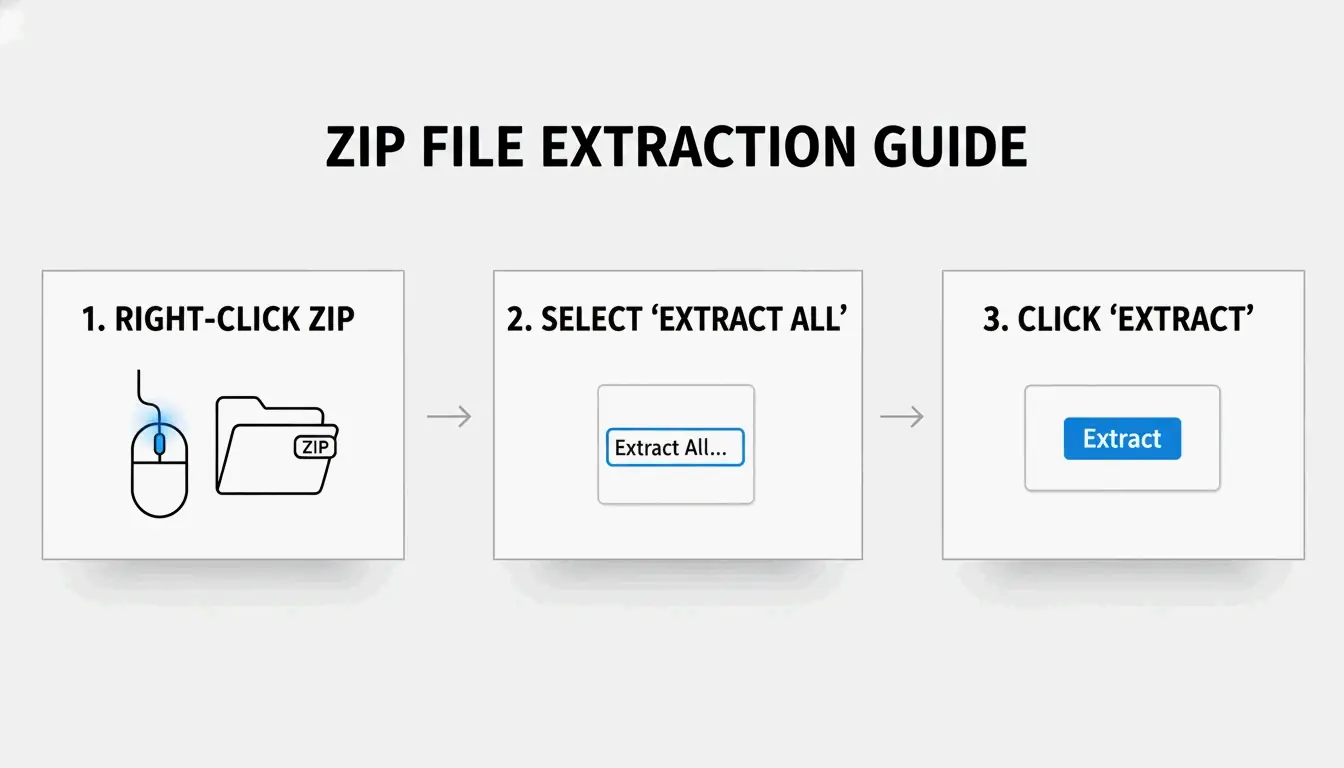
4 Methods to Compress PDF on Any Platform
Method 1: Online Tools (No Installation)
| Tool | Limit | Privacy | Best For |
|---|---|---|---|
| Adobe Online | ~100 MB | Cloud (SSL) | Quick single-file jobs |
| Smallpdf | ~100 MB | Cloud (GPC/GDPR) | Balanced compression |
| iLovePDF | ~100 MB | Cloud | Multiple tools in one |
| PDF24 | No limit | Cloud (German hosted) | Unlimited free use |
Steps: Upload → select compression level (High/Medium/Low) → download.
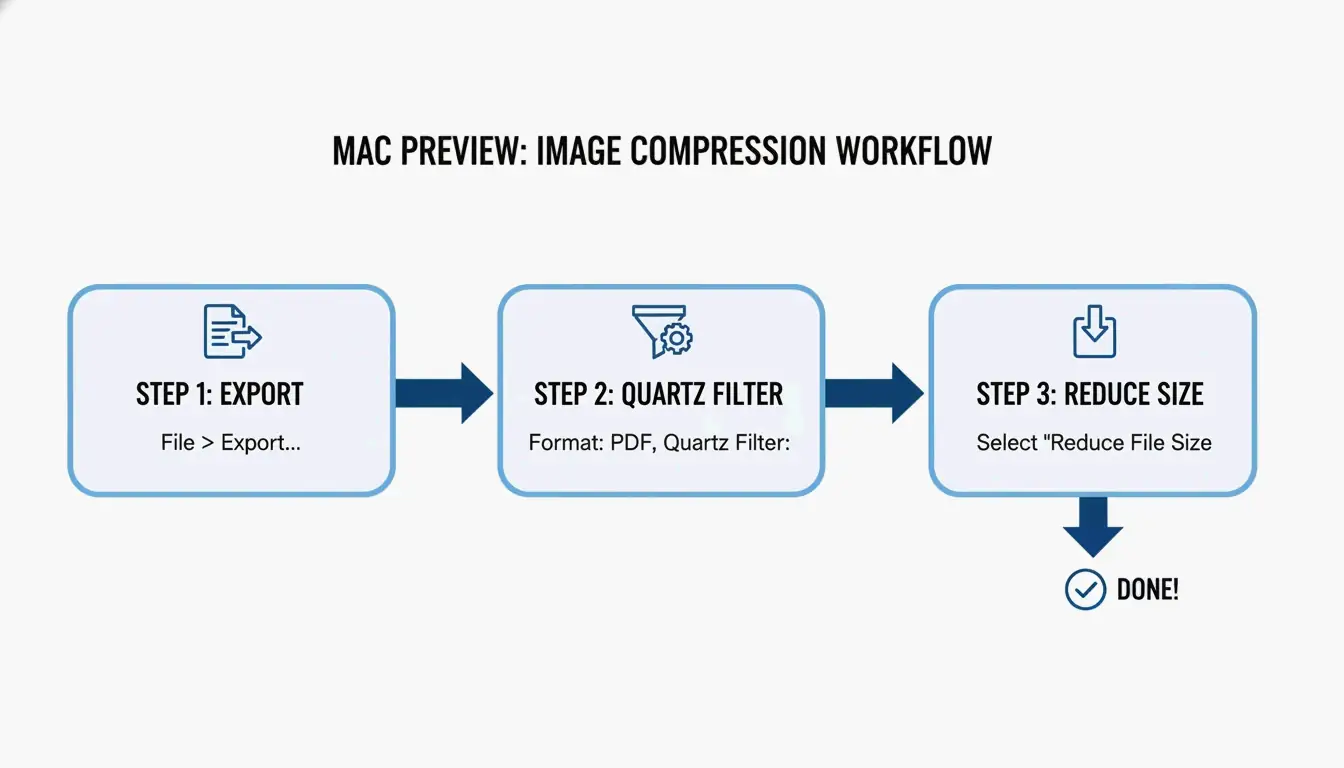
Method 2: Mac Preview (Built-in, Offline)
- Open PDF in Preview
- File → Export
- On macOS Sonoma or older: select “Reduce File Size” from Quartz Filter dropdown
- On newer macOS: check “Optimize image for screen”
- Click Save
Result: A 20-page scanned research paper at 45 MB drops to 8–12 MB. This is lossy — keep a backup of the original.
Method 3: Adobe Acrobat Pro (Windows, Paid)
- Open Tools → Optimize PDF
- Select file → click Reduce File Size
- For granular control: File → Save as Other → Optimized PDF
- Use PDF Optimizer to: downsample images, select compression algorithms (JPEG/JPEG2000/ZIP), subset fonts, strip metadata, flatten annotations
- Click “Audit Space Usage” to see exactly what’s consuming space
Method 4: Ghostscript (Free, Cross-platform CLI)
gs -sDEVICE=pdfwrite -dCompatibilityLevel=1.4 \
  -dPDFSETTINGS=/ebook -dNOPAUSE -dBATCH \
  -sOutputFile=compressed.pdf input.pdf
Free PDF Compress reports scanned color PDFs reduced by 91% with minimal quality loss.
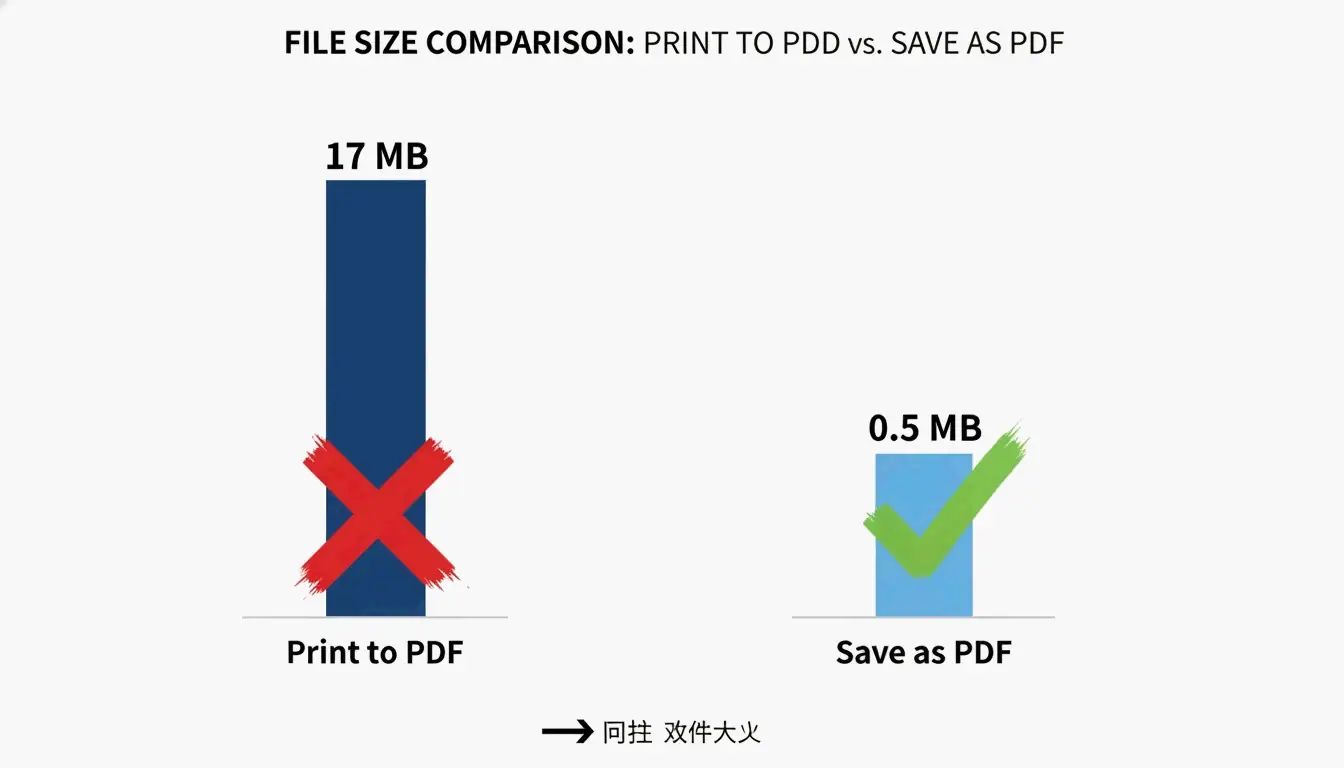
The “Print to PDF” Trap
PDF Candy tested the same document two ways:
| Method | File Size | Why |
|---|---|---|
| Print to PDF | 17 MB | Converts text/images into large opaque content streams |
| Save as PDF (Office) | 0.5 MB | Proper compression from source application |
Always use “Save as PDF” from within Word, Excel, or your source app. Never use “Print to PDF” as a compression method.
Decision Guide: Which Method to Use
| Your Situation | Recommended Method |
|---|---|
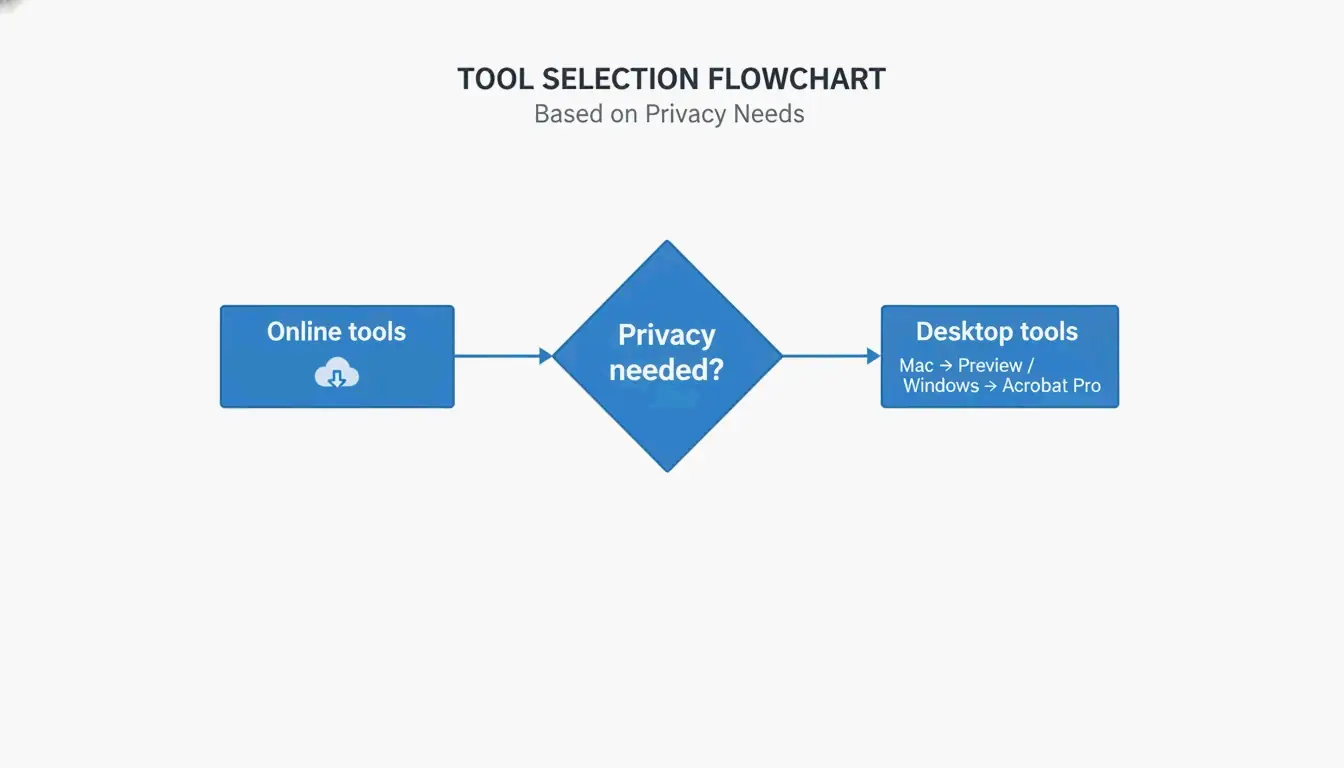
| Quick single file, no sensitive data | Online tool (Adobe Online, Smallpdf) |
| Mac, offline | Preview export |
| Windows, offline control | Adobe Acrobat Pro or PDF Candy Desktop |
| Batch / automation | Ghostscript CLI |
| Confidential / legal documents | Desktop app (Preview, Acrobat Pro) |
| Mobile (Android) | PDF Compressor: Resizer & Zip (offline) |
| Mobile (iOS) | Adobe Fill & Sign or Lumin PDF |
Advanced: Content Streams and Font Subsetting
Content Streams
Neuxpower explains that “Print to PDF” stores text and images in large, opaque content streams that standard compressors cannot optimize. Fix: Go back to the source document and use “Save as PDF.” If the source is unavailable, re-print the PDF through a browser’s printer with “Save as PDF” as the destination.
Font Subsetting
Embedding only the characters actually used (not the entire font family) saves 400–600 KB per font. Enable subsetting in Acrobat’s PDF Optimizer or Ghostscript. This reduces file size by 5–15% with no impact on text quality.
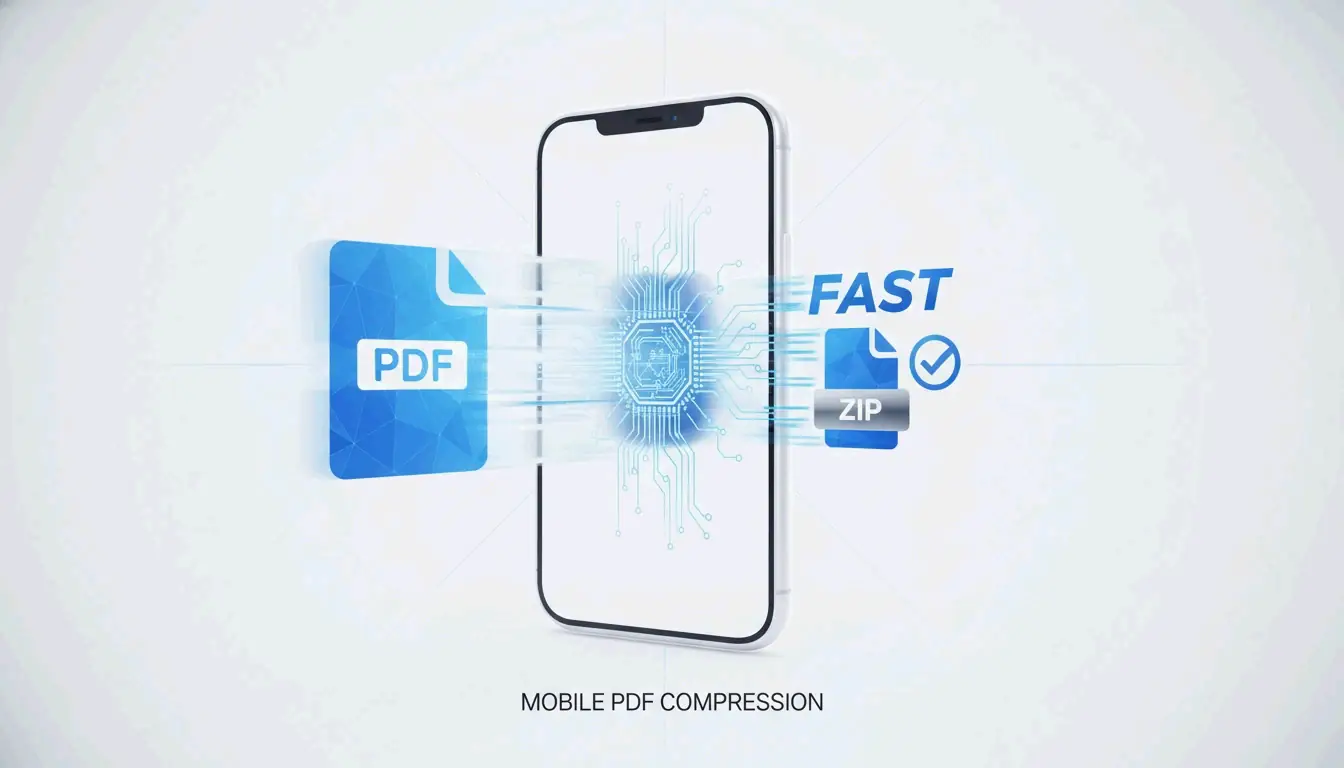
Mobile Compression
Android
PDF Compressor: Resizer & Zip (SoulApps, updated April 2026) — free, works 100% offline. Supports compression levels (Best Quality / Balanced / Smallest Size), merging, splitting, and converting. No sign-in or watermark.
iOS
Adobe Fill & Sign includes PDF compression. Alternatively, use Lumin PDF (browser-based) with AES-256 encryption, SOC 2 Type 1, GDPR, and CCPA compliance. For maximum privacy, use an offline app.
Prevention: How to Avoid Large PDFs
| Prevention Step | Impact |
|---|---|
| Resize images to 96–150 DPI before inserting | Eliminates 80%+ of bloat at the source |
| Use system fonts (Arial, Times New Roman) | Avoids font embedding entirely |
| Enable font subsetting in PDF creation | Saves 400–600 KB per custom font |
| Use “Save as PDF” not “Print to PDF” | 34× smaller files per PDF Candy |
| Set scanner to 150–200 DPI for text | IRCC Canada recommends this for digital submissions |
Conclusion
Choose your compression method by platform: online tools for quick jobs, Mac Preview for offline Mac compression, Adobe Acrobat Pro for Windows with granular control, Ghostscript for batch automation. Always use “Save as PDF” instead of “Print to PDF” — the difference can be 34×. Start with 150 DPI (/ebook) for the best balance of size and quality.
FAQ
Will compressing a PDF affect its quality?
Reducing DPI and re-encoding JPEGs causes minor image quality loss, but text remains perfect. The “ebook” setting (150 DPI) produces no visible difference for screen viewing. Text-only PDFs achieve 70% reduction with zero quality loss.
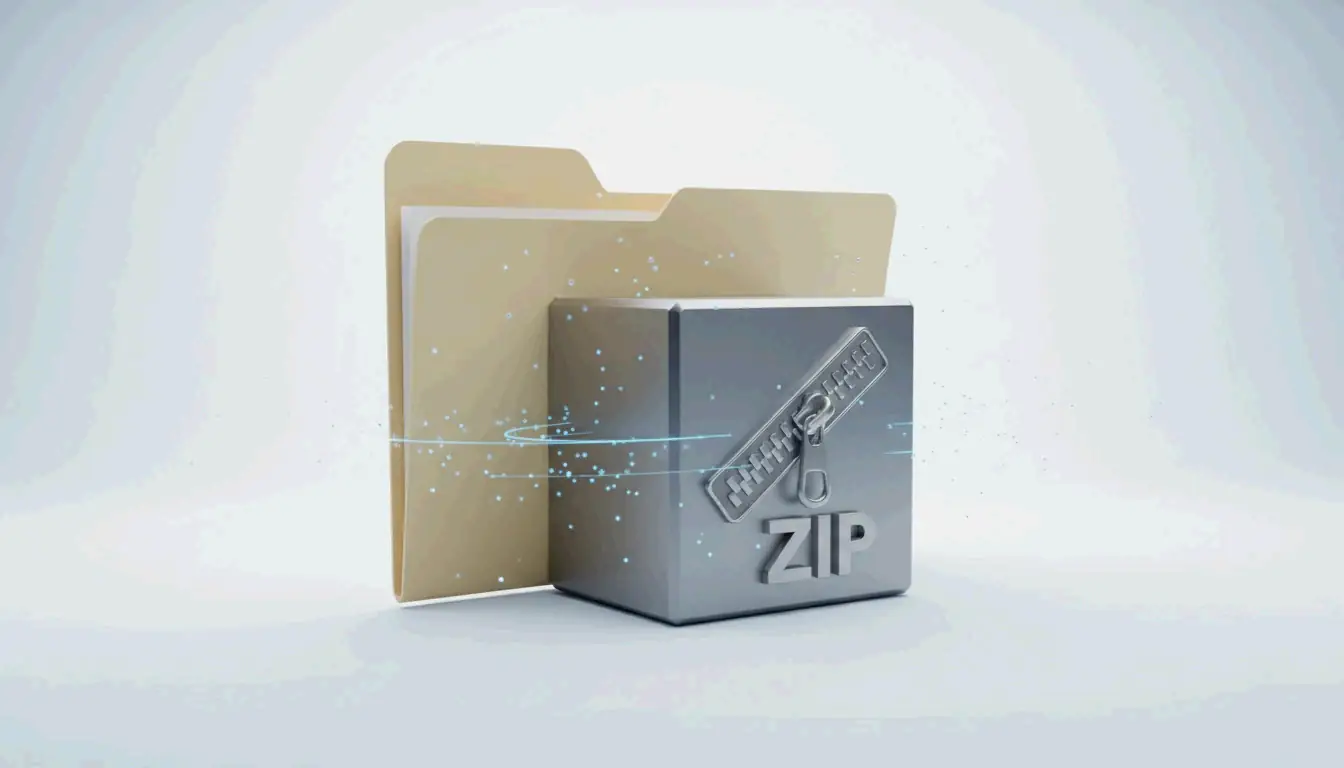
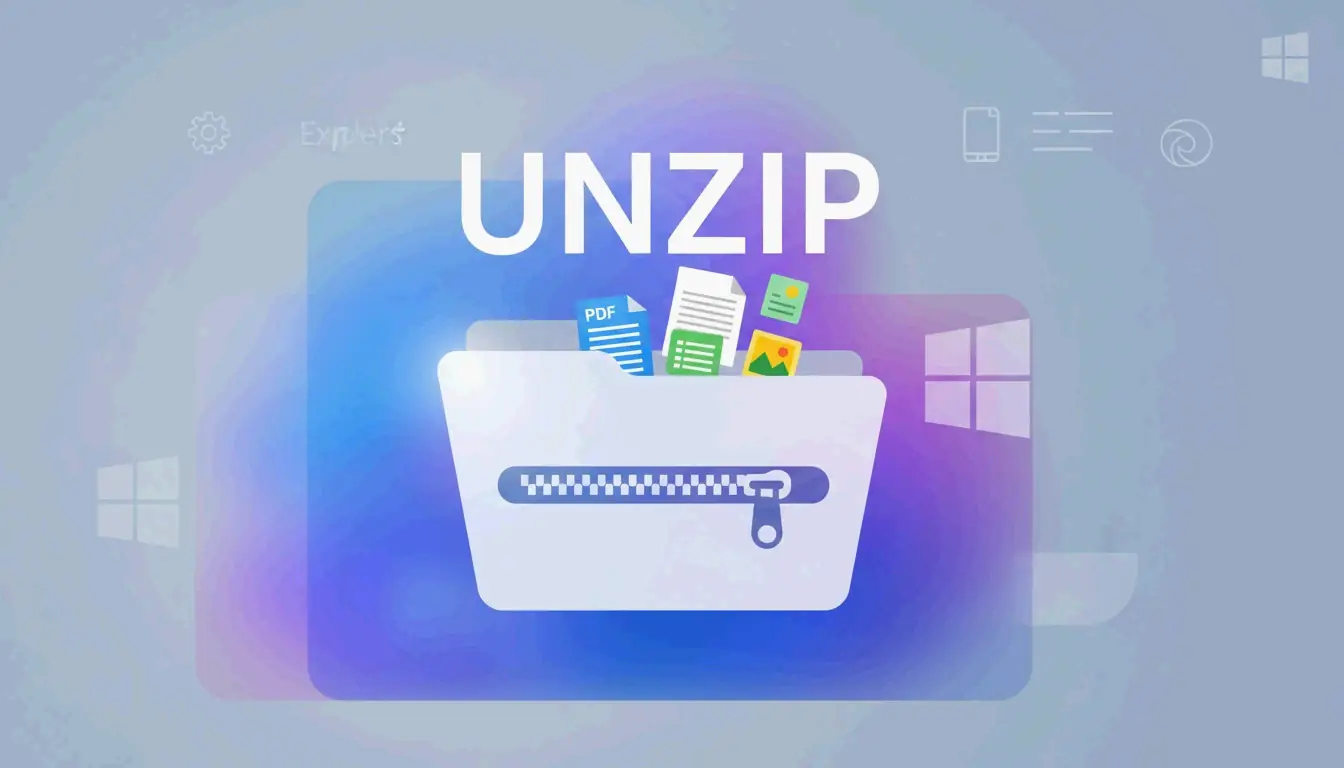
Is it better to zip a PDF or compress it?
Compress the PDF directly. ZIP achieves only 5–10% reduction because PDFs are already internally compressed. Dedicated PDF tools achieve 50–90% by re-encoding images, subsetting fonts, and stripping metadata.
How to compress a password-protected PDF?
Most online tools cannot process locked PDFs. Remove the password first using Adobe Acrobat, compress the file, then re-add protection. Desktop tools like PDF24 or Acrobat Pro can compress locked files if you know the password.
What is font subsetting?
Font subsetting embeds only the characters actually used in the document instead of the entire font family. This saves 400–600 KB per font and reduces total file size by 5–15% with no visible impact.